Online learning emerged as a safe and viable option for education continuity as the COVID-19 pandemic turned personal and professional worlds upside down.
Even before the pandemic, the global eLearning market was already seeing massive annual global growth, and it is expected to reach $374.3 billion by 2026.
So looking into these promising numbers, now seems like the best time to share your knowledge and get rewarded.
In this post, I will show you exactly how to sell online courses from your own website.
Let’s dive in!
- Why sell online courses from your own website
- What do you need to sell online courses from your own website?
- How to sell online courses from your own website
- 1. Create a website
- 2. Choosing and installing a learning management system (LMS) plugin
- 3. Create the course
- 4. Create the course sales page (Landing Page)
- 5. Create a sales funnel
- 6. Promote your course
- How To Create An Online Course And Sell It: The Definitive Guide
- How to sell online courses from your own website- Conclusion
*Disclosure: I only recommend products I would use myself, and all opinions expressed here are my own. This post may contain affiliate links that at no additional cost to you, I may earn a small commission.
Why sell online courses from your own website
As I mentioned before, the eLearning market is only growing.
This means there is a world full of opportunities for you out there.
But I rather show you in numbers why you should create an sell and online course:
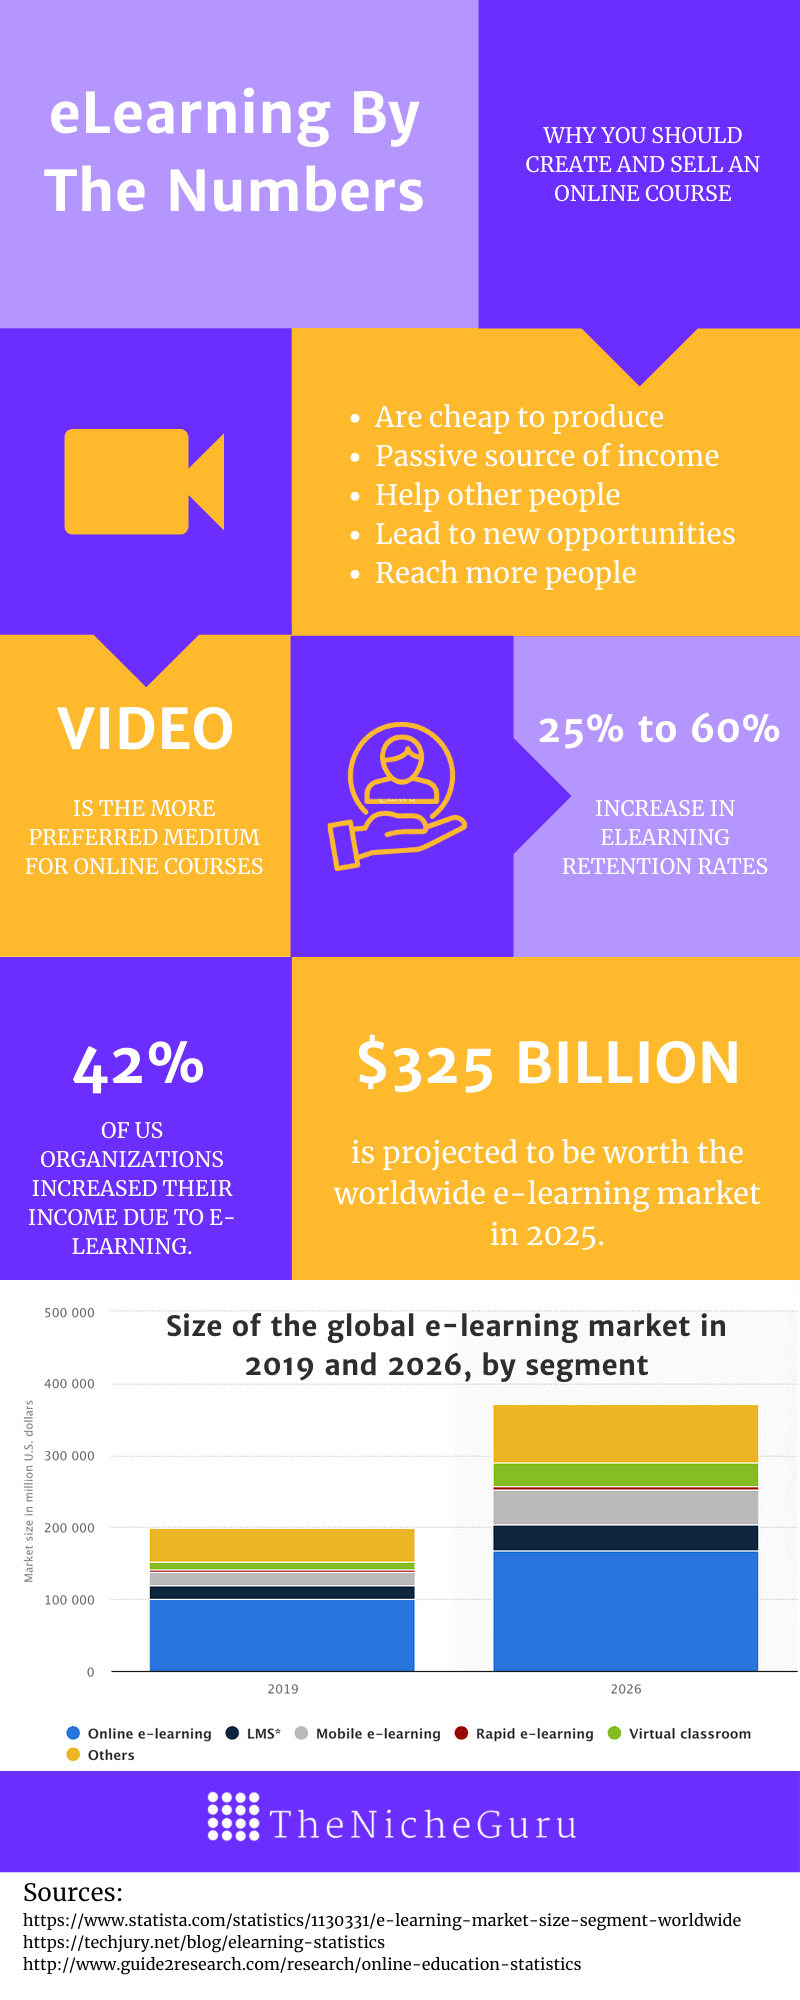
Share this Image On Your Site
<p><strong>Please include attribution to https://thenicheguru.com with this graphic.</strong><br /><br /><a href=’https://thenicheguru.com/niche-marketing/how-to-sell-online-courses-from-your-own-website/’><img src=’https://thenicheguru.com/wp-content/uploads/2020/11/elearning-by-numbers.png’ alt=’eLearning By The Numbers’ 540px border=’0′ /></a></p>
Once you establish a solid niche marketing strategy, your courses can be a great source of passive income.
And what is best, they are easy to create, market, and sell.
What do you need to sell online courses from your own website?
Another great thing about creating and selling online courses from your own website is that you don’t need much.
In fact, all you need is:
- A website
- An LMS plugin to create and host your course
- A landing page or sales page
- A sales funnel to market your course
Therefore, if you already have a website, you are already halfway in.
How to sell online courses from your own website
In this section, I am going to cover each of the elements you need to sell your courses.
You just need to make sure you follow the steps.
1. Create a website
First, you are going to need a website and hosting for your web.
This post is focused on helping you on how to create and sell online courses from your website.
The creation of a website itself is another topic that needs a full guide. And I happen to have a very detailed guide that will help you with this: How To Create A Profitable Niche Website: The Definitive Guide
Resources:
- Kinsta Hosting Review: Pros, Cons, Pricing, and Alternatives.
- Micro Niche Blogging- How To Create A Micro Niche Website
2. Choosing and installing a learning management system (LMS) plugin
A learning management system helps you manage all parts of your online course content, including subscriptions, test/quiz grading, payment handling, and much more.
It provides your students with the option to learn and conduct training over the web.
Also, using an LMS for your course can provide you with some benefits:
- Fast set-up. It will allow you to create your courses fast, so you can start making money faster.
- Cost-effective. You just need to pay for the LMS platform. Meaning, all the profit from the course is just for you.
- Flexible. It does not matter if trends change or your course content needs to change. You have the flexibility to change anything you need at any time.
Which LMS plugin should you use?
The LMS plugin I recommend you is MemberPress.
It is a full-featured WordPress membership and LMS plugin.
Some of the key features it offers are:
- Create and sell your online courses.
- Control who sees the content.
- Sell digital downloads.
- Accept credit cards securely.
- And much more.
And what’s best, all without difficult setup or complex coding.
The Course add-on is built right into MemberPress. It is a 100% visual course builder with progress tracking and a sales feature. The best thing about this tool is that there’s no need to install a separate plugin to sell memberships or protect your course content.
You can manage absolutely everything with his powerful plugin.
How to install MemberPress plugin? (or any other LMS plugin)
Before moving to the installation part, let me tell you two important things:
- Memberpress is not free
- There are no good LMS plugins for free with all the features you need to sell your courses.
So before jumping to any conclusion, think about this plugin as a good investment that will surely pay off. Moreover, MemberPress includes a 14-days money-back guarantee. So you can always try it first with no risk.
Installing MemberPress and the course add-on
First, I will assume you have Wordpress installed since it is neccesary to install this plugin. But if you don´t, simply follow this guide to installing WordPress.
If you already have Wordpress working, then we can continue:
Step #1. Head to Memberpress.com
Step #2. Click on “Get Memberpress“
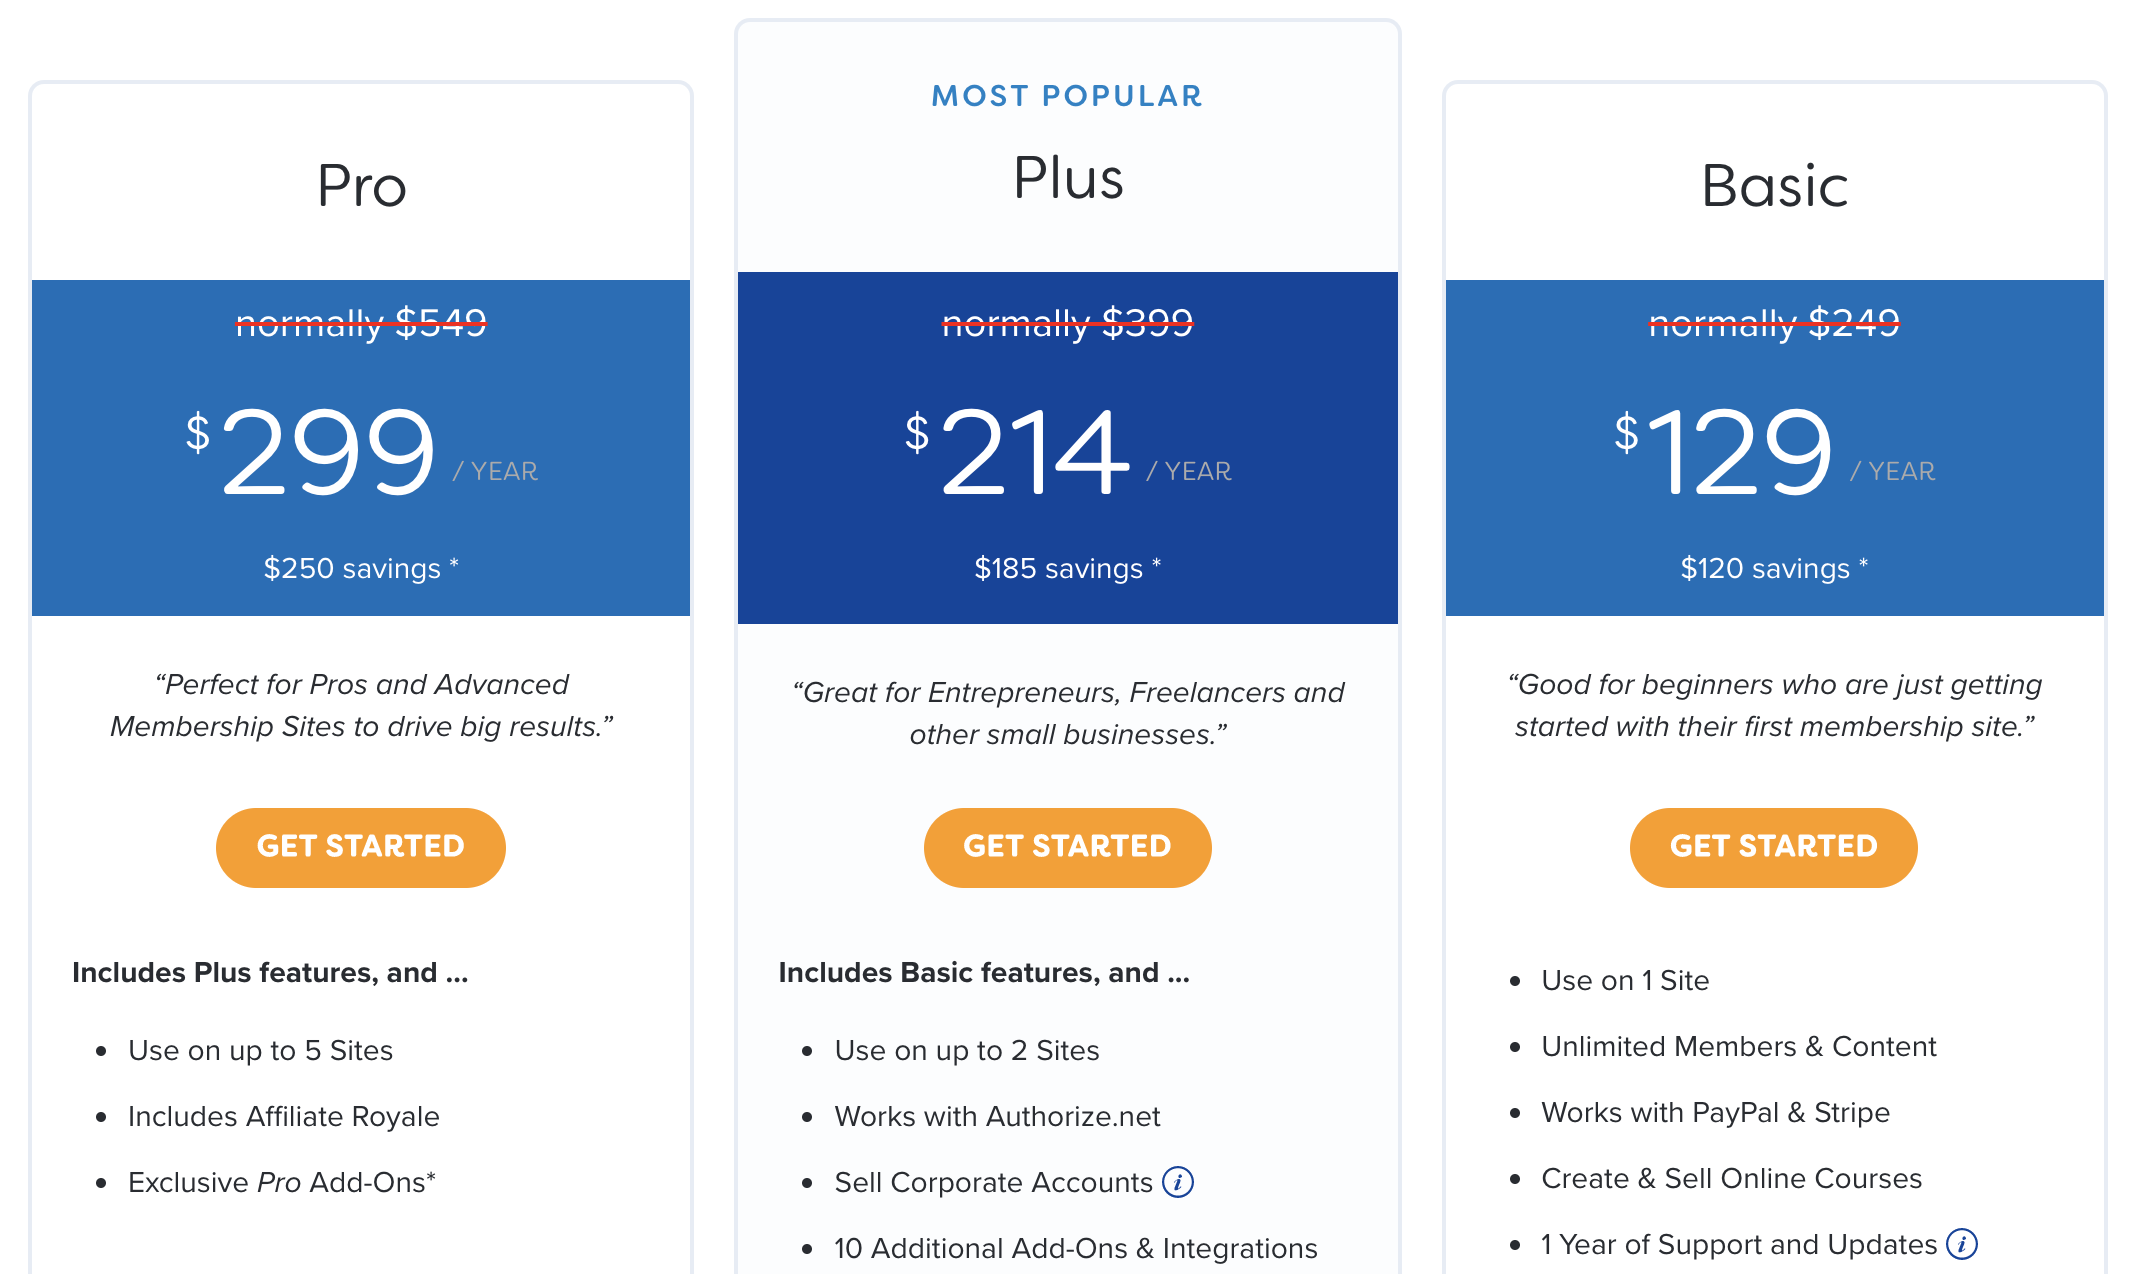
Step #3. Choose a plan
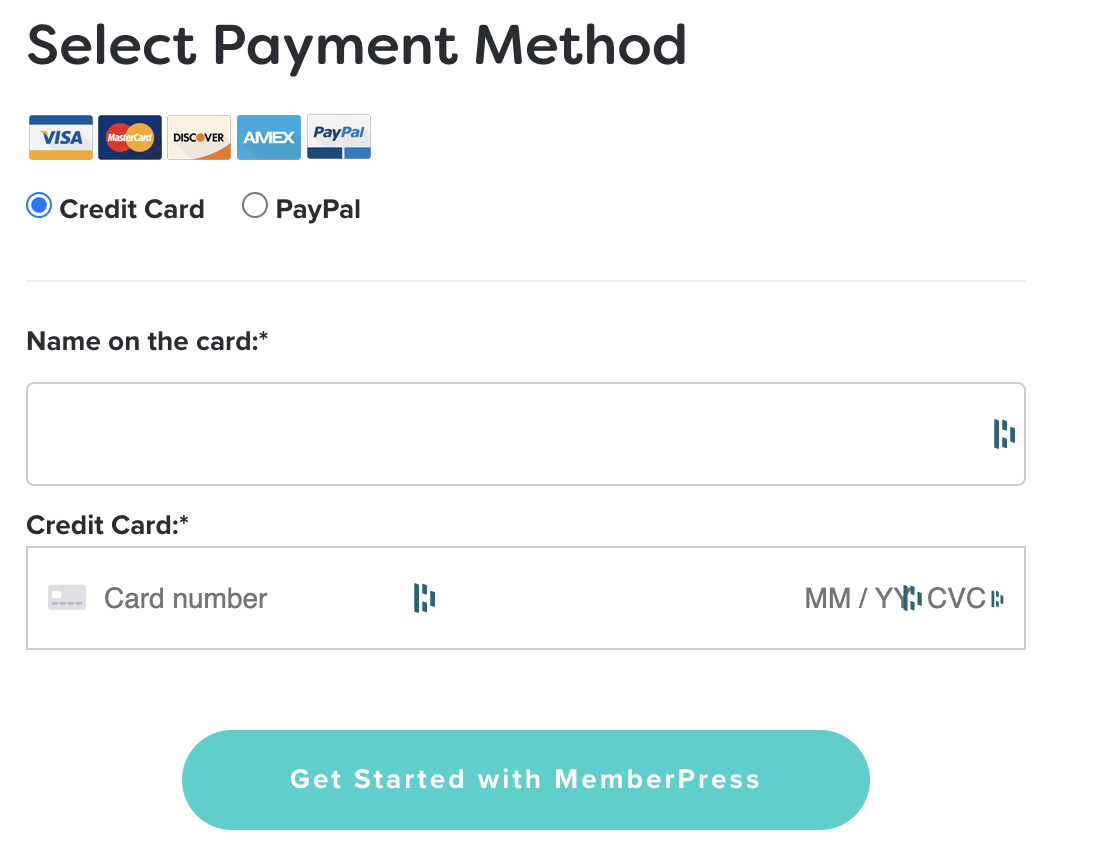
Step #4. Fill up the information and payment and click on “get started“
Step #5. You will receive an email where you will be able to download the plugin in a zip file. You can also log into MemberPress.com and download the zip file from there.
Step #6. Login to your WordPress dashboard
Step #7. Head to Plugins -> Add New -> Upload plugin
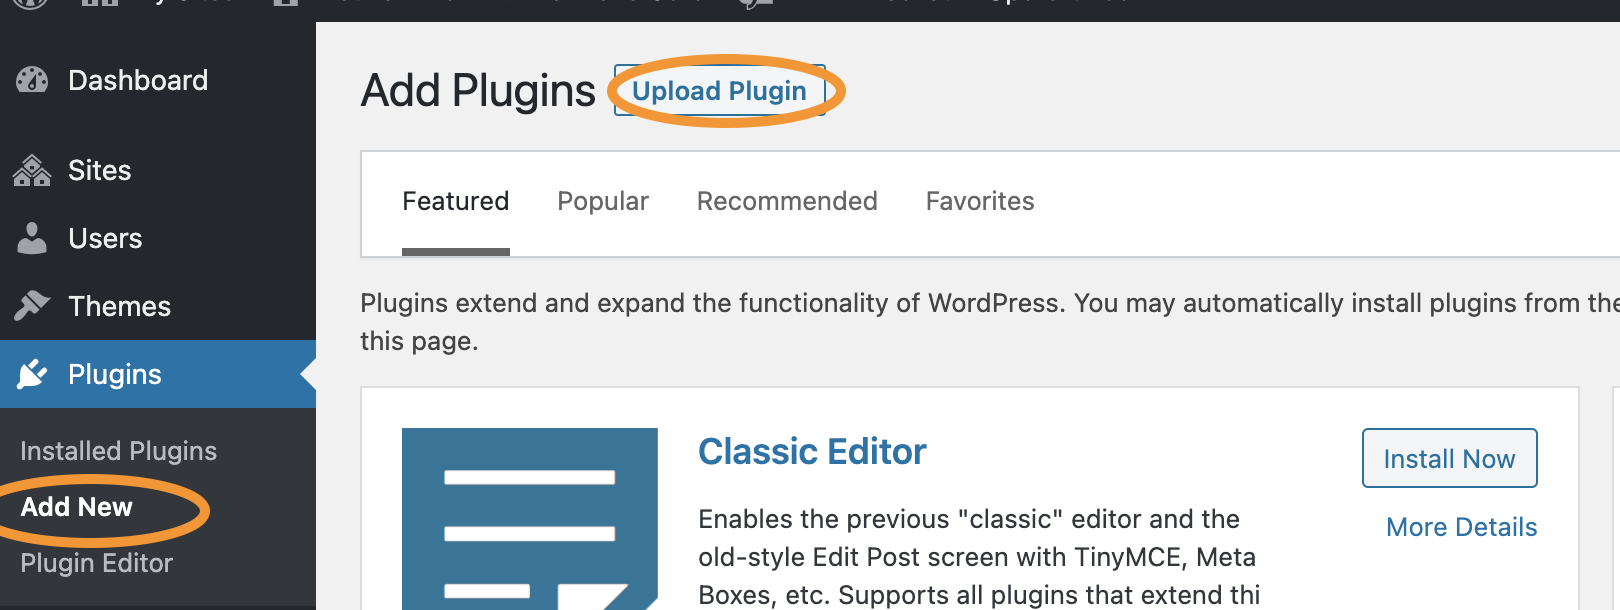
Step #8. Choose the MemberPress.zip file you downloaded in step #5.
Step #9. Click “Install Now“
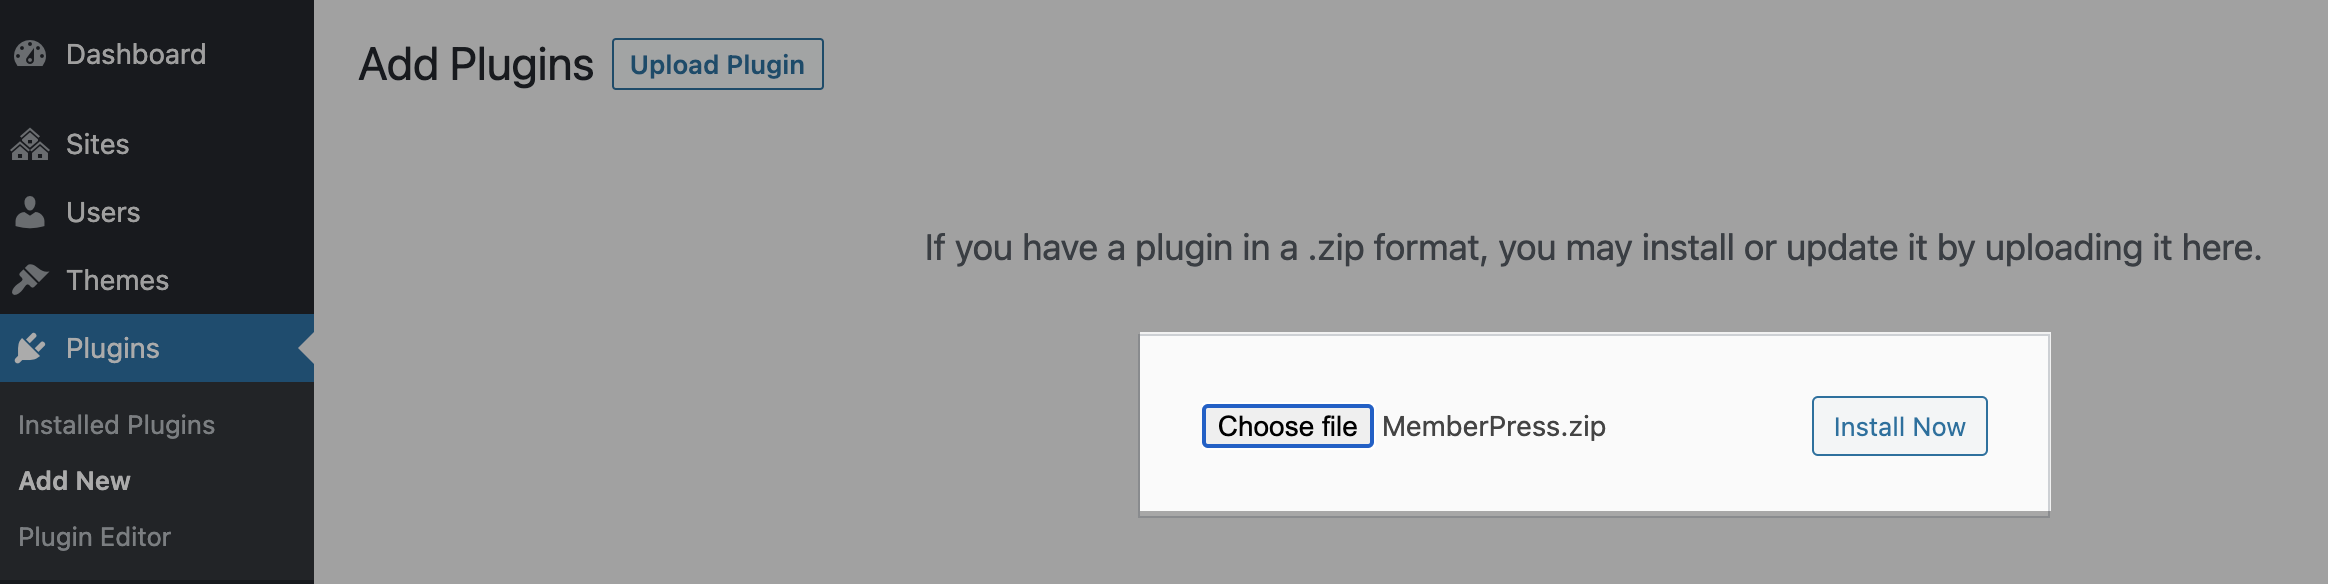
Step #10. Click “Activate Plugin“
Step #11. Go to MemberPress > Courses page in your WordPress dashboard. Then locate the Courses Add-on and click to install it.
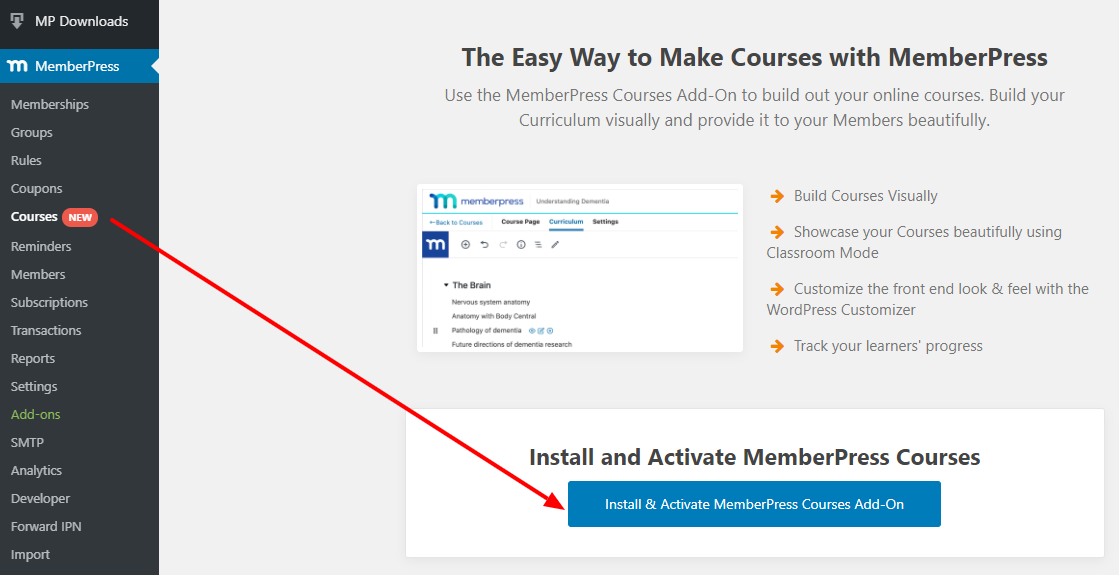
And that’s it!
After installing the add-on, it will be active on your site.
You’ll then be redirected back to the courses page, where you can create your first course.
3. Create the course
Now is time to put together your course into your selected LSM platform.
I will keep using Memberpress for this example. In any case, the process will be very similar to any other plugin.
Step #1. Visit your new MemberPress > Courses page, and you’ll see the following buttons at the top:
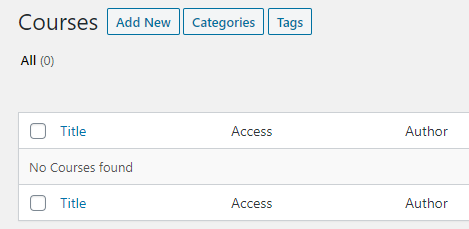
Step #2. Click on “Add New” to add a new Course.
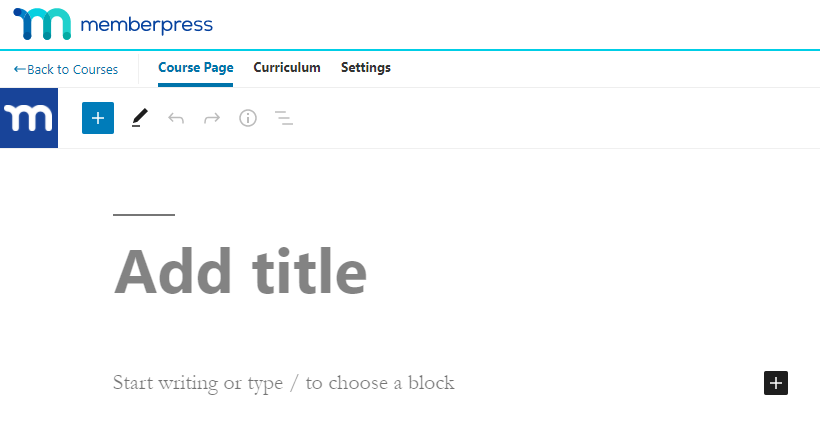
Step #3. Now, all you need to do is to give your course a catchy title and some descriptive content below the title.
This content will show up as the course overview/description on the front-end.
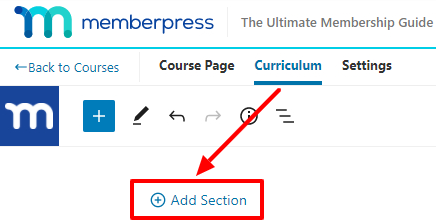
Step #4. Click on the “Curriculum” tab at the top to add your sections and lessons. The first thing you’ll do here is to add a Section. Think of sections as containers or modules that help you organize your lessons into groups.
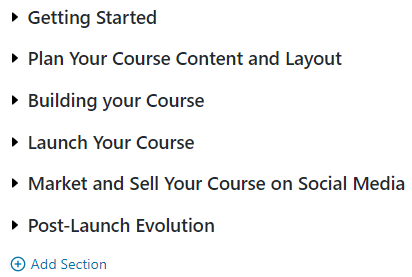
Here is an example of how you might layout your sections:
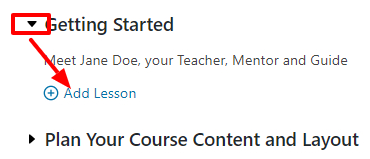
Step #5. Expand each section to add lessons as shown below:
Once a lesson is created, it will show up in a list on the right side of the page:
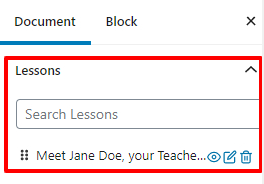
You can search for existing lessons and use the grid icon on the left to drag them into a section within your course. If the lesson already exists in another course or section, it will be moved to a new location.
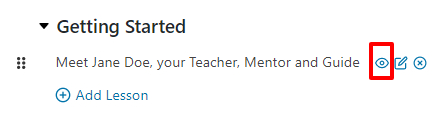
Step #6. To view a lesson, click the view button next to it. This will open the lesson for viewing on the front-end in a new window or tab in your browser:
And that’s all you need to do to get started with your course content!
If you need more details about the course configuration, you can check the full guide from Memberpress here. Also, you can apply these eLearning course tips to increase your chances of succeeding.
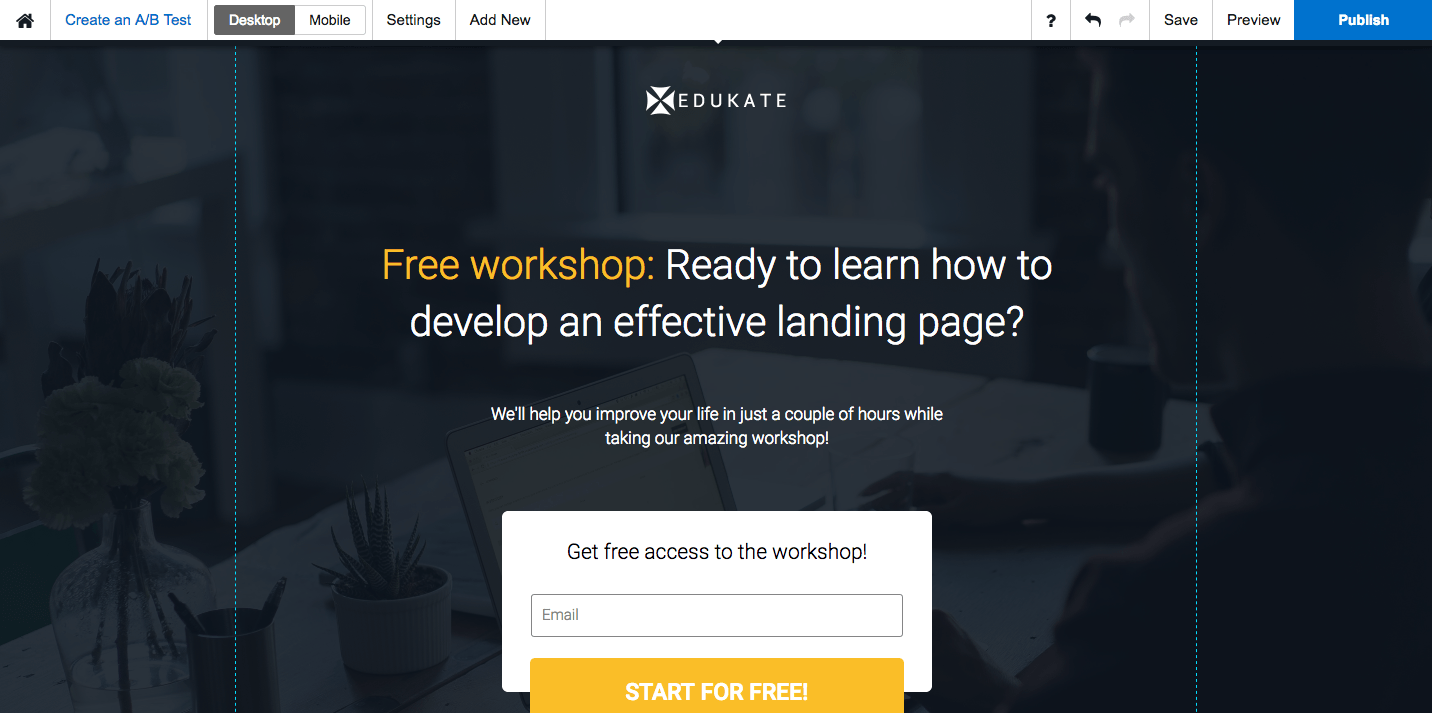
4. Create the course sales page (Landing Page)
Once your course is ready to go, you’ll need to attract potential customers. The best way to do this is by using a sales page or landing page.
A sales page is where all your potential customers are going to land. So you should craft this page very carefully.
The structure of a compelling course sales page
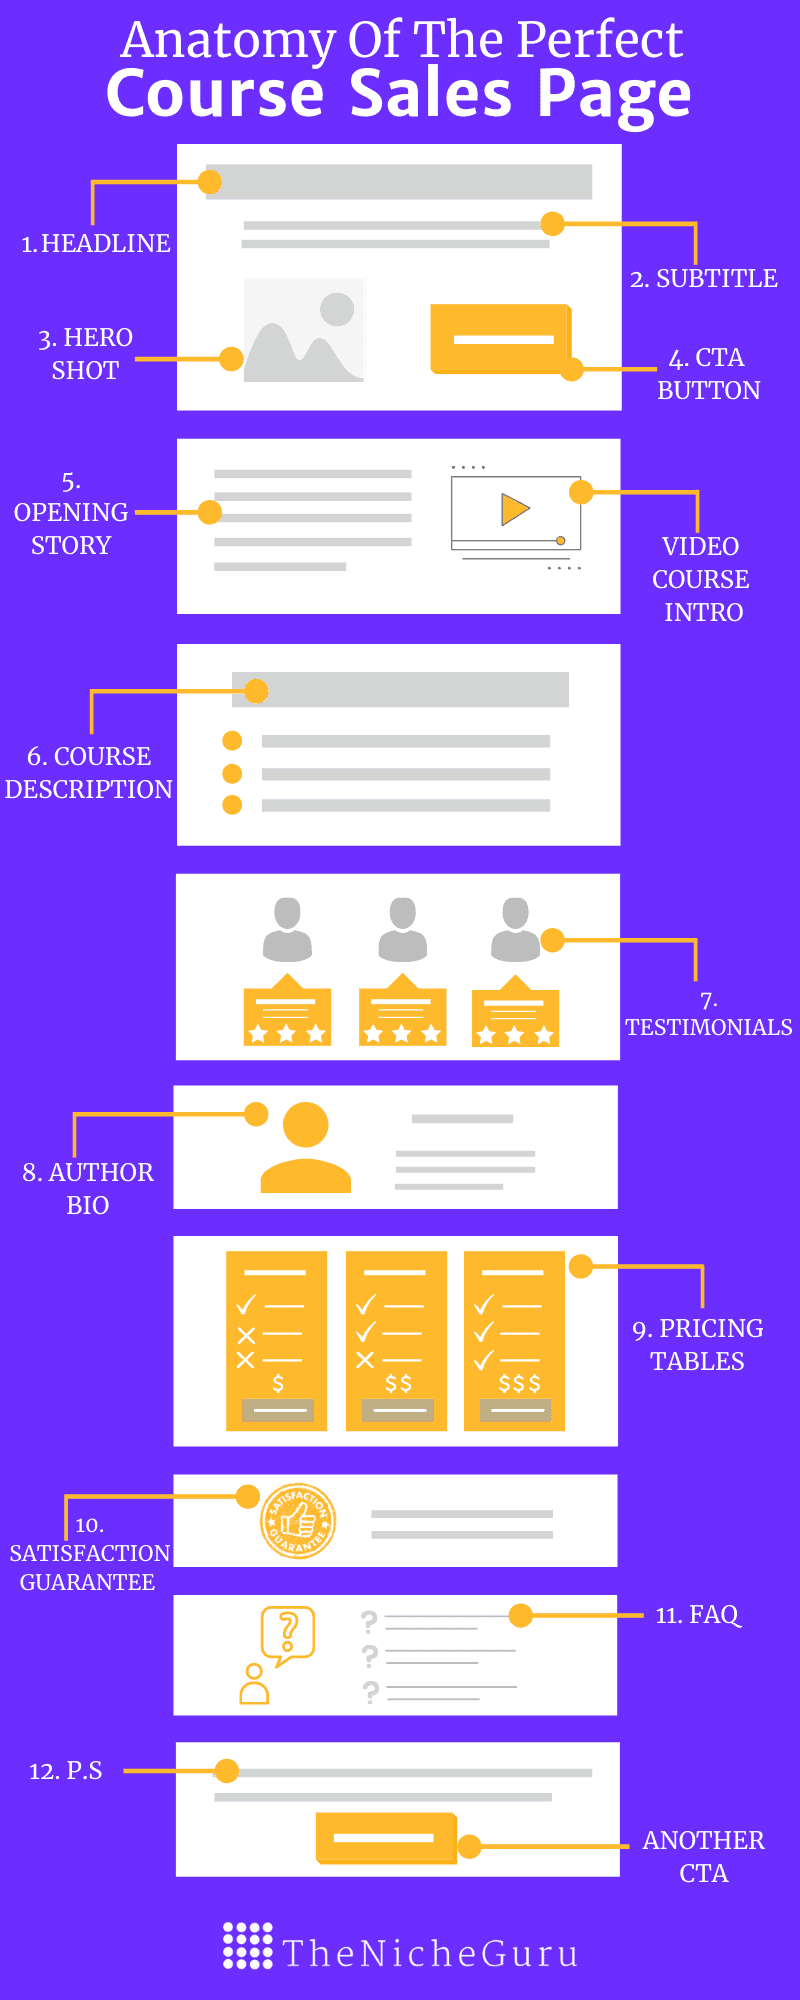
1. A compelling headline.
The headline is the first thing your readers are going to see. If it catches their attention they will stay for more. But if it does not, they will leave. That means you need to engage them fast.
These are some rules you should follow to make it work:
- Make the headline unique.
- Your headline has to be useful.
- Be very specific.
- It should convey a sense of urgency, scarcity, or curiosity.
- Focus on the benefits of taking your course.
2. A descriptive subtitle.
The subtitle will support your headline. You should use it to provide further details and point to the benefits of taking your course. It needs to address the questions:
- Who is this online course for?
- How would it help me?
- Why would I benefit by taking it?
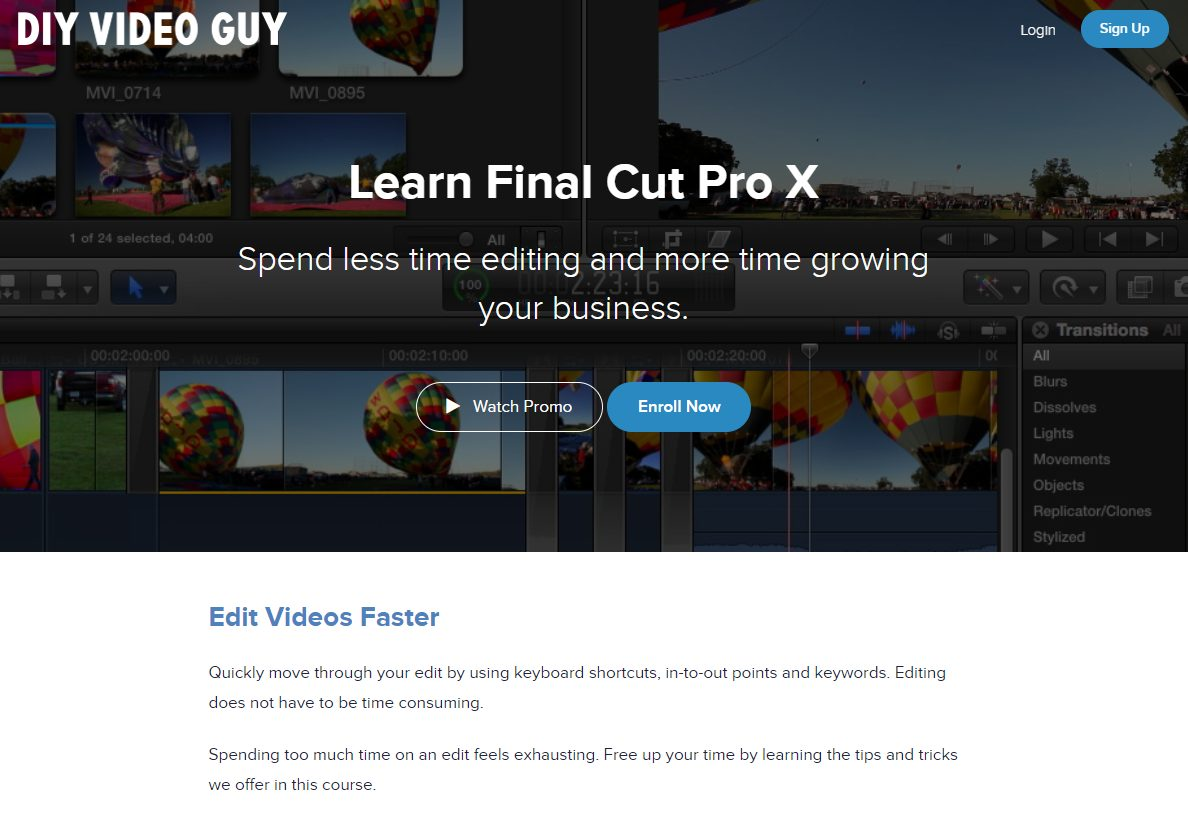
3. Hero Shot (High-quality media)
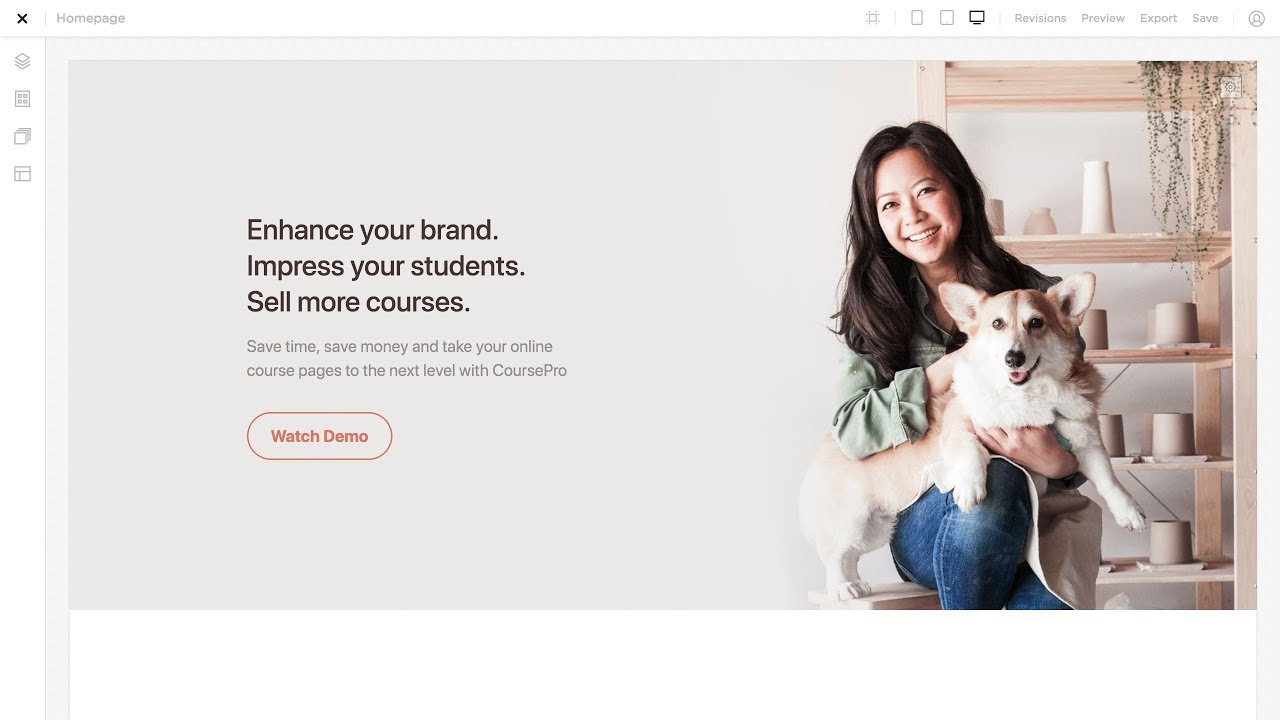
Visuals are very important in the design of your sales page. It does not matter if you are going to use photos, graphics, or videos. They need to have good quality.
Some of the best media elements you can use for your course sales page are:
- Videos. Adding a demo of how your course works can be a great, and visual idea. Plus, people love videos.
- Pictures. Use a picture directly related to the online course topic. Bright pictures normally work best.
- Mockups. You can create mockups of how a lesson looks like on a laptop or an iPad.
- Graphs/Charts. These work great to show your students some statistics of useful data about your course.
4. Call to action (CTA) buttons.
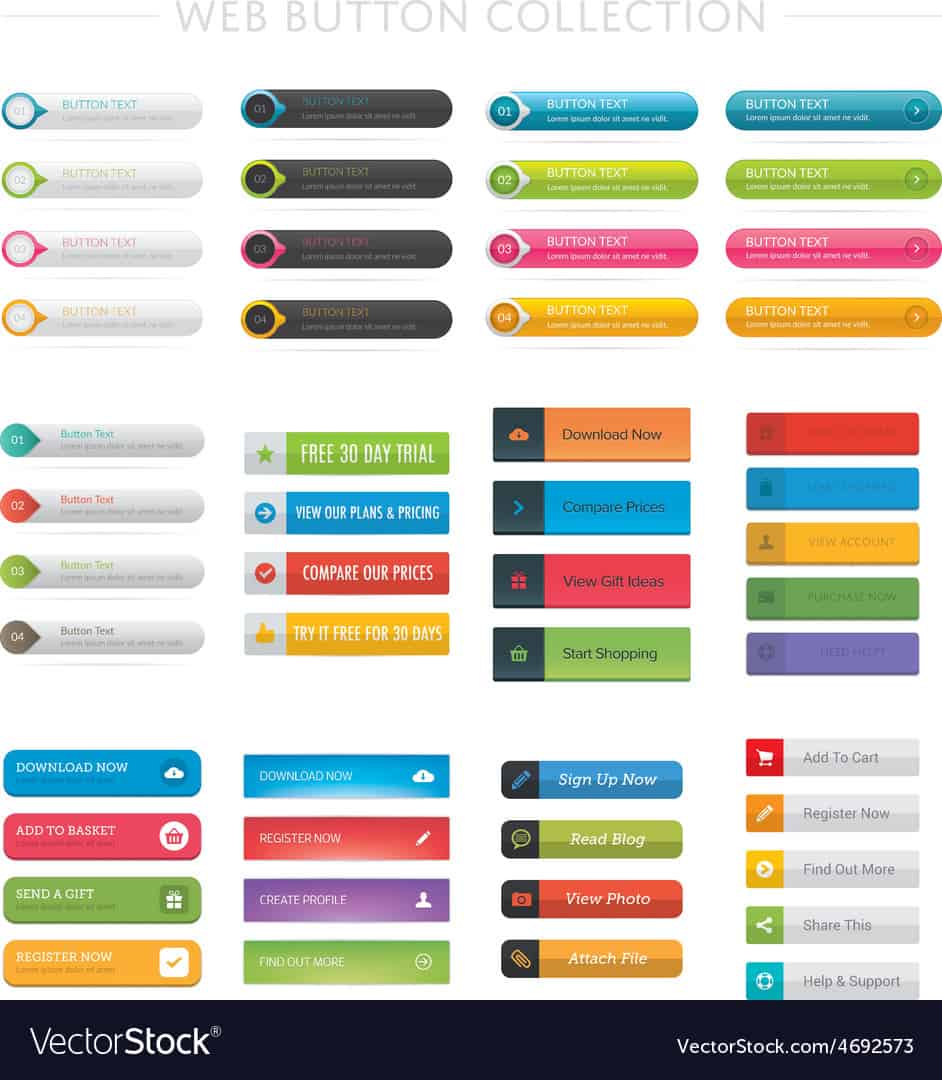
The main goal of your landing page is to convert readers into students. To do that, call-to-action buttons are your best weapon, together with a convincing copy.
You need to create clear and prominent CTA buttons. They need to stand out.
Some tips on how to create CTA buttons that stand out are:
- Use short action-packed text. Call to action buttons should feature action-oriented text. Some powerful words that work well are “get,” “you,” and “try” and “now”. They should back up your offer.
- Use grab-attention colors. One of the easiest ways to make them stand-out is with colors. Bright colors normally perform the best.
- Create large and easy to read buttons. You need to make them easy to find even if you are accessing the page through mobile. Make sure you stick to an easy to read font.
- Create a sense of urgency or scarcity. This will likely improve click-through rates. Add words like “Only Today” “limited time”, etc.
- Use them above the fold, in the middle, and at the bottom. Most of the time, one CTA is not just enough. So place them across your page for better chances.
- Test your buttons text. A good practice is to try different variations and choose the one with more clicks.
5. An opening story
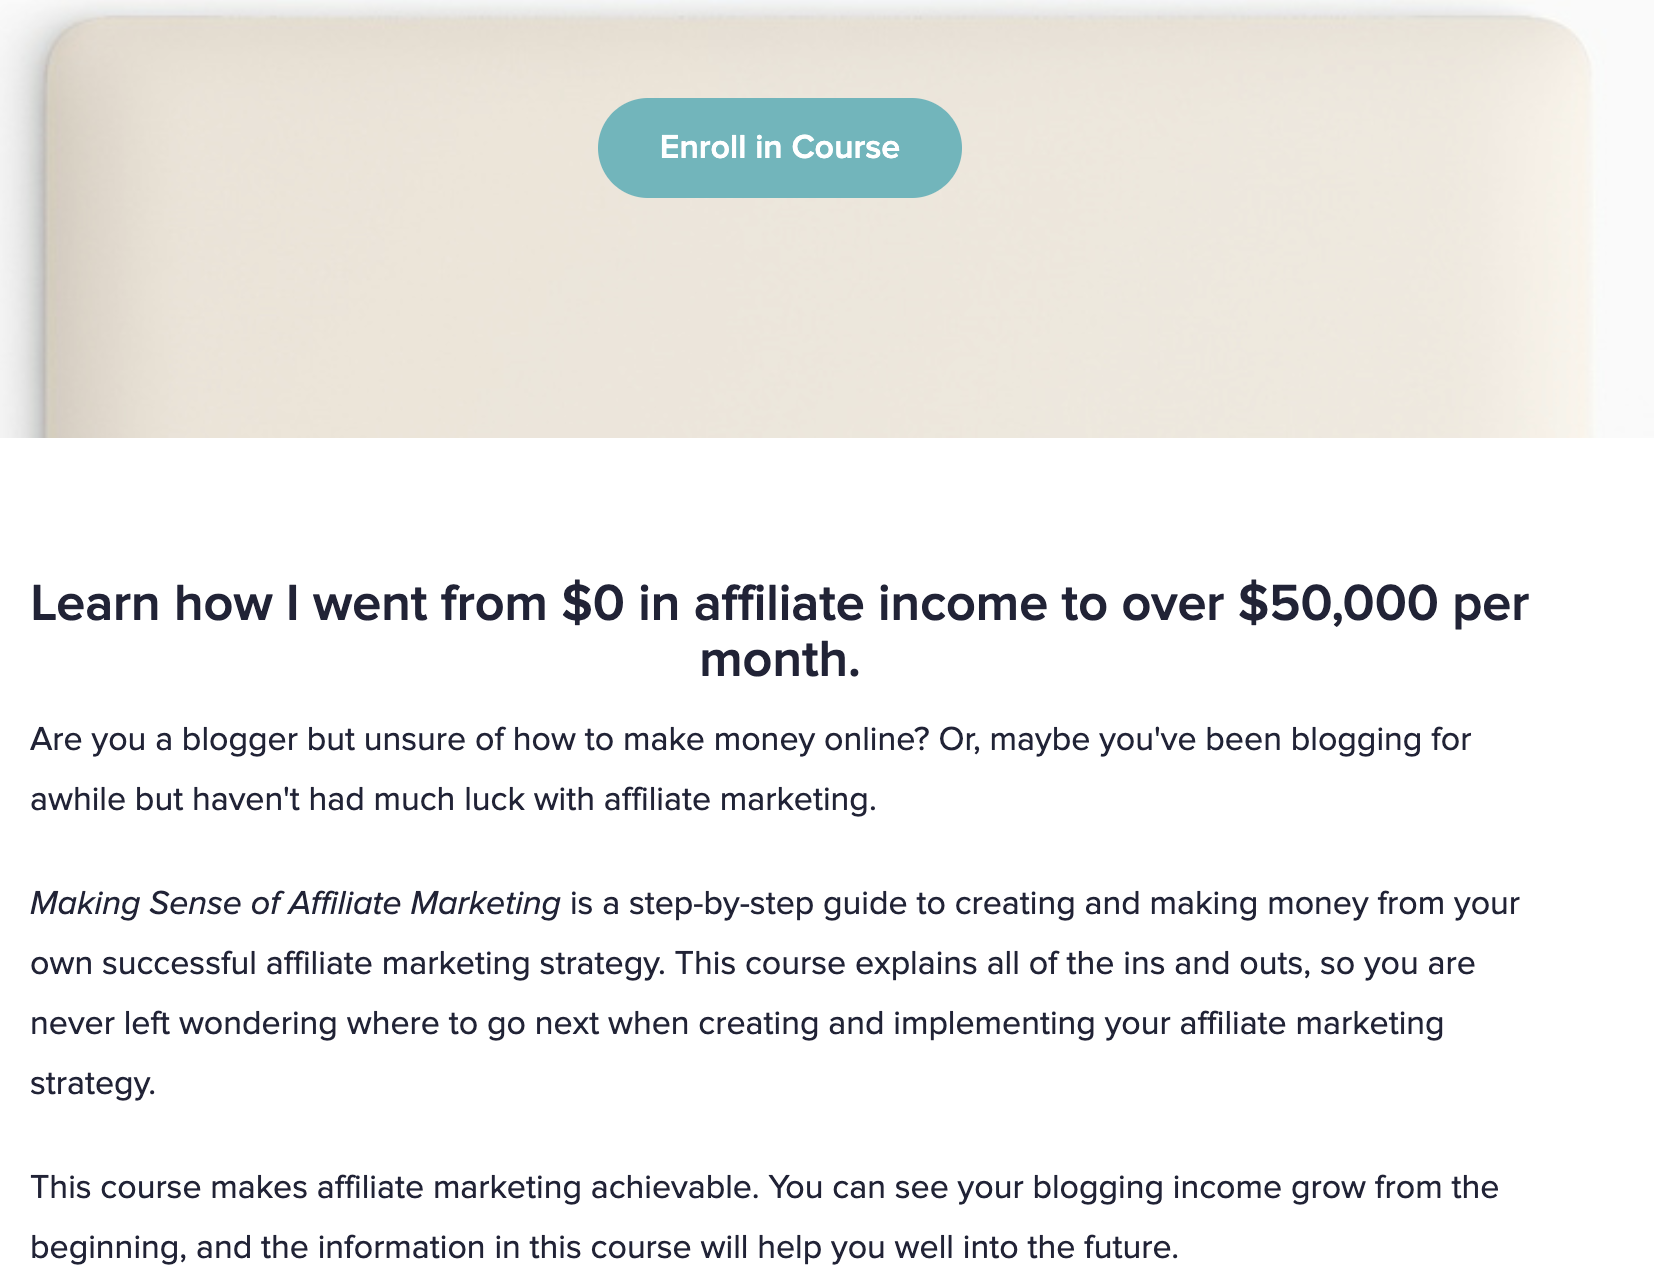
Stories are a powerful element to introduce your reader’s problem. With a story, you can tell your readers how a course can help them.
Start with the pain point and end by telling how this course can help them fix that. That will help you to build trust, and they will feel more identified. This will also help converting readers into customers.
6. The course description.
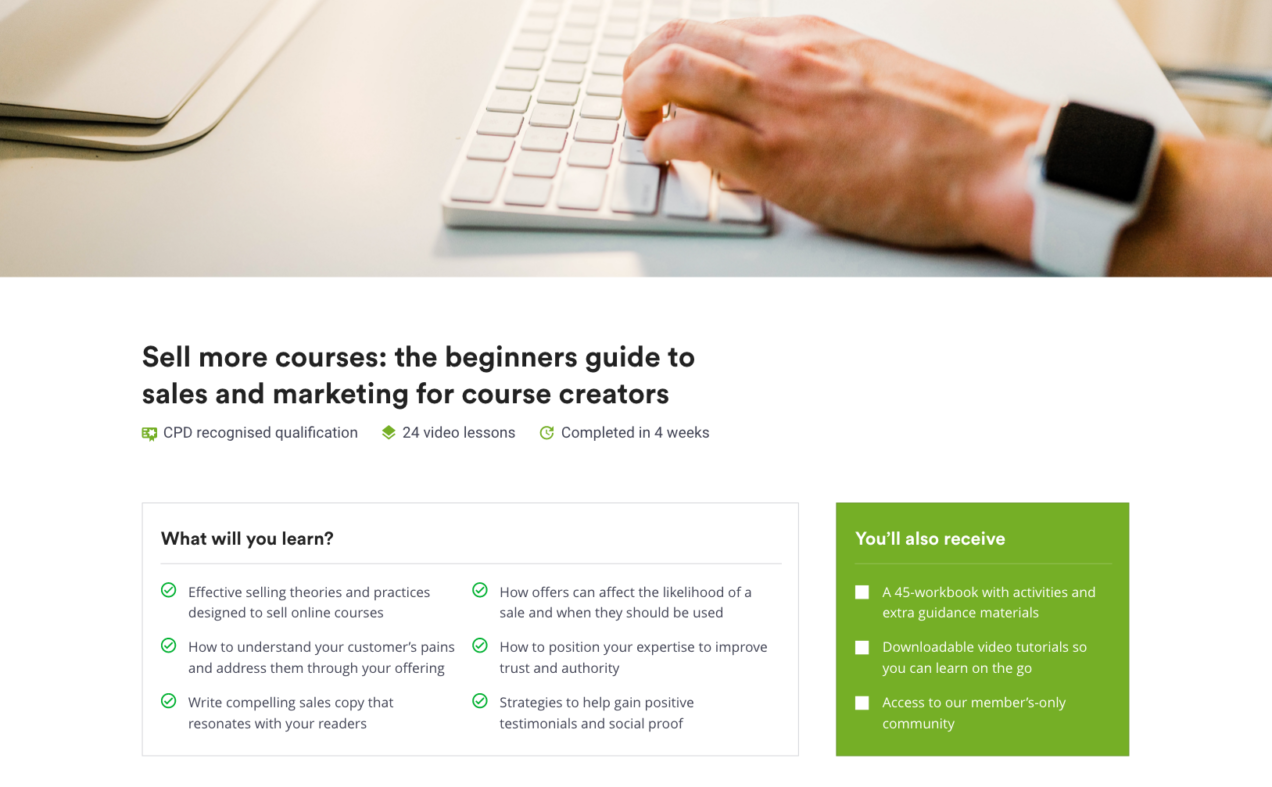
The course description is probably what your readers will be more interested in.
It should contain all the key elements of your course. Your course description should also contain the what and the why:
- What are you going to learn?
- Why this is beneficial for you
Make sure you include all the content within the course: Videos, checklists, worksheets, bonus (if any), etc.
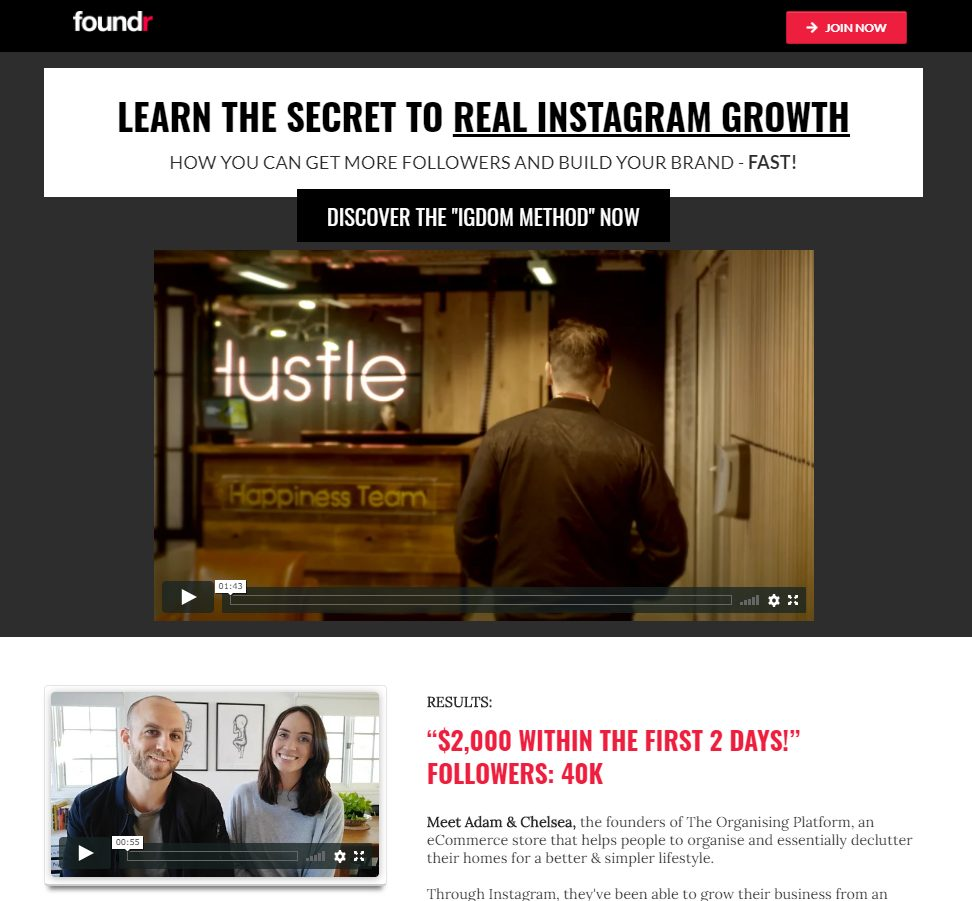
7. Testimonials.
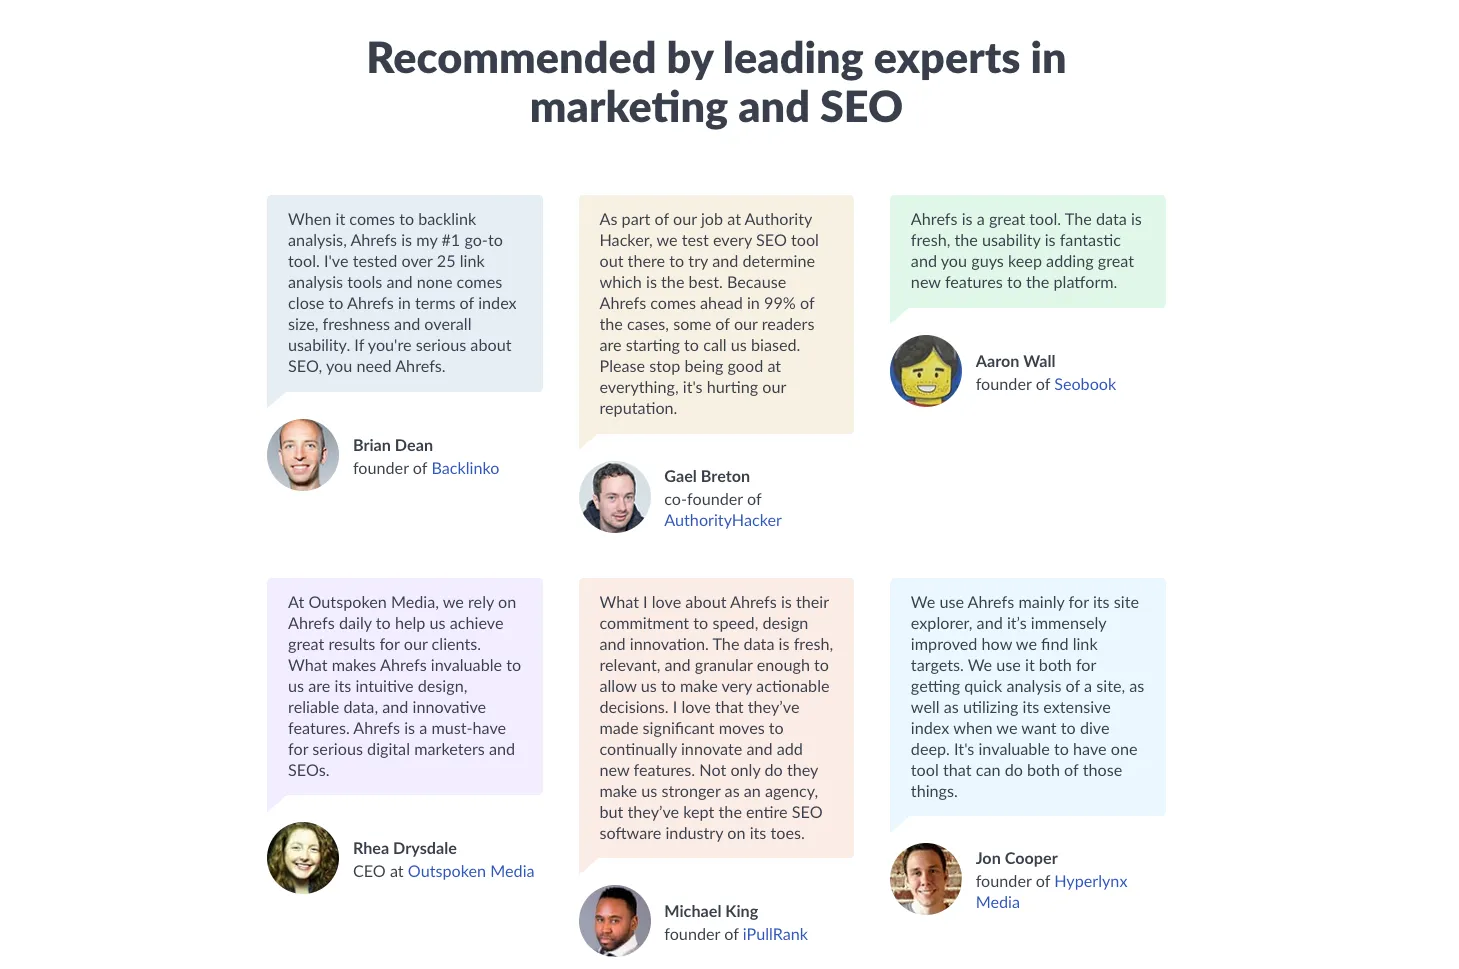
These days, we all need some kind of proof before committing to buying something.
Testimonials are a good way of providing social proof. Your students will want to see other people’s experiences.
With testimonials, your credibility increases, so will your conversions. To get testimonials, you just need to ask your students to provide you with a couple of lines about the impact of this course on their lives.
If you don’t have any students yet, offer your course for free to the first 5 or 10 people in exchange for testimonials and feedback. That could be a good promotion technique that could benefit both.
8. Instructor bio.
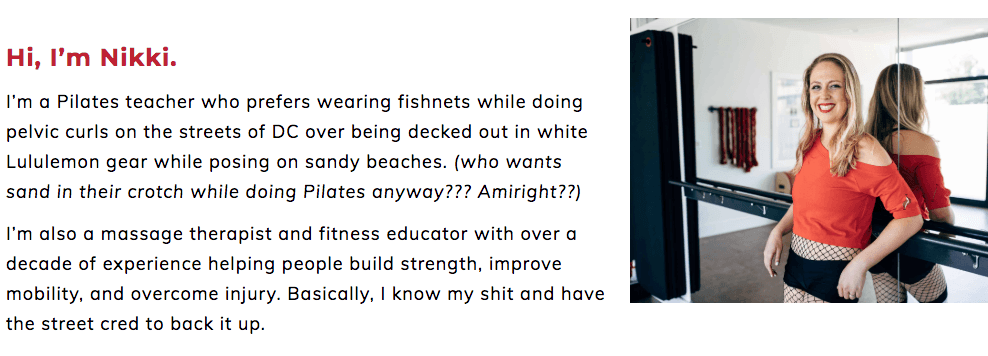
People will be interested in knowing the author of the course.
They will be asking themselves; “What is the author’s background and why should I sign up with you?”
In your bio, there are two key elements you need to include:
- A headshot. People like to see who you are.
- A short paragraph telling them why you have the experience to run this course.
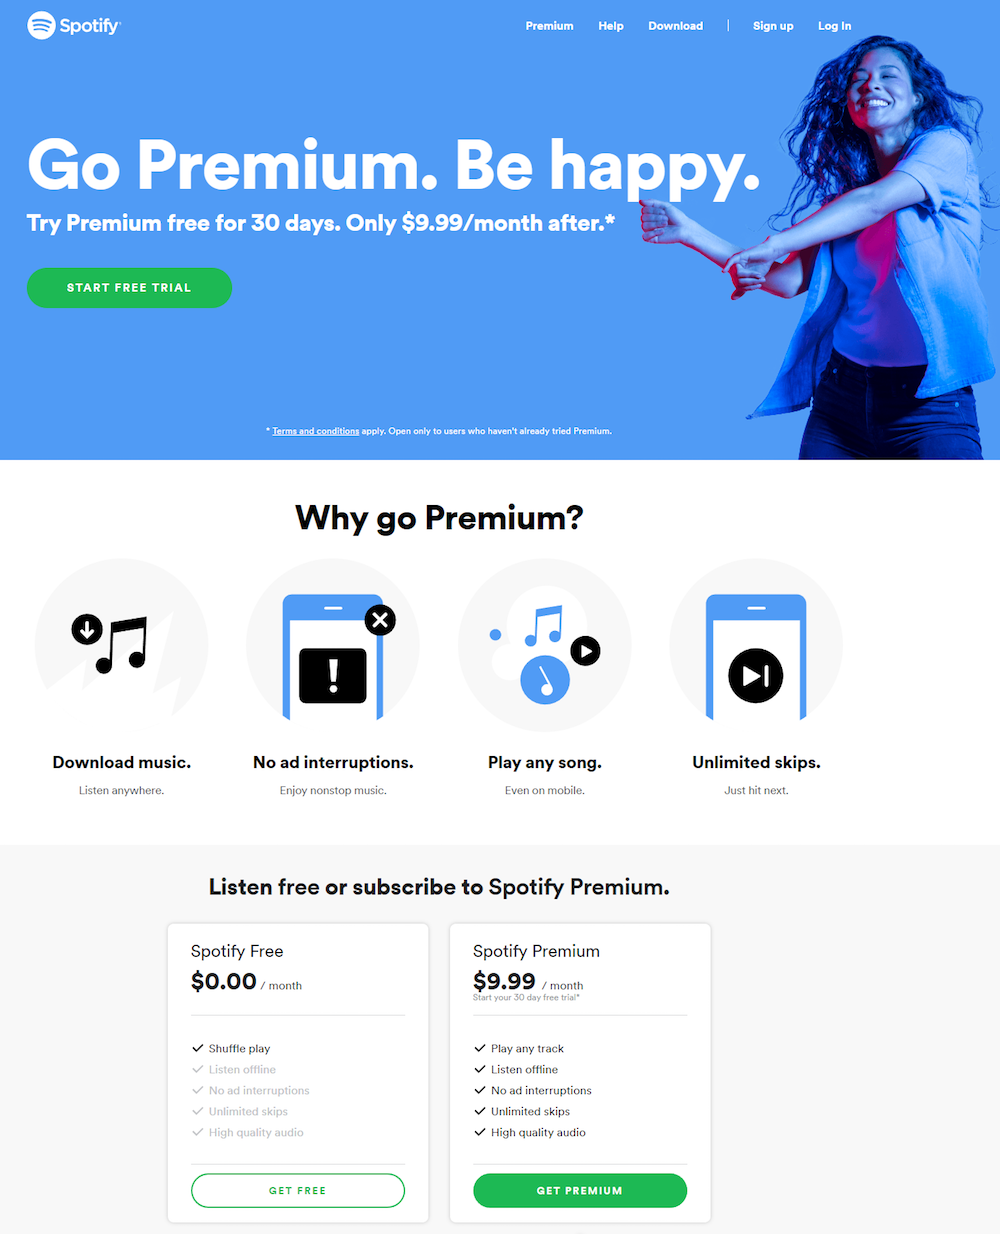
9. Pricing details.
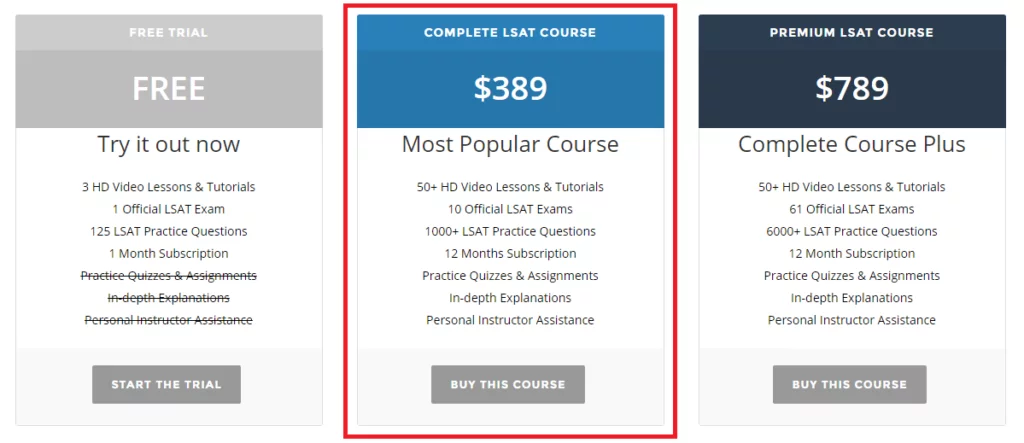
Also, your readers will need to know the pricing details so they can make their decision. You need to be concise and clear about the pricing options and what is included.
So, list out your price, explain if there are different tiers of pricing, and make sure you have an appealing CTA button ready.
10. Satisfaction guarantee.

Something that has proved to provide peace of mind to your potential customers is a satisfaction guarantee.
Adding things like a “money-back guarantee” can help boost your sales. By doing this, your students will be more confident about buying your course.
One of the most common practices is to add a “100% money-back guarantee within the first 30 days of purchase“. But you can also try different variations.
11. FAQ.
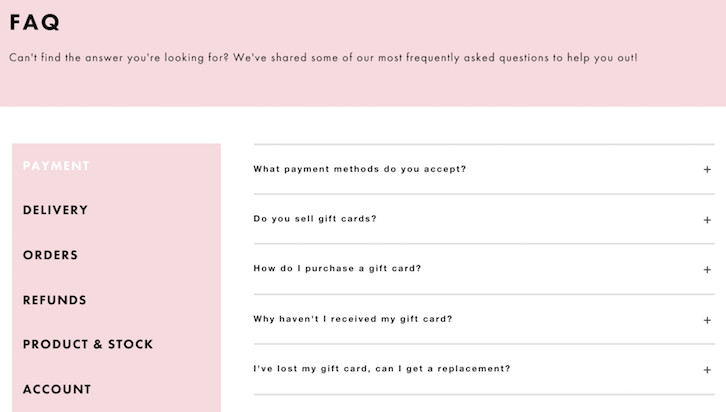
Your potential students will want to know every detail. So creating a FAQ section to give some answers to the most common questions can be great.
A FAQ section needs to cover the most common concerns about taking your course. Provide them with clear answers so they won’t back up because of the lack of information.
12.Include a P.S.

P.S. are great attention grabbers. Many people will just scroll all the way down and look for something short and sweet.
A good P.S. is the best way of hooking them. Simply summarize your online course in a couple of lines with a solid reason to enroll in your course. Then, add a CTA straight after.
How to create a sales page?
The easiest and most effective way of creating a sales page is using one of the tools designated for this. The reason is they have been designed to build landing pages effortlessly with templates and convert better. Plus, they also include analytics so you can test what is working and what is not.
Lastly, they allow you to collect emails from your readers, which you will need to leverage your marketing game. I recommend you checking Instapage for this purpose.
Why Instapage?
- It has been designed to boost conversions.
- Create relevant, on-brand, mobile-responsive post-click landing pages and experiences without a developer.
- Optimize your post-click landing pages for higher conversions with detailed heatmaps, A/B and multivariate testing, and robust analytics.
- Dynamically deliver the right experience to the right audience and identify high-performing target segments by tracking metrics at the audience level.
- Visualize your ad campaigns and effortlessly connect ads to your relevant landing pages all in one place.
- Fast-loading landing pages.
How to create a landing page using Instapage?
Step #1. Sign up for a 14-day trial here.
Step #2. Click on the “Create New Page” button on the dashboard.

Step #3. You will then see two options to build a page: choose from the template library or upload an “.instapage” file:

You can build a page from scratch if you’d like or select one of the templates from the categories in the left margin.
If you select the template option, you’ll have access to the template gallery, where you can browse from the following types:
Step #4. After you’ve chosen a template you can edit individual post-click landing page elements by selecting the item, and then clicking the “Edit” option:
Step #5. Click “Preview” to see how it looks. Once you’re satisfied with your page, click “Publish” in the top-right corner.
Ta-da!
That is how easy you can start creating a perfect landing page with Instapage.
5. Create a sales funnel
A sales funnel is each step that someone has to take to become your customer. It is a way of breaking down the customer journey all the way from the “awareness” stage (when they first learn about your business) to the “action” stage (when they’re ready to buy your product or service).
Often funnels can also include post-purchase follow-ups which increase retention as well as cross- and up-sells.
.jpg)
What do I need to create a sales funnel?
To create a sales funnel you are going to need:
- A tool like Instapage. This will not only allow you to create landing pages but also on page sales funnels.
- An email service with automated sequences like GetReponse. GetResponse is especially good for course creators due to the features included to create off-page sales funnels.
How to create a sales funnel?
There are two kinds of funnels you can create:
- On-page
- Off-page (email funnel)
On-page funnel
This is what you need to do to create your on-page funnel:
- Drive traffic to your landing page. In this page, is where your potential customer should land and get exposed to your offer.
- Front- end offer. Present potential customers with the opportunity to buy a product or procure your service.
- Give an upsell. Offer your customers who just bought or are about to buy a product or service the opportunity to upsize, or upgrade that service. For example, create an offer that will deliver even more benefits to the customer if they upgrade.
- Keep it going. The last step in the sales funnel is to keep this flow going. Follow up with all your new customers and ensure they are happy with their product or service. A great way to accomplish this is to offer a membership-based rewards program. This will allow you to remain in contact with customers, giving you the perfect means to tell them about new deals and services.
Off-page funnel (Email sales funnel)
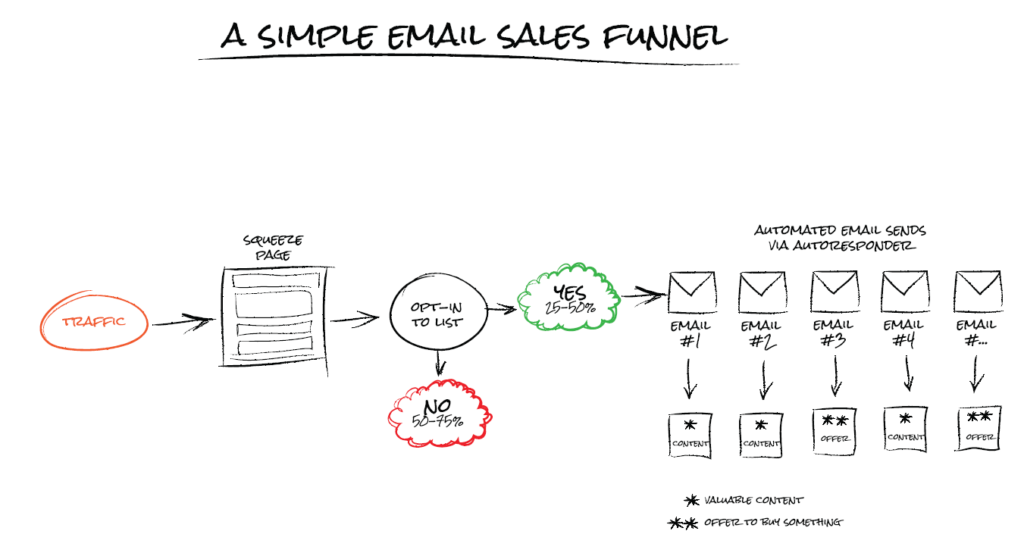
Normally, an email funnel will work much better since you wouldn’t be working with a cold audience anymore. Instead, you will be sending your offers to people who voluntarily subscribe to your website. This means the chances for them to buy something from you are higher.
This is what you should do:
- Drive traffic to your landing page. This is where you have the chance to convert readers into leads with Instapage.
- Create an automated email sequence for when people sign up.
- The first couple of emails should be valuable content for your subscribers. It will need to be related to the final offer. This will increase engagement.
- Include an amazing offer in your sequence. Since you have been providing them with valuable content, they will feel more inclined to buy from you.
- Follow up with interested customers. Email services like GetResponse, allow you to see how clicked on your courses but did not buy. Most of the time, they will need a second or even a third push for them to buy. You can even create a separate funnel for people who clicked and visited your offer but did not buy.
With a tool like GetResponse, you will be able to analyze which emails get clicked and which do not. This will allow you to refine your strategy so you can always keep improving your sales funnel.
6. Promote your course
A key thing about how to sell online courses from your own website is to know how to promote them.
There are different ways you can do it. But I suggest you start with these:
- Social media
- Guest Post
- Webinars
- Paid ads

Use Social Media
For this strategy to work, you need to start by delivering quality content to your audience.
This will generate interest. If you keep doing that, by the time you want to market your course, you will have a more engaged audience and more people will be willing to check your course.
Also, you can create a private group on Facebook to build a community of interested people.
Write a guest blog post.
Writing a guest post can be a great way to drive traffic to your sales page. All you need to do is cover some of your course topics and share them with a website in your niche with traffic. Normally, this formula will help you in finding guest post opportunities. Simply type on Google:
- keyword “submit a guest post”
- keyword “guest post”
For instance, if my keyword is “health and wellness course” I would type: health and wellness “submit a guest post”. That should provide you with a list of sites accepting guest posts.
Run a webinar
Webinars are a great tool to reach potential customers effortlessly. Moreover, they are easy to set up and conduct.
Create a script for a one hour webinar with topics directly related to the goal of your course. Make sure you address pain points and deliver instant value to the attendees. Then, you can target this very same audience to promote your online course. You can use Zoom or Thinkific to create your Webinars.
Use your email list
If you have an email list, it is going to be the best way to promote your online course. The reason why this will work great to promote your course is that your subscribers are already people interested in your content.
All you need is a good email service provider. The one I recommend you to check is GetResponse. It is especially good for online course creators due to the tools they provide.
Lastly, I suggest you take a look at these two blog:
- How to set an effective email marketing campaign.
- 7 Best Cheap Email Marketing Services (Compared & Reviewed)
Use ads to promote your course.
Running paid ads can be one of the most effective tactics to promote your course. However, if you don’t do it properly it can eat your budget.
The main benefit of using ads is that you’ll get results faster. However you will need to research what is the best platform for your target audience. I recommend you start with Facebook ads since are cheaper than Google ads.
How To Create An Online Course And Sell It: The Definitive Guide

Learn how to create an online course and sell it with this step by step guide. From choosing a niche topic to marketing your online course.
How to sell online courses from your own website- Conclusion
Your way to success in creating and selling online courses starts with niche research. Once you have your niche ready, this is how you can sell online courses from your own website without much hassle. And what is best- you just need to do all this just once. Then, you can sit and start earning a passive income.
If you decide to go for a learning management system instead, I suggest you read this Thinkific review.
Now I’d like to hear what you have to say:
Did you find all the resources you need to create and sell your course on this guide?
Let me know by leaving a quick comment below.