Are you considering Thinkific to host your online course business and start making money?
Creating and selling online courses is already a lot of work. So using an LMS (Learning Management System) is probably the easiest way to start.
Thinkific is one of the most solid options out there. But like any other tool, you need to understand if it is the right tool for you.
In this post, I am going to provide you with a complete Thinkific review so you can see the pros and cons, features, ease of use, pricing, and more.
Let’s dive in!
*Disclosure: I only recommend products I would use myself, and all opinions expressed here are my own. This post may contain affiliate links that at no additional cost to you, I may earn a small commission.
Thinkific Review At A Glance.
My Verdict
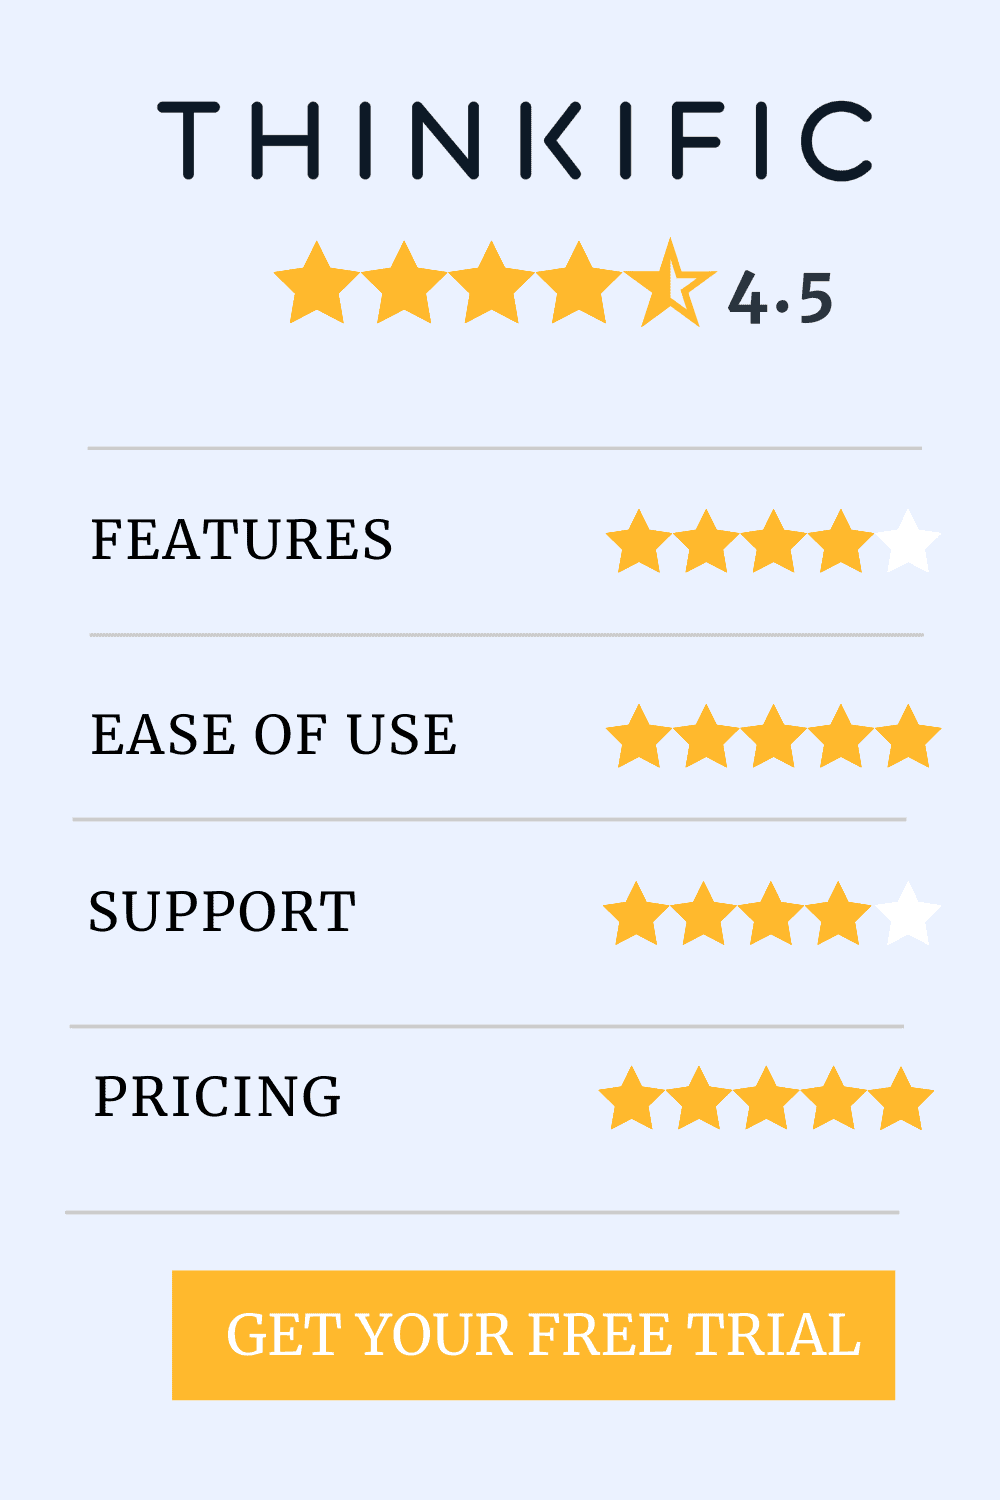
★★★★☆ 4.5![]()
Thinkific is a solid LMS platform that allows entrepreneurs and businesses to create online courses easily.
Personally, I think Thinkific is a great platform that provides all the key features any course creator needs. Even the free plan will provide you with enough features to keep you going.
Where Thinkific excels is in understanding the needs of course sellers and making things easy. However, it lacks a marketplace where to promote your courses.
Thinkific Pros and Cons.
PROS
CONS
What Is Thinkific?
Thinkific is an LMS (Learning Management System) platform that allows entrepreneurs and businesses to create online courses.
It allows to create your own online courses from scratch and sell them directly from the platform. It also allows customisation and offer every tool you need from the course creation to well past your launch.
Wether your goal is to sell courses and increase your revenue or to educate your readers, Thinkific got your covered.

Thinkific Review.
In this Thinkific review, I am going to analyze:
- Features
- Ease of use
- Support
- Pricing
Also, you will learn how you can benefit from using Thinkific and how it works.
1. Thinkific Overview. | 


Personally, I think Thinkific is a solid online course platform for entrepreneurs and small businesses for creating and selling online courses. Even the Thinkific free plan will provide you with enough features to keep you going.
Thinkific won’t only make it easy to create courses but will also guide you all the way until the end and further. Other advanced plans make this platform even more impressive with features I will detail below.
Where Thinkific excels is in understanding the needs of course sellers and making things easy. This, together with making the learning experience seamless, makes Thinkific a great platform for course creators.
Now, let’s take a look at the Thinkific experience in detail. To understand if this is the right platform for you, we are going to check what it can offer.
The reviews given to each section are only my personal opinion after testing it.
You might want to read:
2. Thinkific Features. |
Thinkific provides many great features even in the free plan.
Some of the most useful and powerful features Thinkific offers are:
The features Thinkific provides are with no doubt more than enough to create and keep a successful online course running. However, I think chat support is vital for any platform like this. It is true they make the whole process easy to follow but is easy to have some doubts at some point. This is just my personal opinion.
Also, it lacks internal email marketing. Personally, I prefer a dedicated email marketing tool since they are more powerful than the ones built-in platforms like this. I suggest you read this Converkit Review, which is my favorite email marketing option.
You might want to read:
3. Thinkific Ease of use. |

Not only Thinkific is very intuitive, but it also guides you throughout the whole process.
Below I will show you how each of the sections works with a personal note on how they performed.
Sign Up.

The sign-up process was totally painless.
All you need to do is to provide an email and hit the “Get Started Free” button. Then you just need to fill in your details and select the plan you need. You can start with the free plan, where you can create up to 3 courses for free, or select any other plan you need.
In less than 2 minutes you’ll be signed in.
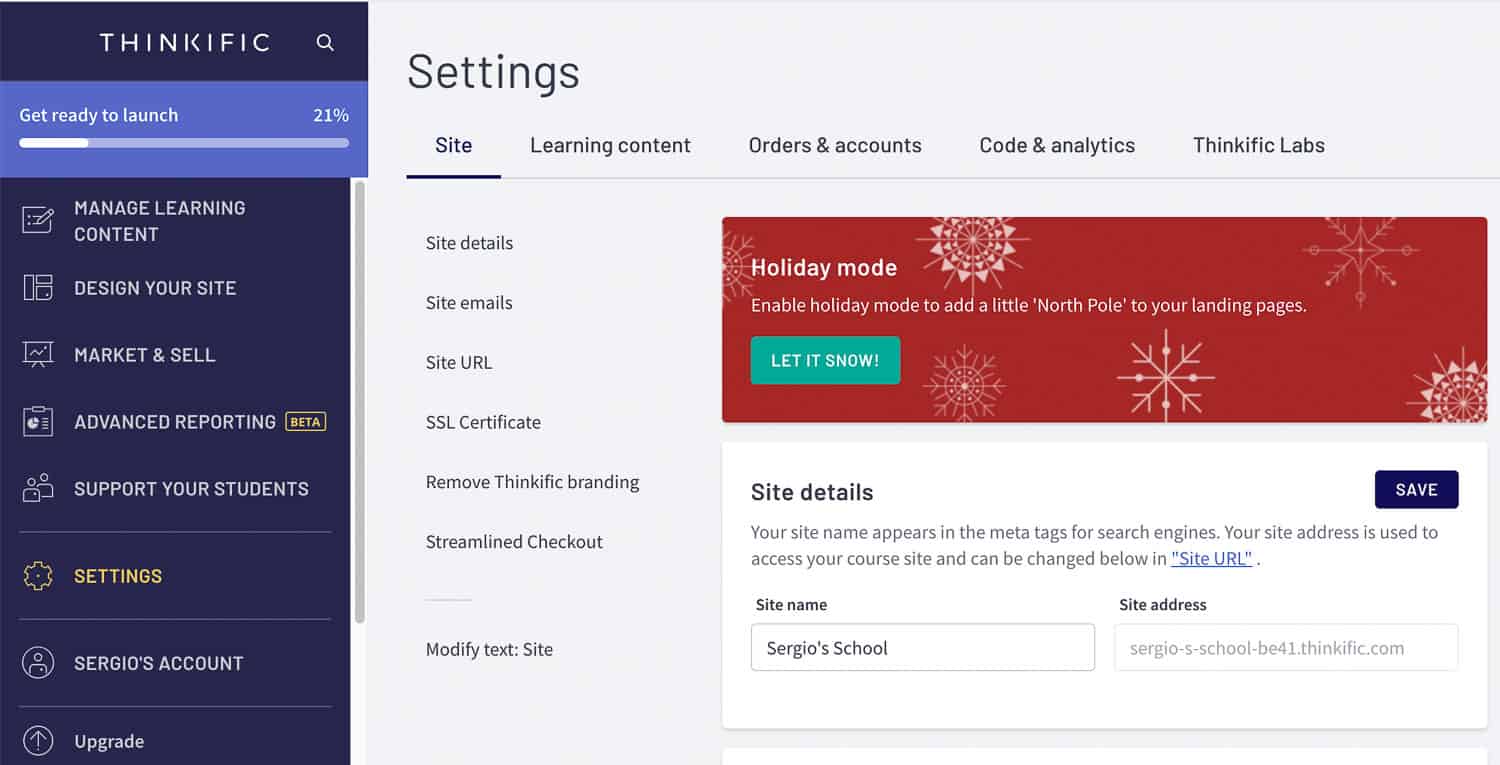
Once you have your account ready to go, you can fine-tune some details in the “settings” tab. You can change your school name, site URL, and more.
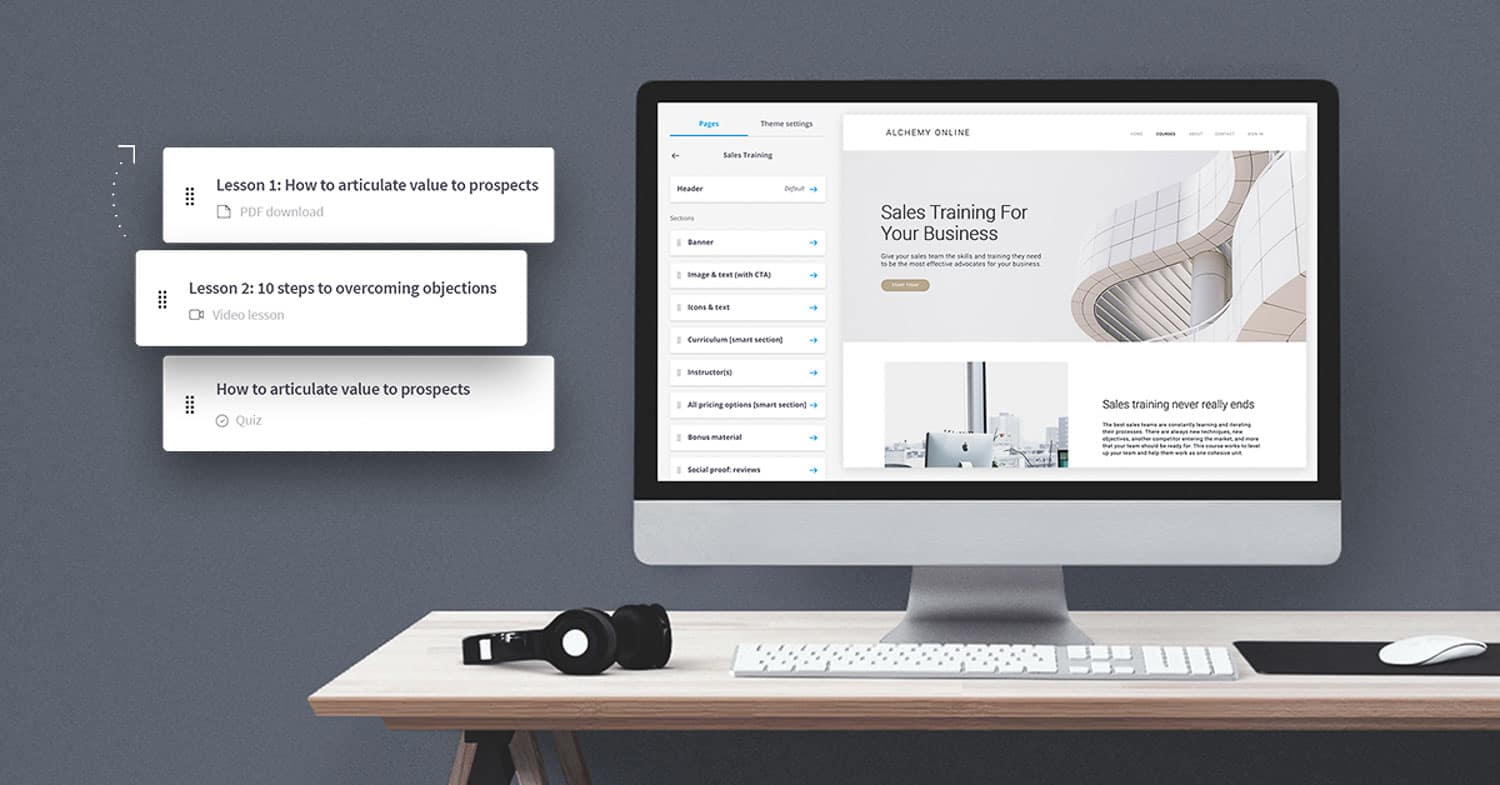
Creating your first course.
Something Thinkific does very well is to guide your course creation step by step. I didn’t feel lost at any time when creating my first course because they made it very easy.
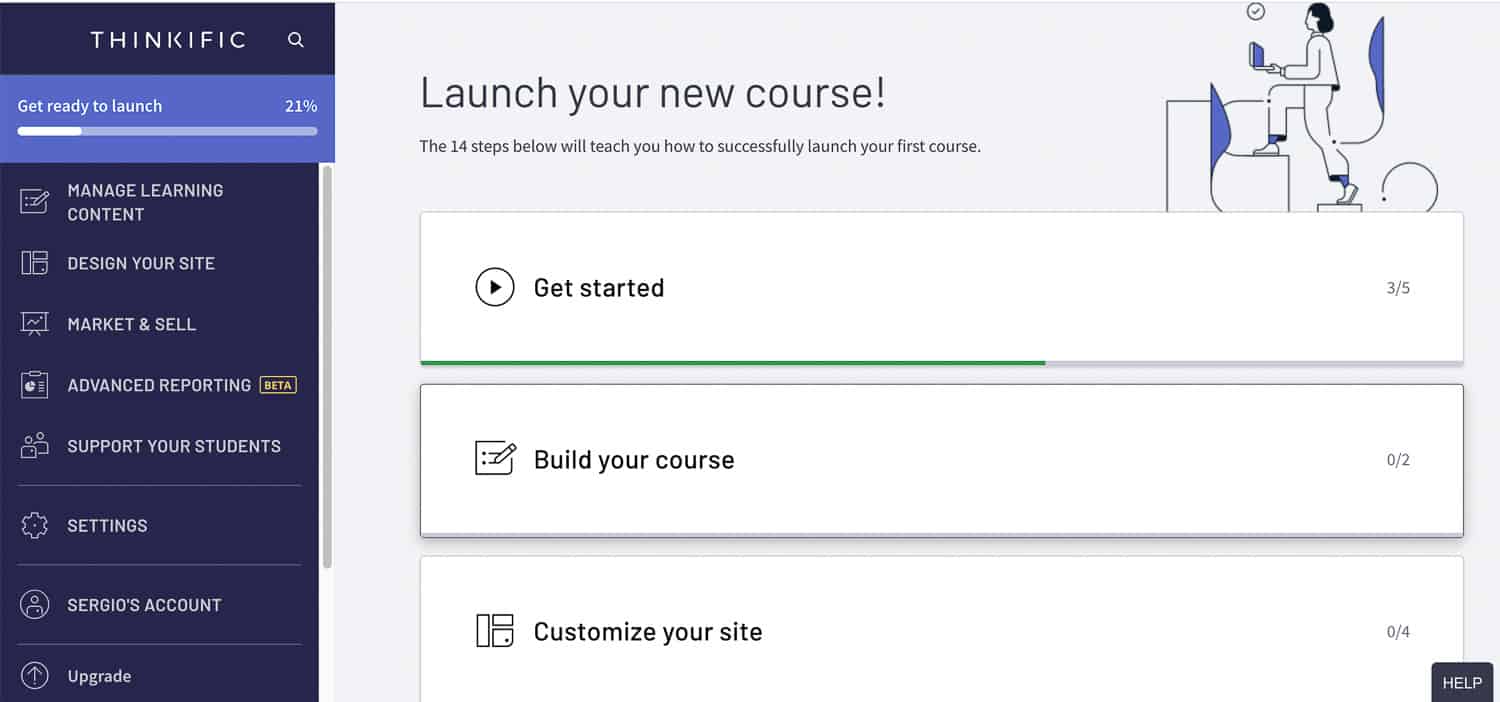
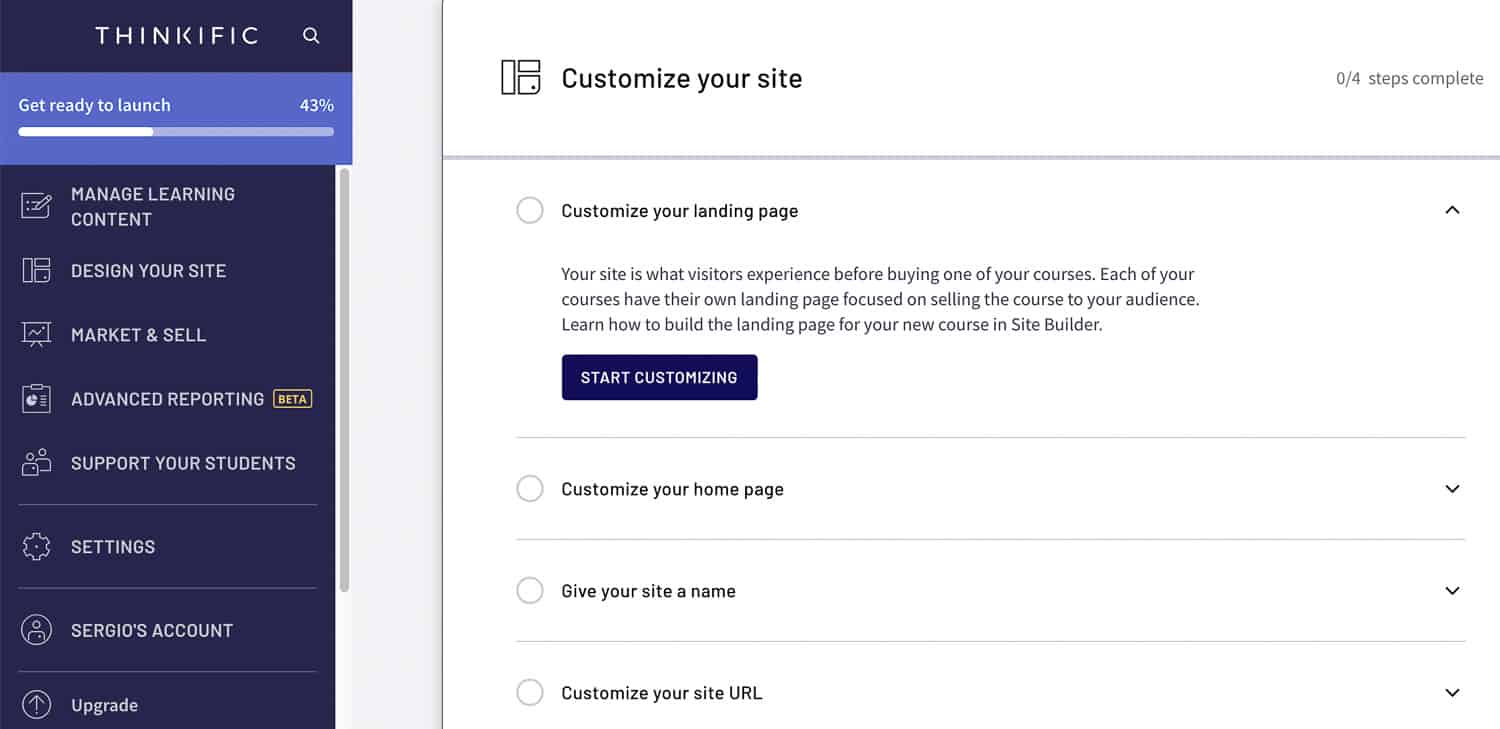
Once you login into your Thinkific account you’ll see a dashboard. In the main area of this dashboard, you’ll find different sections:
- Get started: Where you’ll find all the basics steps you need to do before creating your first course.
- Build your course: Here is where you actually add content to your course.
- Customize your site: Here is to customize your landing page and home page.
- Publish your course: Fine-tune the last details before publishing your course.
1. Get Started
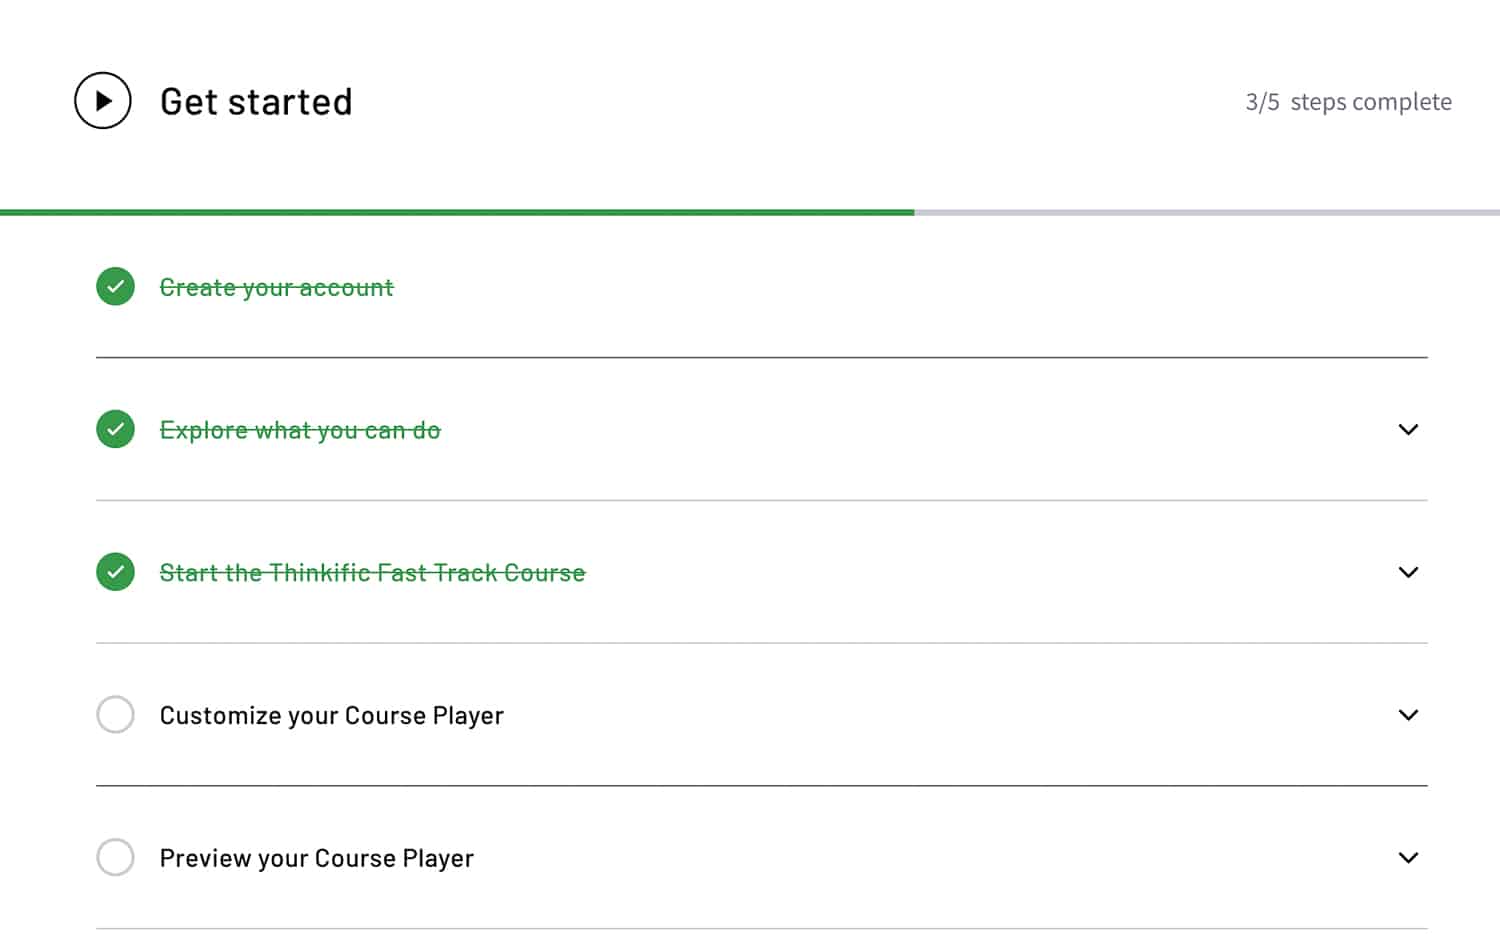
The “Get Started” section is where you will find some basic steps to follow before creating your course. This information is visually presented with text and videos to make the experience seamless. All you need to do is to click over each of them, follow the steps inside, and jump into the next one once you finish it.
The steps you need to complete here are:
- Create your account.
- Explore what you can do.
- Start the Thinkific fast track course.
- Customize your course player.
- Preview your course player.
After you finish this module you will already have a pretty good idea of how this works. It is presented in a way you don’t even need to think what do next. It all flow naturally.
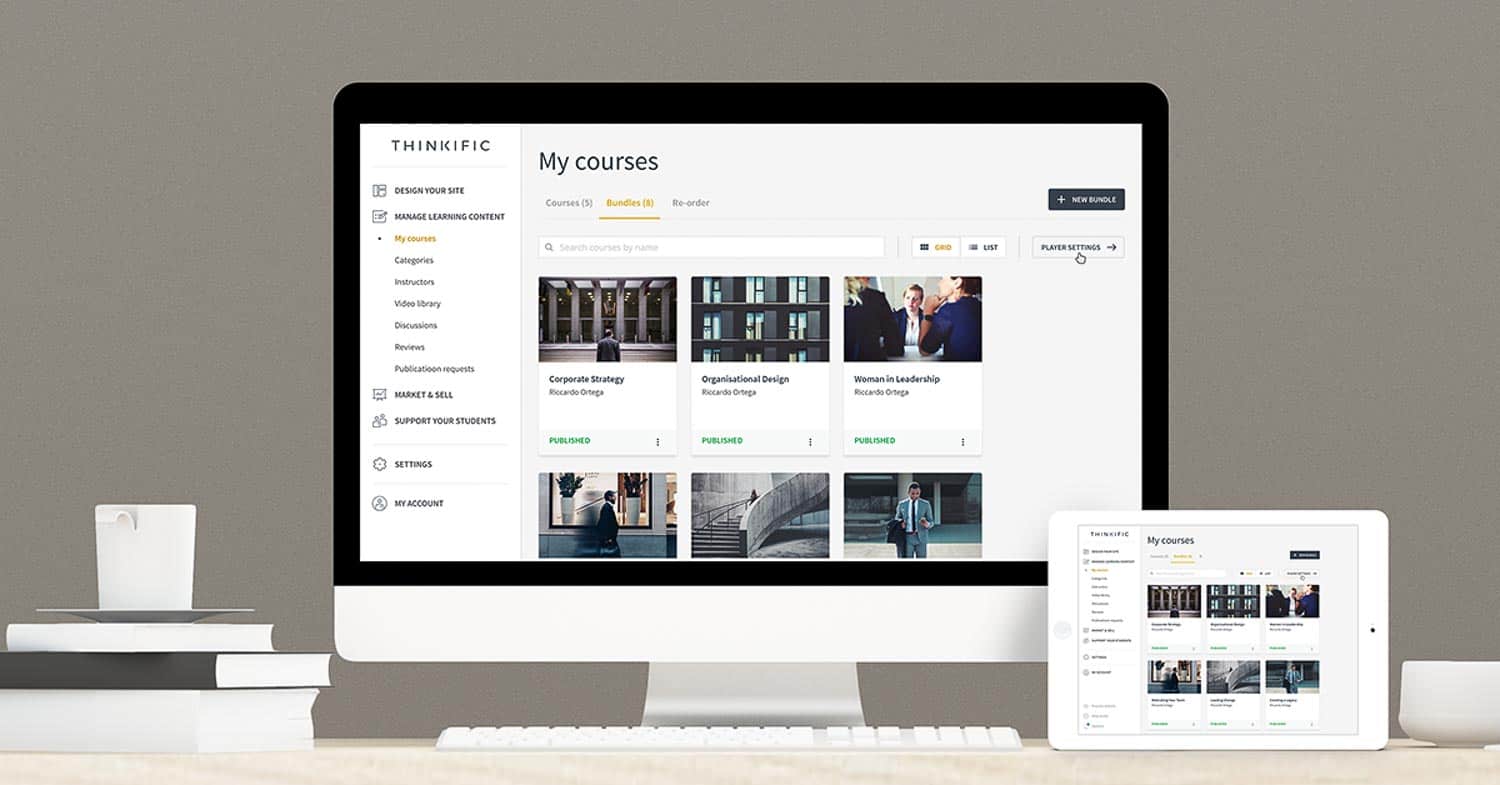
2. Build your course
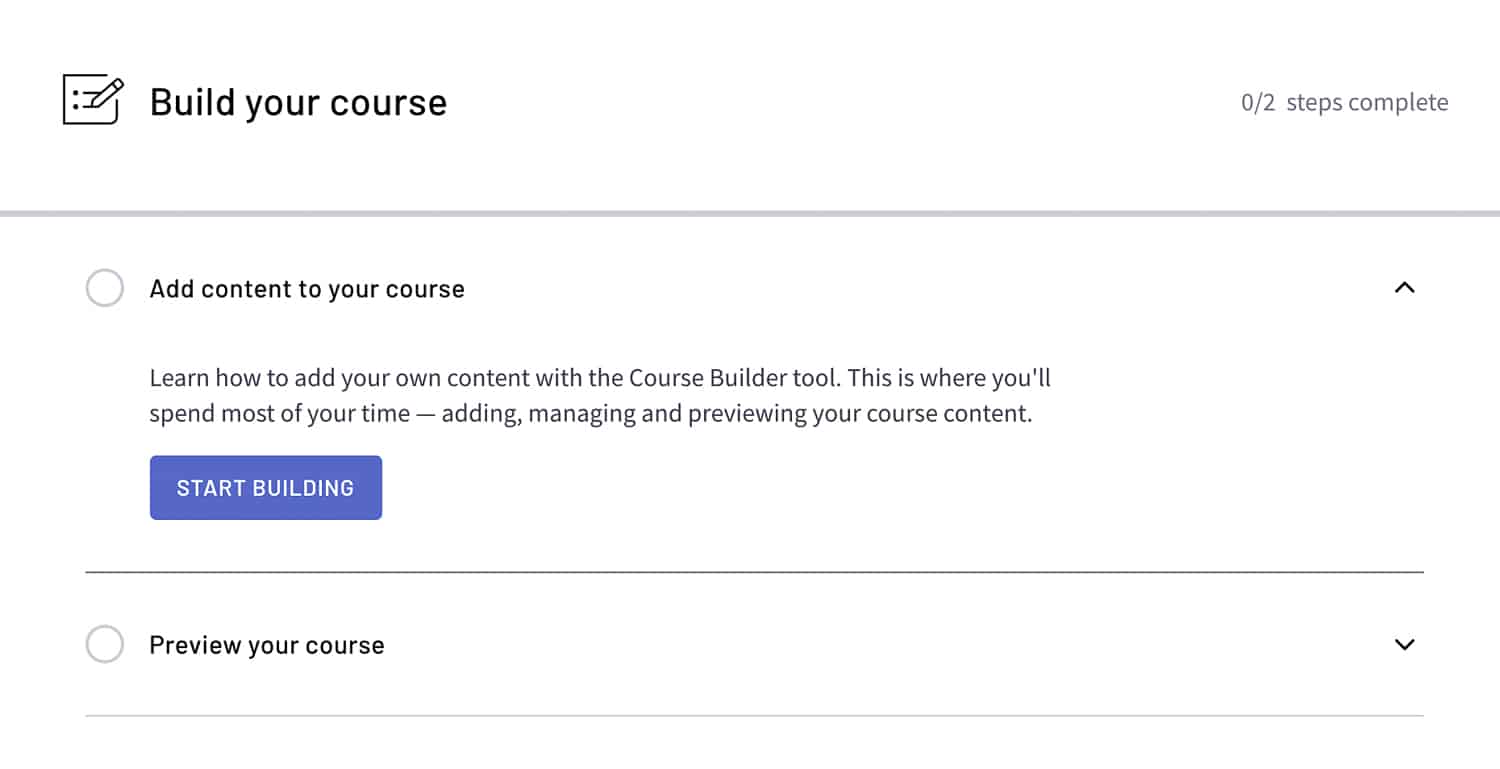
This section will help you to start adding content to your course.
Step #1. Click on the “Start Building” button. Some dialogs will show to guide you through the process.
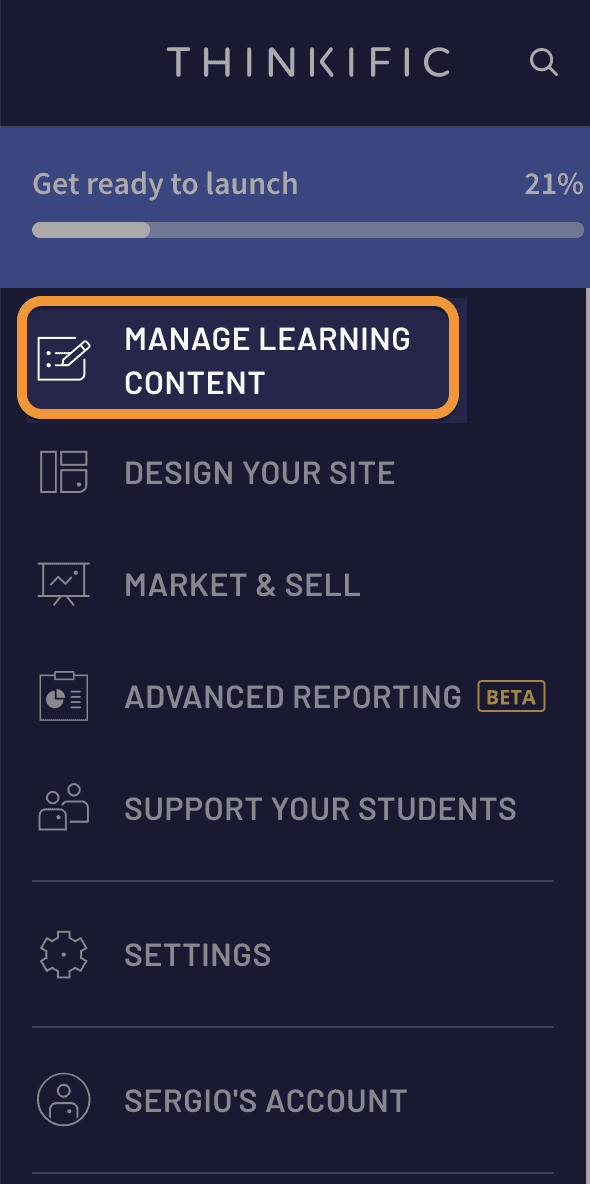
Step #2. Click on “Manage Learning Content” on the left menu.
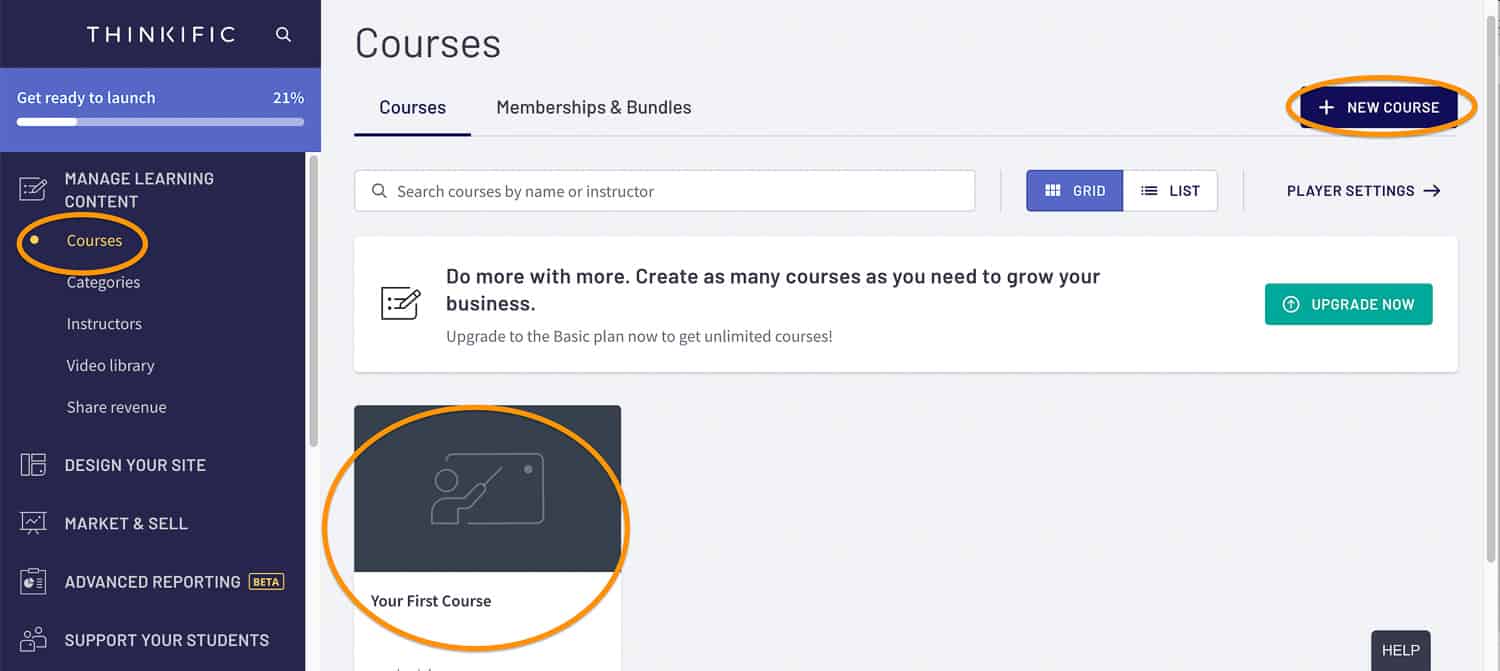
Step #3. Click on “courses” on the left menu and the screen below will show. Then you can create your first course by clicking the “your first course” icon. If you have a basic plan or any other, you can also click the button “+ New Course“.
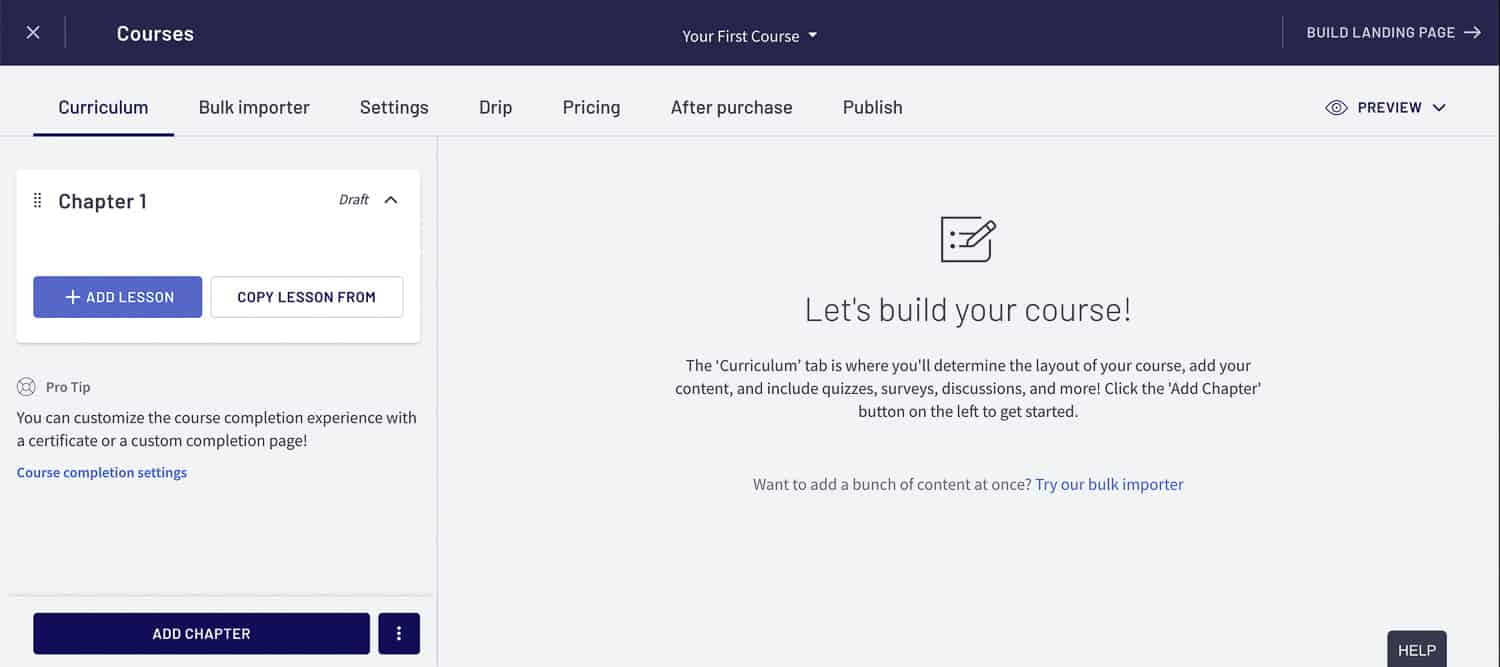
Step #4. From here is where you actually starting creating your chapters and lessons. To begin, click on the “+ Add lesson” button.
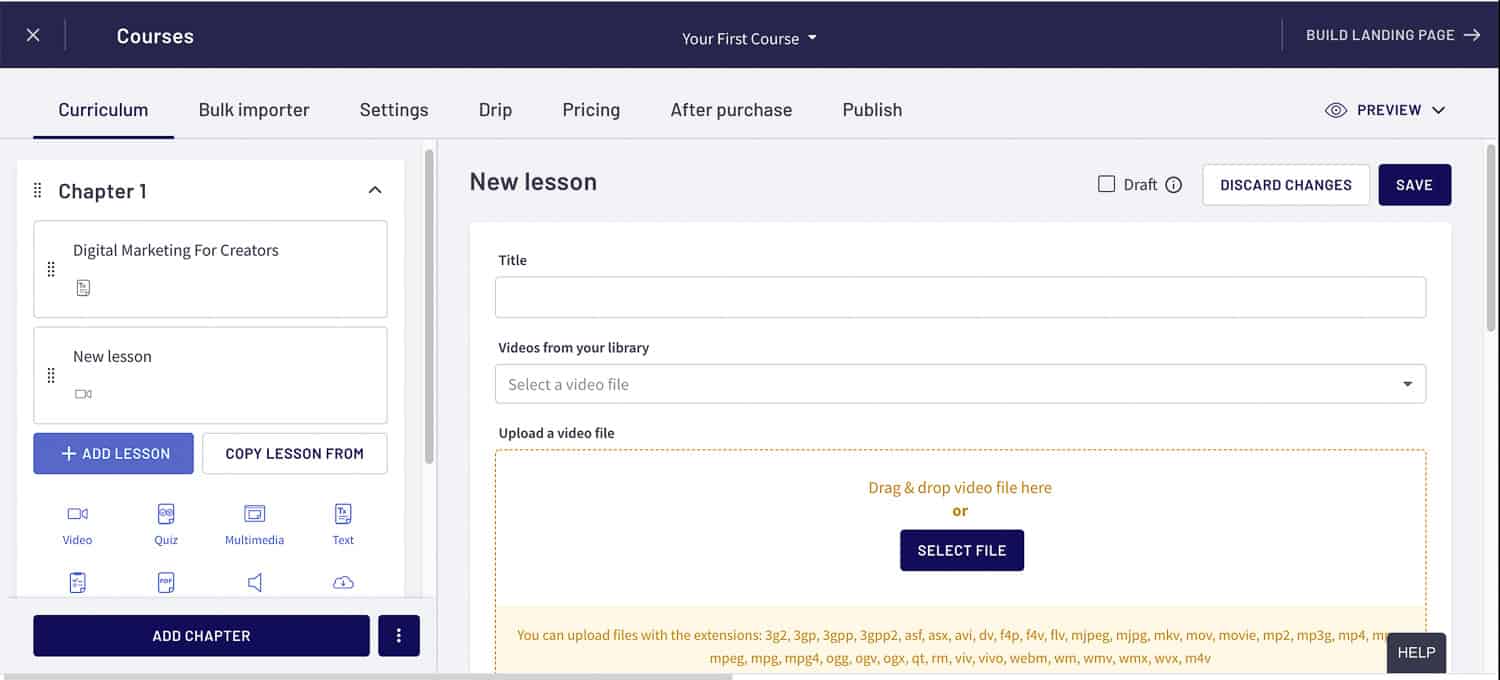
Step #5. Lastly, all you need to do is choose the type of content you want to add to each chapter. You can even preview all the changes you do.
Step #6. Finally, you can control all the different parts of your course easily using the top menu.
Overall, I’d say it is very intuitive and easy to use and create courses.
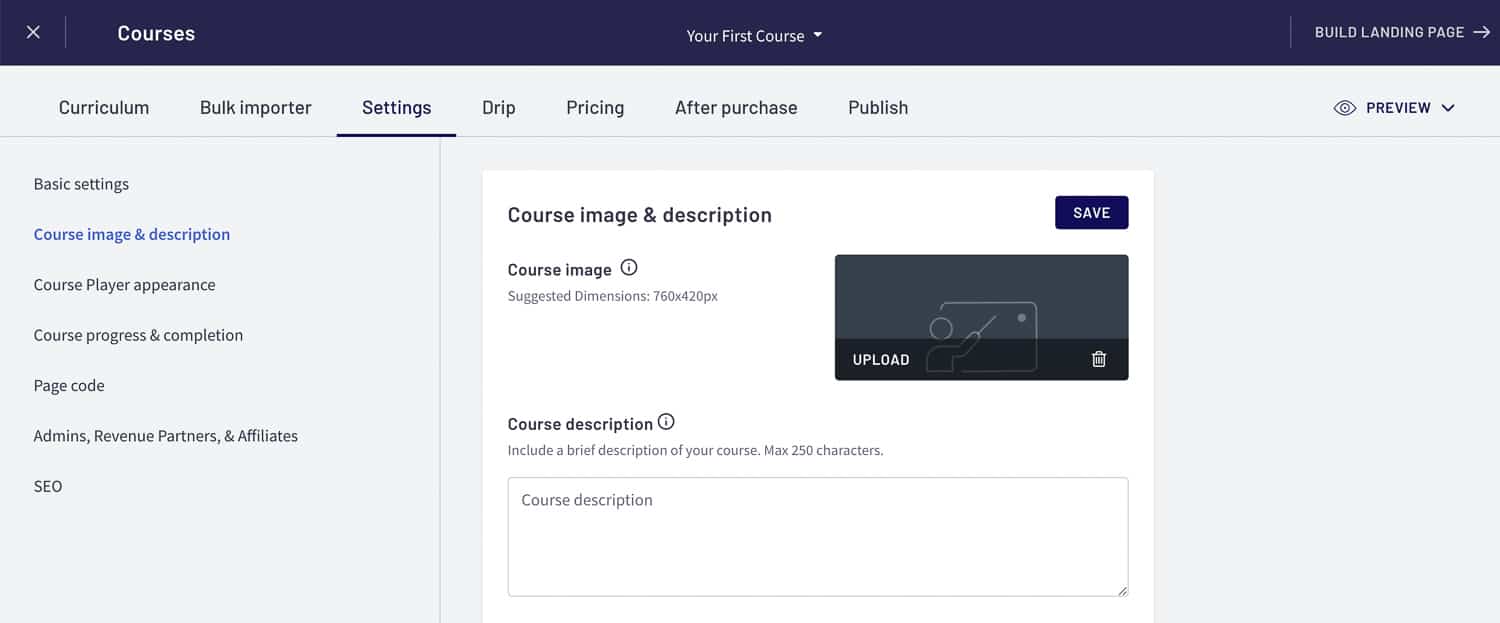
3. Customize your landing page and home page.
This section is where you can customize your course landing page and home page.
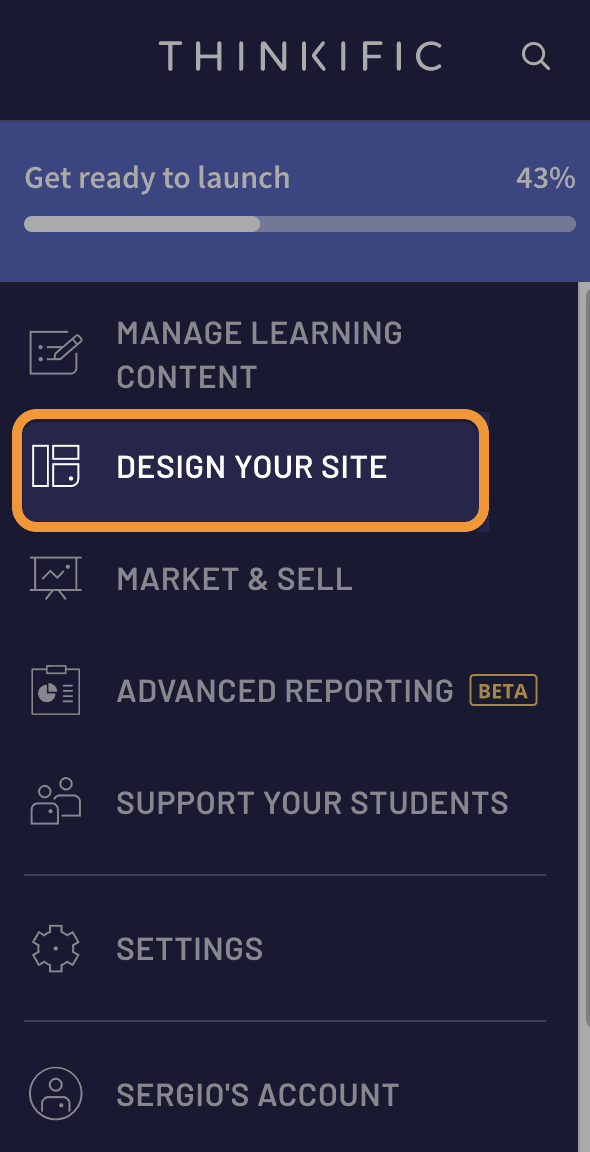
Step #1. Click on “Design your site” A new sub-menu will open. Click on “Site Builder“
Step #2. From here you can create landing pages for your home page and courses. The procedure is the same.
Click on the page you want to create the landing page for. In this example, I am going to click on the “Home page“
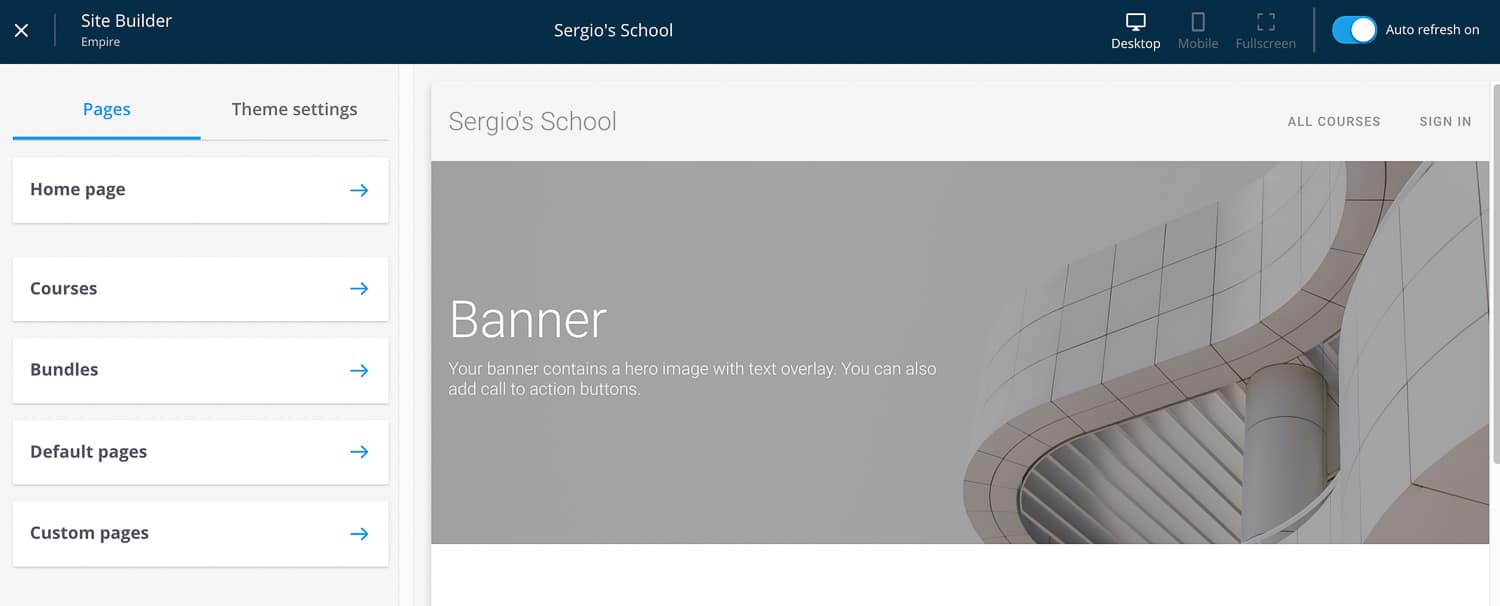
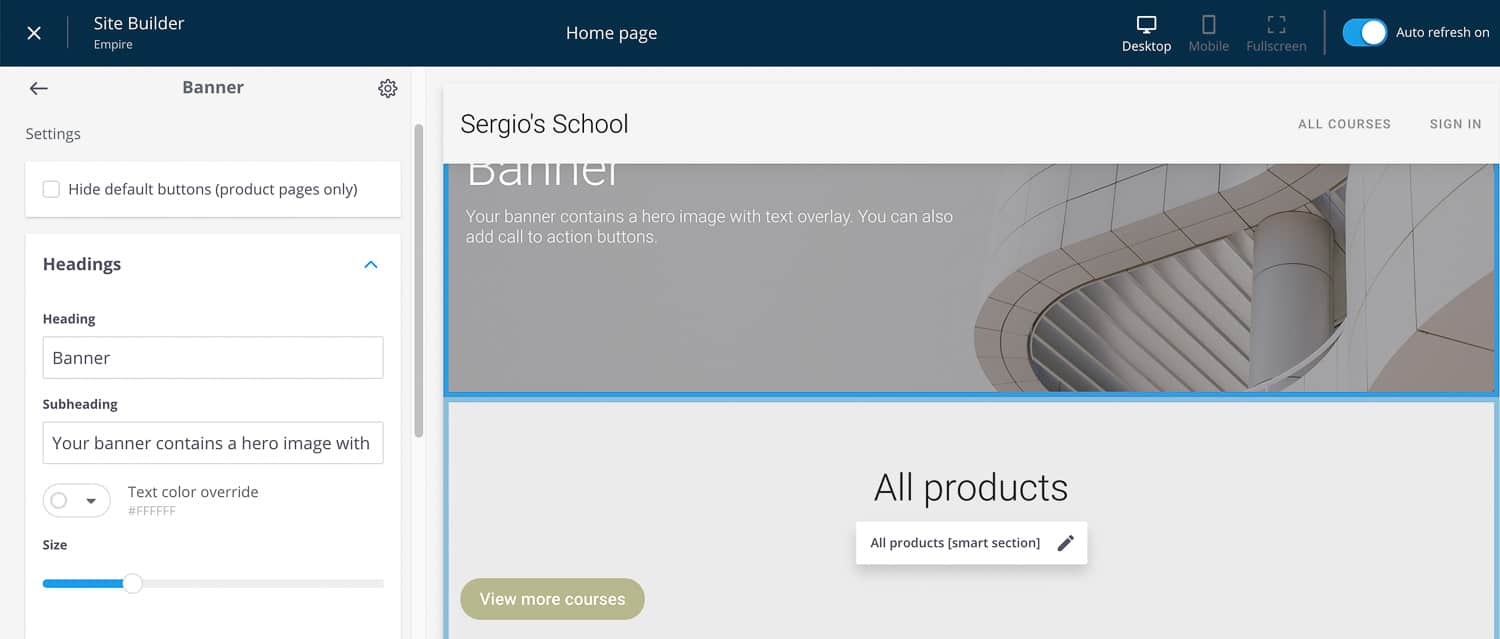
Step #3. On the next screen, you will be able to control each section. You can change the banner heading, size, picture, etc.
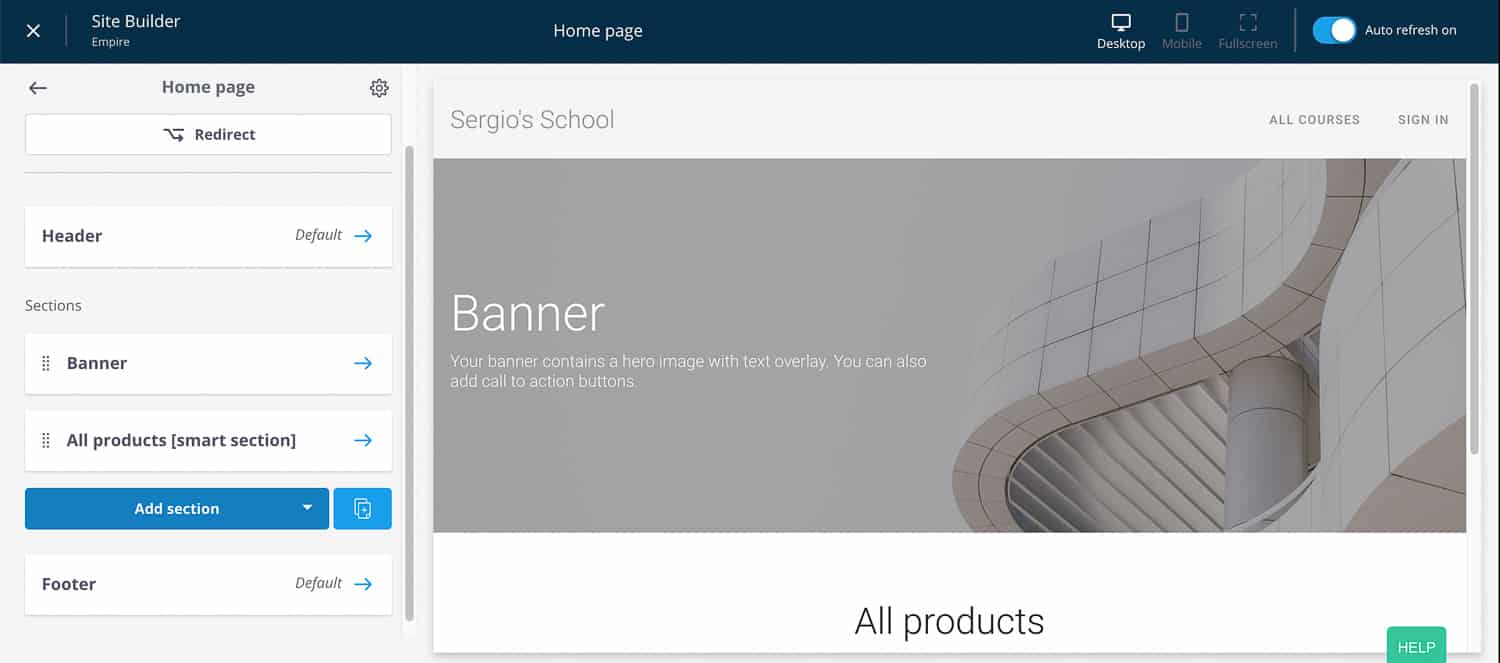
Step #4. All you need to do is click on the section you want to change, and you will see the fields you can change.
Something as important as building the home page and the course sales page is very easy with Thinkific.
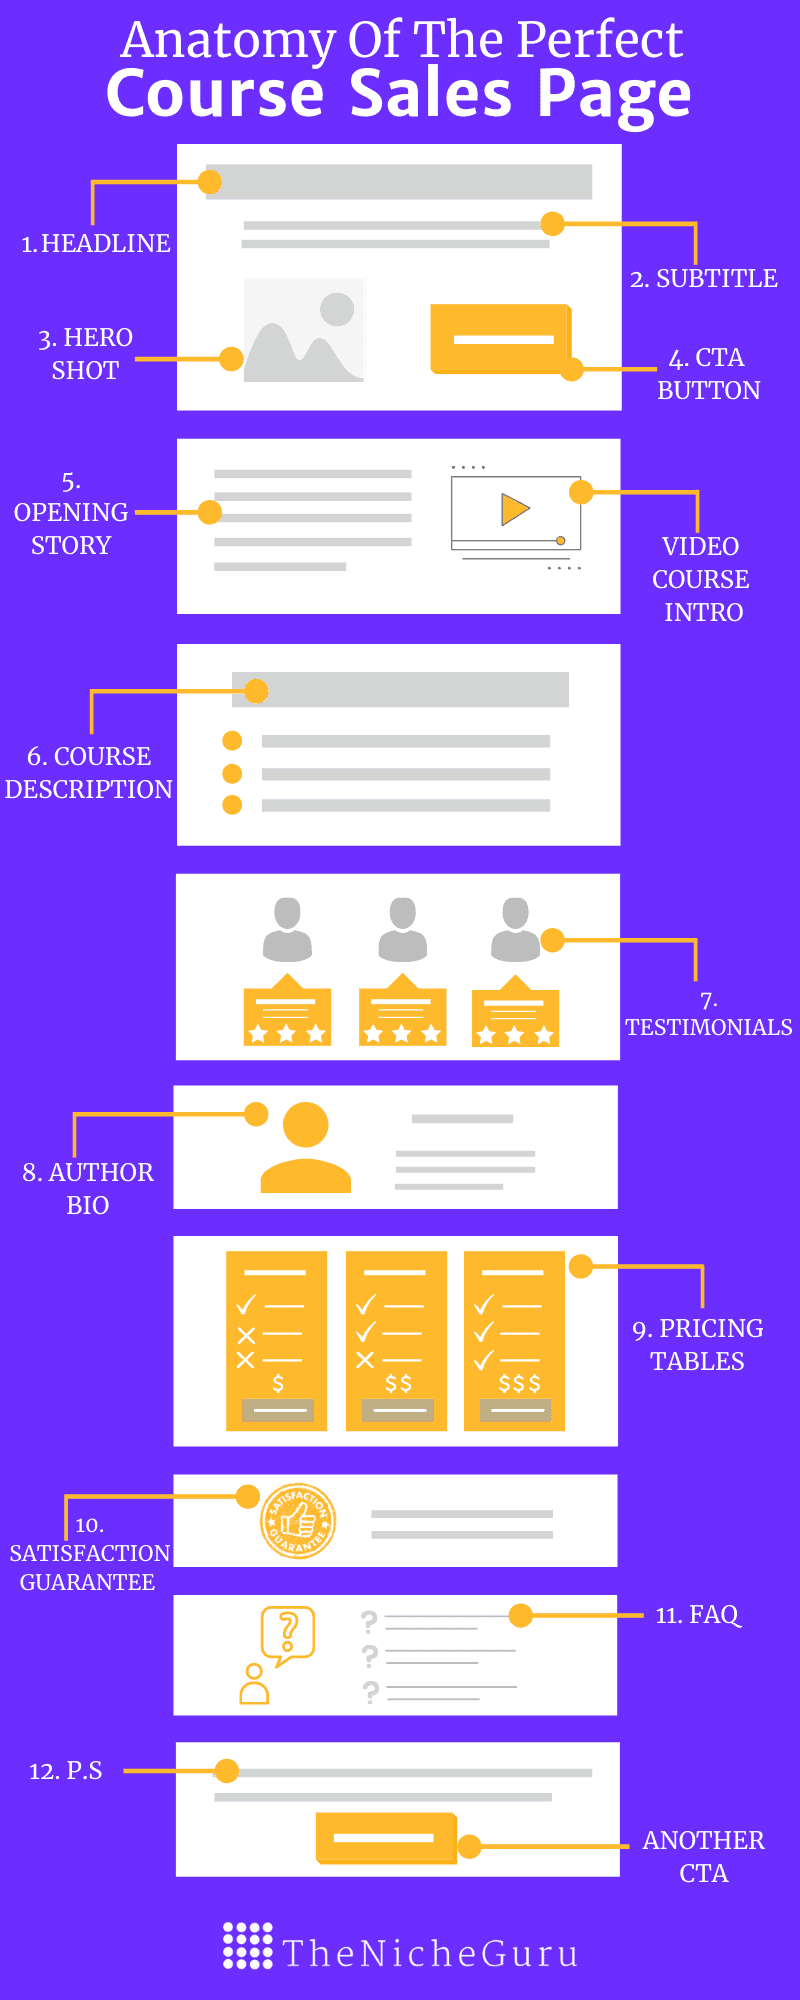
Also, I suggest you check this post to learn the anatomy of the perfect course sales page.
4. Publish your course.
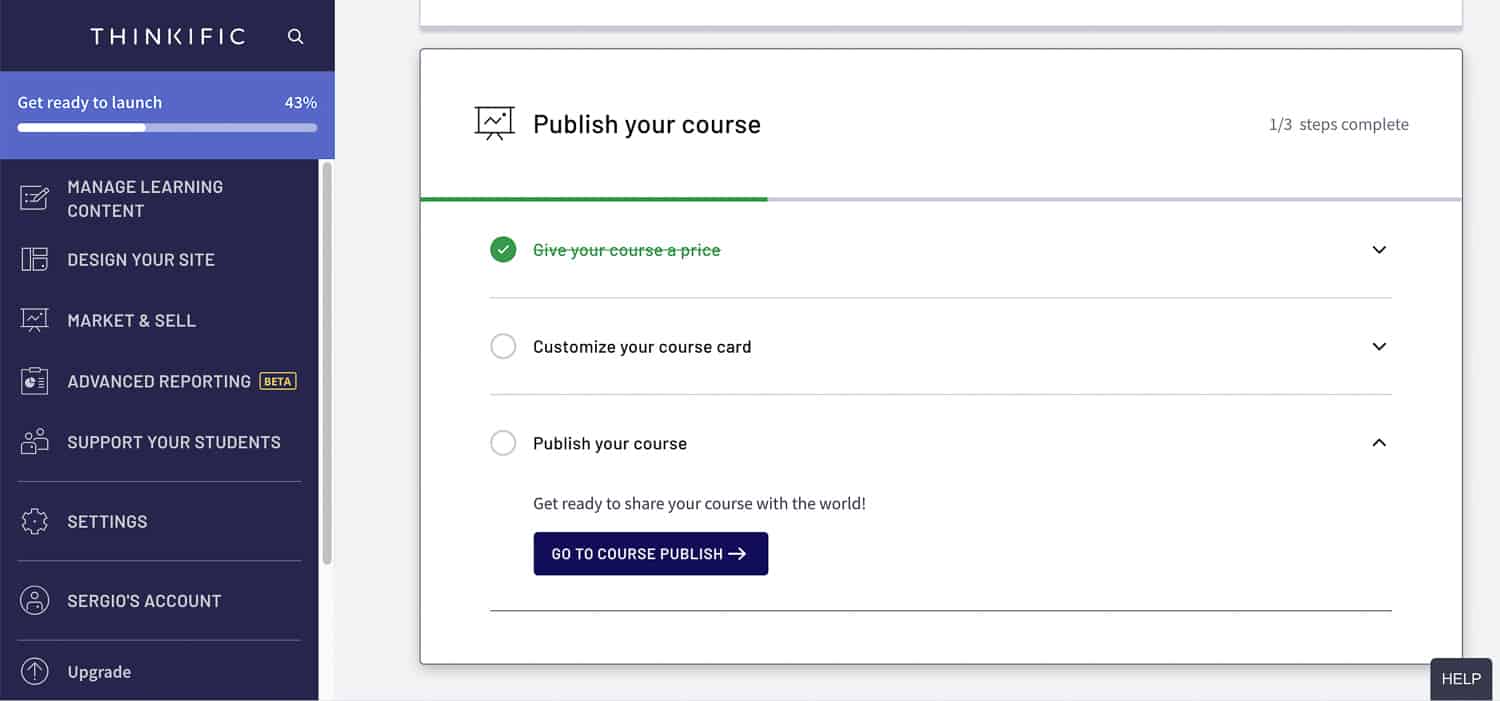
Lastly, you just need to publish your course. The “Publish your course” section divides this into 3 tasks:
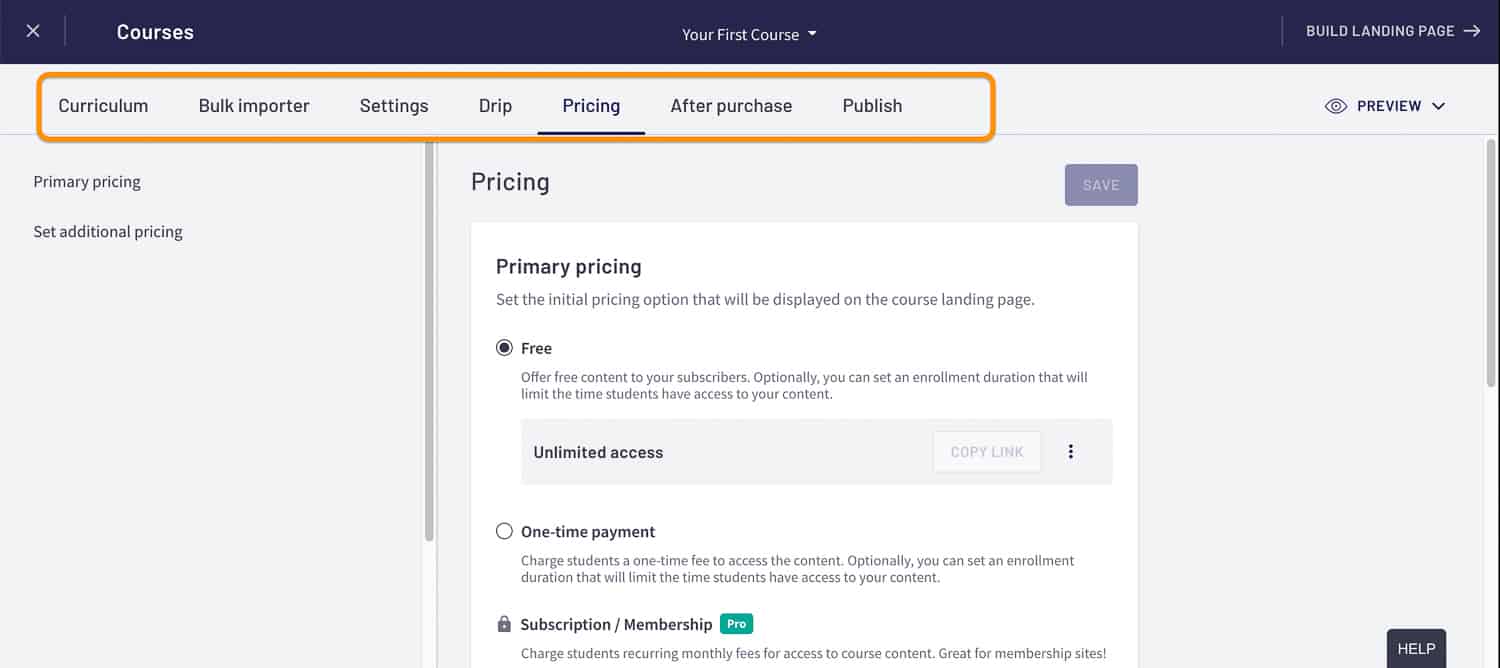
1.Give your course a price. You just need to click on the button and fill in the info below:
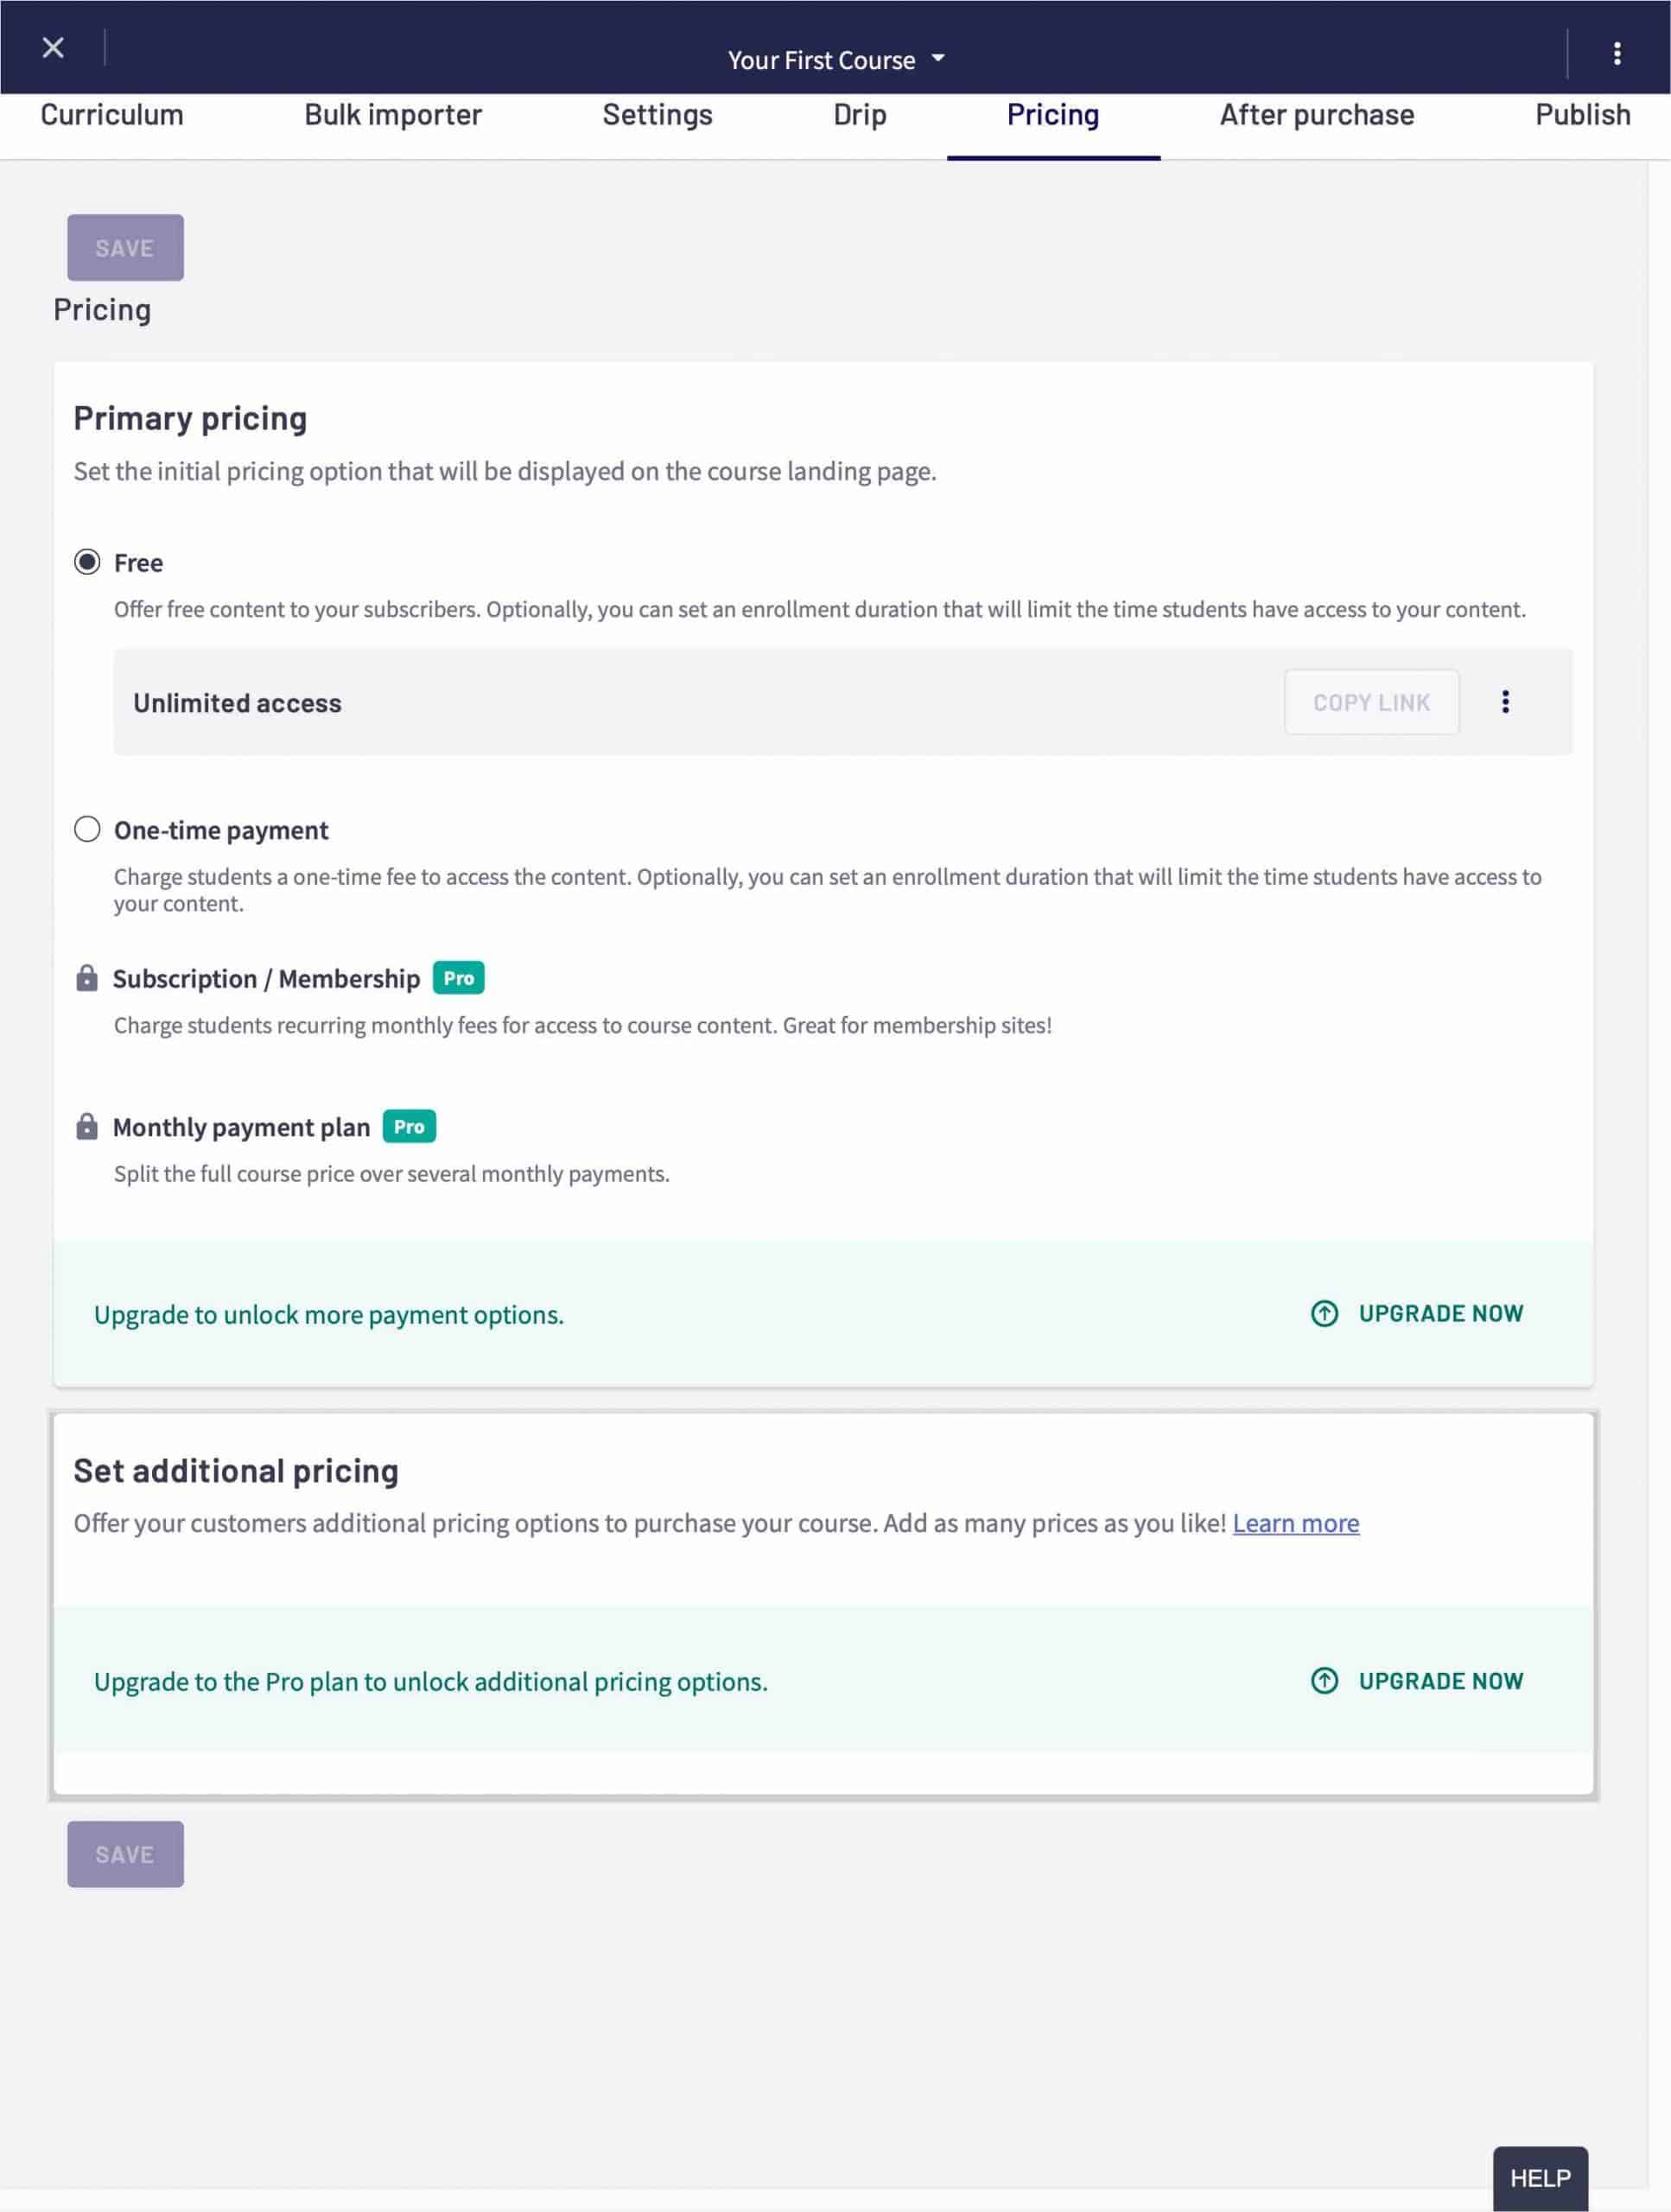
2. Customize your course card. When you click the button in this section, it will take you to the course settings. You just need to fill in all the info here to get going.
3. Publish your course. Lastly, when you click on “go to course publish” you will see this:

So you just need to select an option and save. In under 5 minutes, you can have your course published.
Market and sell your course.
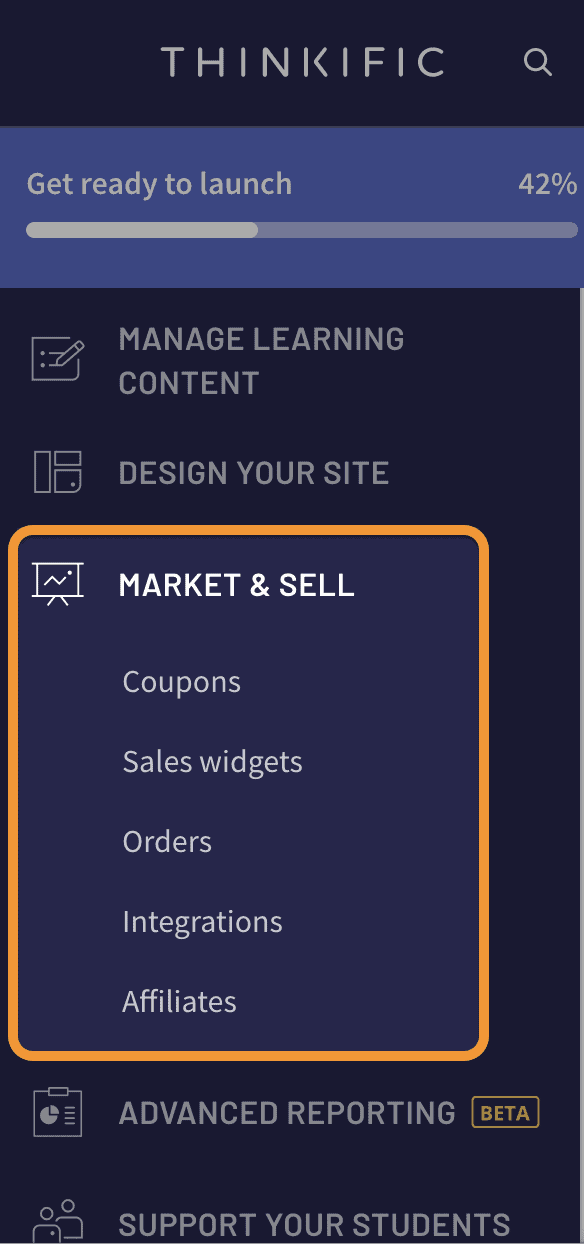
Once your course is ready, you will need to market and sell it.
Thinkific does not really have a marketplace. What it means with these options is to provide you with some extra tools to make it easier to sell it. But ultimately, the marketing is all up to you. I suggest you take a look at these niche marketing strategies you could use to market your course.
Here we are really testing “ease of use” and not the features themselves. So how easy is to use these market and sell tools?
It is pretty straight forward.
I reckon coupons and sales widgets are the most useful tools to help to sell your courses. To get started, head to the Market & Sell section of your admin dashboard and select Coupons. Click on New Coupon. This will take you to the coupon creation screen.
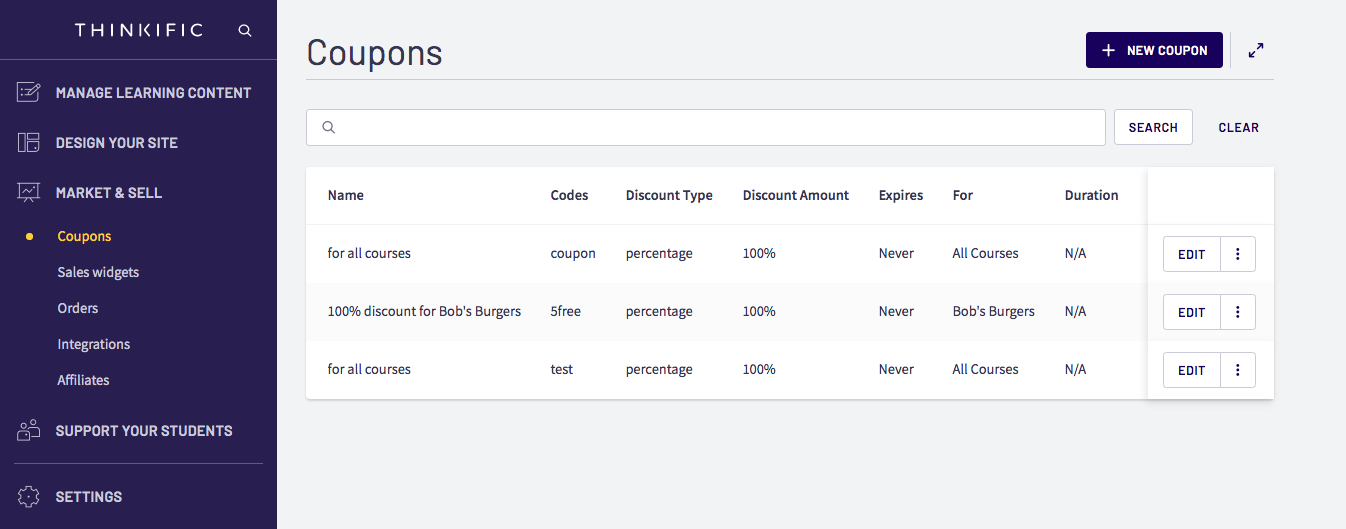
Easy to create, edit and share, and, will help you increase your sales.
If you own a website, sales widgets are a good way to promote your online courses.

Once that’s done, select the button to “Finish and generate code snippet“.
In any case, you should take a look at how to sell online courses from your own website. You’ll find very practical information that will help for sure in marketing your online course.
Then all you need to do is grab the code snippet and paste it into the HTML editor of your chosen site.
Advance Reporting.

The advance reporting provides you deeper insights in a visual way. It includes four reports you can work with:
- Revenue. Here you can check your revenue over time
- Orders. To see completed orders.
- Enrollments. To see free and paid enrollments.
- Student engagement. To see how students engage with your content.
I liked how easy was to see key details with a glimpse. Also, you can filter by different values to personalize each report. I think reports should be easy to understand, and Thinkific succeeds on that.
4. Thinkific Support. |
Stories around customer service and support can be very different from one person to another.
What works great for one can turn into a nightmare for others. That is why I think it is better to understand the bigger picture. So for this section, I checked what people said in TrustRadius support rating.
It is worth mentioning, that as of today (January 2022), it has a solid 8.9 out of 10 according to TrustRadius:

In any case, I am going to comment only about support ratings. Every review of support is good. People claim support responses are very fast. If your plan includes phone support, the reviews are even better.
They even have a Facebook group with a community willing to help you.
My own experience with the support team was good. However, I really missed having a chat window like some other services have. Personally, I think that could be a great improvement and will avoid being back and forth if someone has several queries.
5. Thinkific Pricing Plans. |
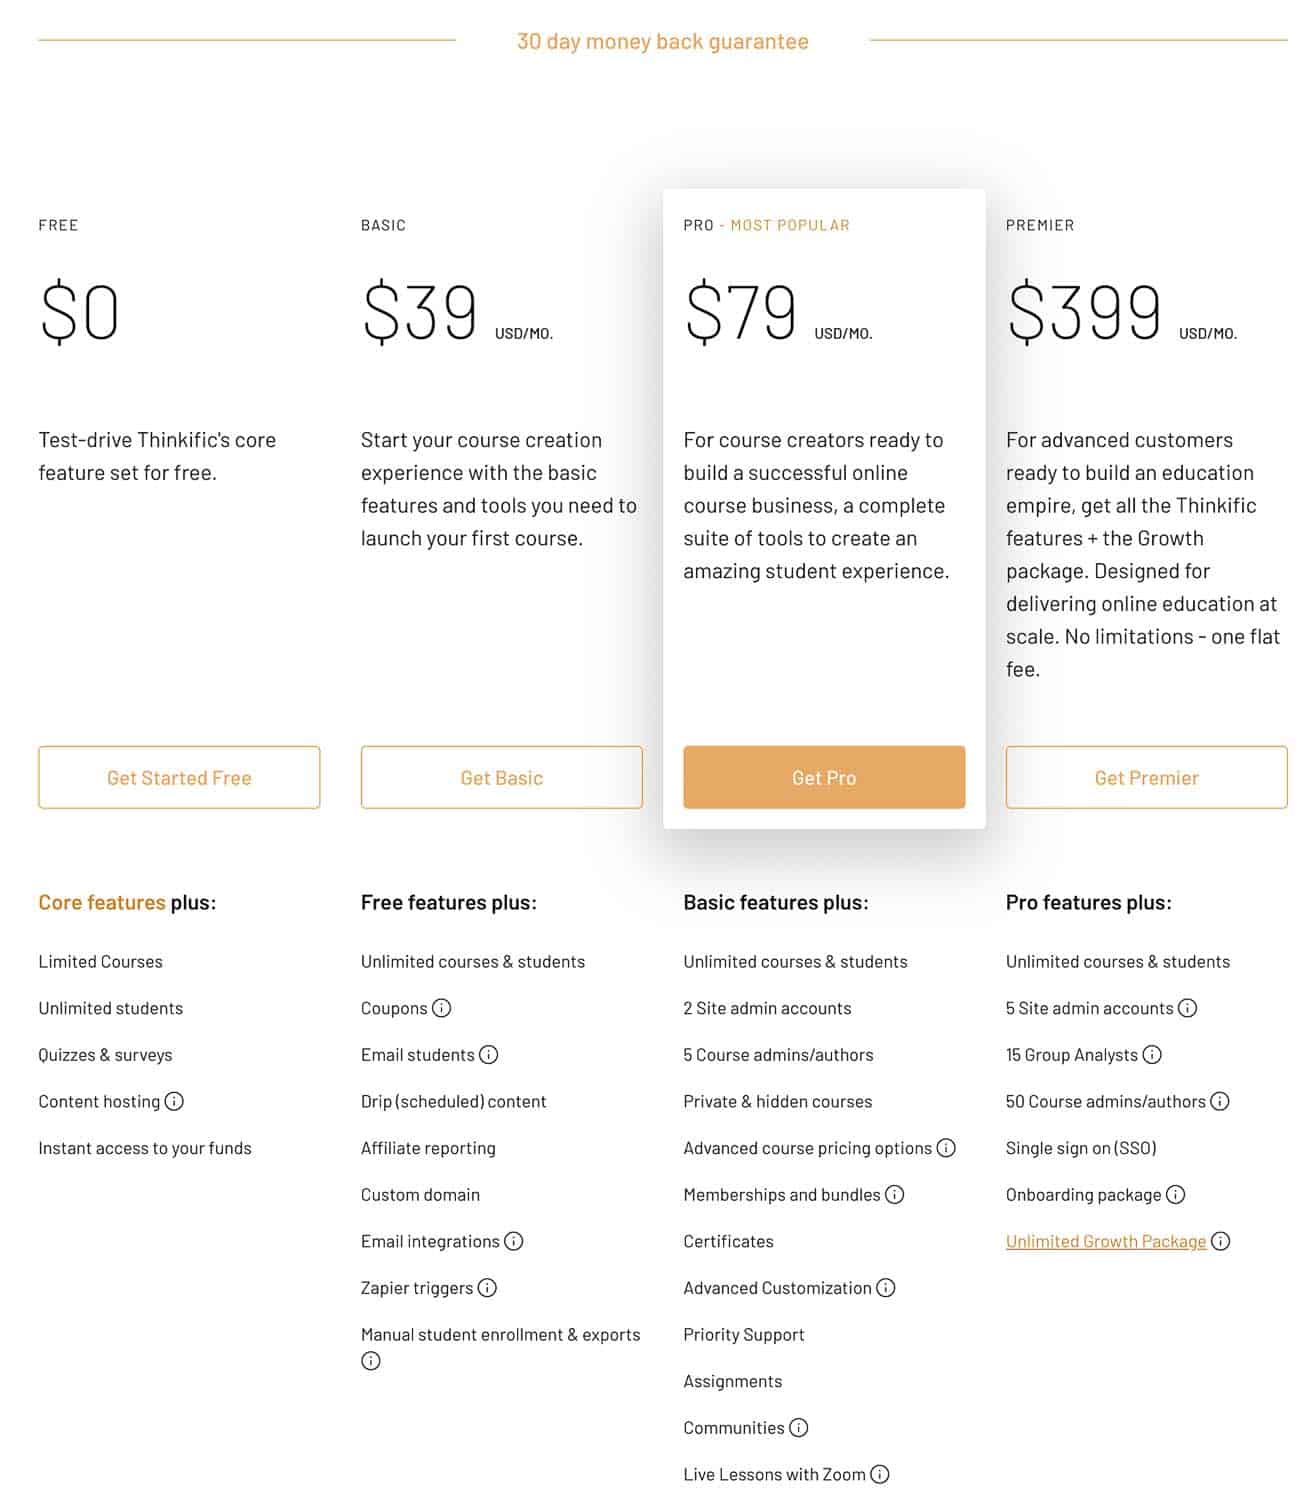
In my opinion, Thinkific pricing plans are fair for the features and services they offer.
They offer a free plan with limited courses, but it is enough to get an idea of how it works. With the free plan, you don’t even need to give your card details, so as long as you can work with that plan, you won’t need to pay at all.
Then, the basic plan starts at $39 per month. It offers some more powerful features and already unlimited courses and students. So if you can live with the basics, you can live with this plan.
For small businesses, the pro plan offers amazing tools and features. Like more admins, memberships, offer certificates, etc. This is normally the best seller due to the number of features and services provided.
Finally, the price tag is aligned with other similar tools. So I think the prices they offer are pretty fair.
Thinkific Alternatives.
Thinkific is fairly new in the online course business, but they are doing a great job. However, you might want to see some other options for hosting your courses.
My three favorite options are:
- Teachable: Teachable is one of the most popular course platforms. It provides an intuitive and well-designed platform easy to navigate. Teachable is a simple alternative to Thinkific, it’s easy for new creators to use it but does not come with as many learning capabilities.
- Leanworlds: LearnWorlds is another all-in-one platform for course creators who want to create, host, and sell their courses. It comes with a powerful page builder, tools to create interactive lessons, is customizable, and has a modern look.
- TalentLMS. TalentLMS is ideal for small to midsize companies. It provides a user-friendly experience allowing to create quickly training programs.

Thinkific Review: Is it really worth the money?
If you are a course creator, I’d say it is totally worth it.
Thinkific is probably one of the most complete learning management systems out there. It will provide you with the most essential features you need to create and sell online courses. Also, it is a company that is investing time in doing things well, and you can easily see that with the reviews from all the happy customers.
Overall, Thinkific is great for student engagement and interactivity, ease of use, selling/conversion tools, and customer support.
So why don’t give it a try?


RELATED CONTENT