Interesting Niche Topic + Niche Targeted Audience = Successful Online Course
But if you don’t, there are some easy ways to do it:
- Social Media Polls: Create polls on Facebook or Instagram and ask people what they would like to learn about. Try to be as specific as you can when creating the poll options.
- Surveys: Send an email to your subscribers with a survey to gather information. I personally use Typeform for this since it is visual and effortless to set up.
- Analytics: Lastly, you can always sneak peek at your analytics to get more information about your main audience and interests. Tools like Google Analytics or Facebook Pixel can be beneficial in providing this information.
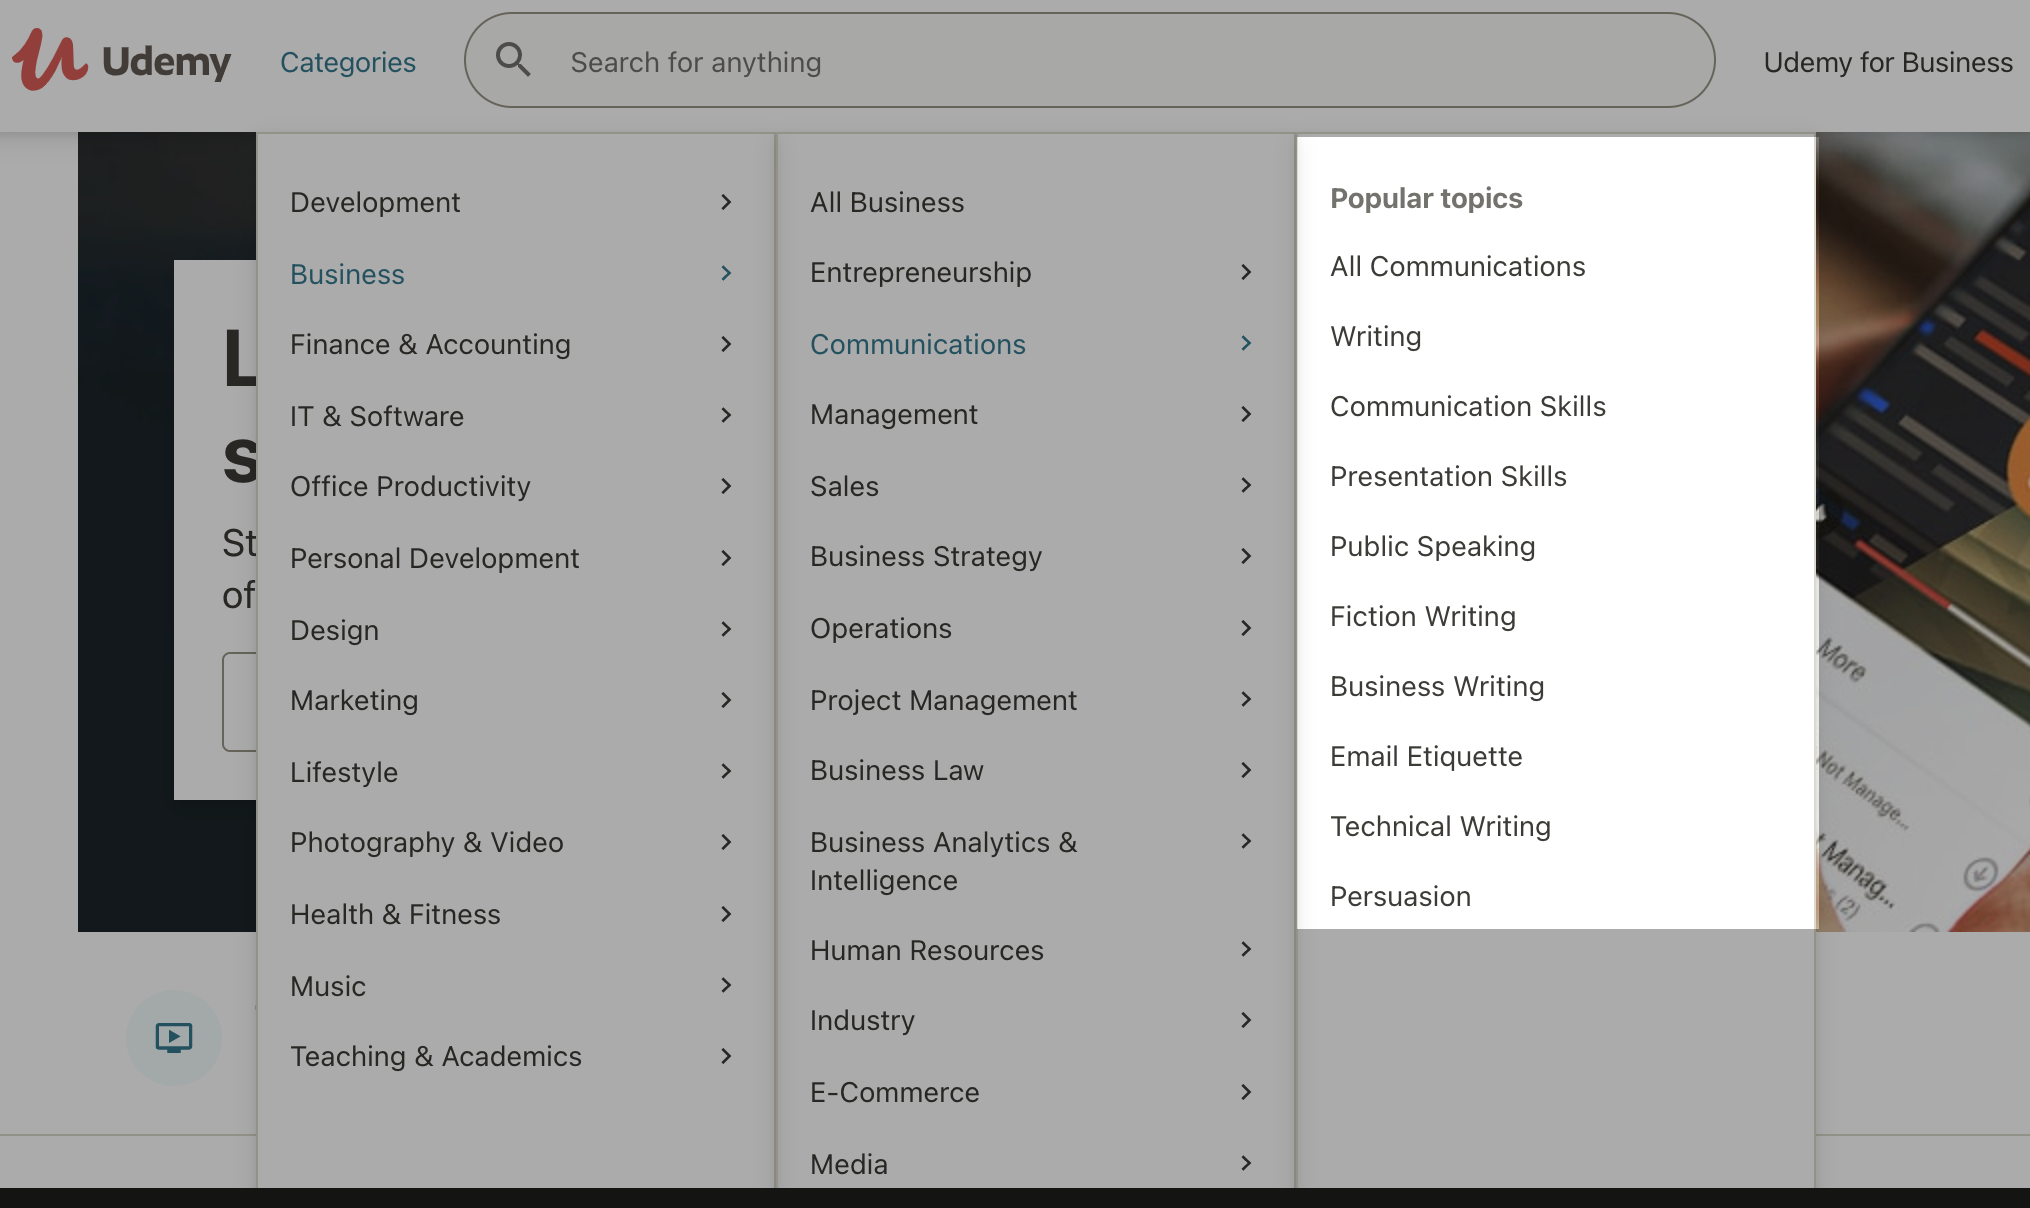
Step #3. As you navigate the menu, a new sub-menu will extend to the right. Keep navigating, and another menu with the popular topics about the selected category will show up on the right-hand side.
These are the topics people are more interested in within the selected category. But we can still keep narrowing down topics.
What you need to do next:
Validate your idea
- Use social media polls
- Using surveys
Create webinars to nurture your audience
Pre-selling your online course

You can do this easily in two different ways:
1- You can simply create a landing page and clearly display all the info there, and collect payment. You can do this easily using Instapage.
What you need to do next:
- Video. Probably the most used format over the last years. Courses can be composed of a sequence of videos you can create using many different platforms, which we’ll be discussing later. You can create videos of you speaking, performing an action, or even recording your screen while showing how to do something.
- Text. Your course will consist mainly of written text. It could be delivered in an email sequence, in a pdf like an ebook, a presentation, etc.
- Audio. This is another format that is gaining momentum with the rise of the podcast. All you need is a good microphone to record your training.
- Mix. Nowadays, most of the courses include a mix of video and text. For example, after a video lesson, you can sum it up with an infographic, create a survey for feedback, or even a quiz to keep people engaged.
Also, I suggest you check a tool like this AI voice-over that allows you to convert text to speech easily.
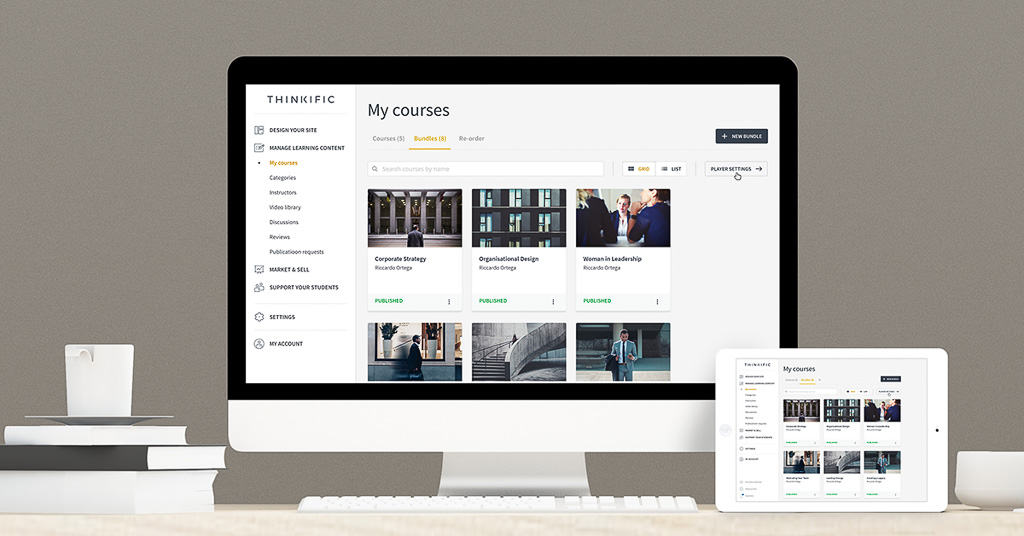
How to create an online course
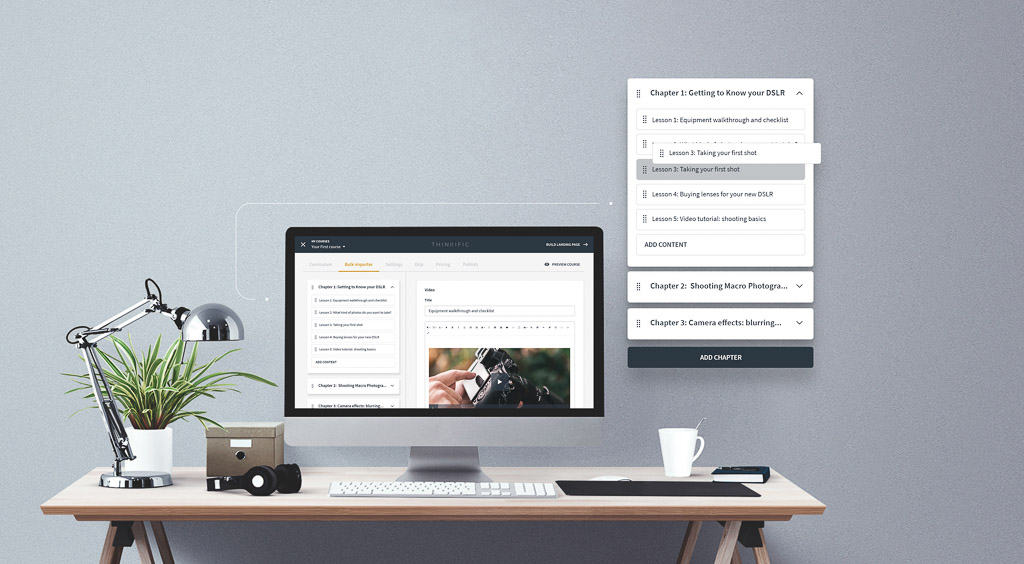
Source: Thinkfic
What of the best things about how to create an online course and sell it is that you don’t need much.
In fact, all you need to do is:
- Gather the tools you need to create your course
- Create the course outline
- Produce interesting and useful lessons
1. Gather the tools you need to create your course
- NexiGo PC Webcam: Nobody wants to pay for a course where video quality is not good. And there is a reason this is the number one bestseller in webcams. 1080P, autofocus together with its small size and a very affordable price, make this webcam a solid option for any course creator.
- Audio-Technica AT2020 Microphone: Whether you are recording videos or podcasts, this microphone will have you covered. Ideal for home projects, this might be the best value for money micro out there. It is fairly small and easy to install, and every customer is absolutely delighted with its performance.
- LimoStudio’s Umbrella Lighting Kit. Bright photos and videos have been proved to perform best in any audience. And it is understandable since nobody wants to struggle to see a video. Also, poorly illuminated videos suggest poor quality, and you don’t want to project that image. With this portable and easy to set lighting kit, you’ll have all the light you need for all your projects.
- Camera Canon G7 Mark III: If you’re looking for the absolute best camera to shoot inside or outside videos, this should be your choice. It provides a 4k sensor and almost unrivaled image stabilization.
- Amazons Basic Tripod. If you work with a camera, you are going to need a tripod. You don’t need to spend much on this since Amazon Basics offers you a great tripod at a great price.
- Zoom Screensharing: This is one of the most used screen-sharing software by online creators. It will capture your screen and voice as you navigate through your course.
- Canva graphic design platform: For any graphics that you need to create, Canva is your tool. Infographics, ebooks, presentations, anything you need. It has it all, and it is free.
2. Create the course outline
- Set the online course goal and work backward. It is easier to work having the final objective in mind.
- Write down all the skills and things you’ll need to teach so your students can complete your course and reach the goal.
- Next, you just need to build a logical sequence for each lesson and chapter.
Try to think of each lesson as a goal towards an objective. Then each chapter should be a step towards that goal.
3.Produce interesting and useful lessons
- Make sure things are not repeated. Go thoroughly through your outline to make sure you won’t repeat the same topic differently.
- Optimize your content, so it is not too long or too short. People get bored easily. So you need to include only what is strictly necessary. Try to find the sweet spot between long and short, including only what is relevant.
- Create engaging content. For the same reason as before, your content should keep your students interested. To do that, include lots of useful information in an actionable way. Visuals also play a significant part in your course. That way, you will keep your students entertained and engaged.
- Cover each topic in depth. It is easy to find general information on the internet. So what really provides value to your students is thorough content. Something unique and useful they cannot find anywhere else.
- Provide clear actions on what to do next. Include assignments at the end of each chapter or lesson. You can also create quizzes to keep your students engaged. Make sure there is an action for your students to take at the end of each lesson.
What you need to do next:
There are 3 different ways you can do this:
- Option 1: Use an online course marketplace
- Option 2: Self-host on your website
- Option 3: Use a learning management system (LMS)
Option 1: Online Course Marketplaces
In conclusion, they have the ultimate control, but they will also take care of everything like:
- Promote the course to their students
- Make courses accessible
- Collect payments
- Udemy: It offers loads of support for creating and marketing a course. They can get your course featured so you can reach a lot of potential customers effortlessly. Udemy’s marketplace insights also help you select the perfect course topic and see how it stacks up against other courses on the platform.
- Coursera: Coursera is a professional online course marketplace with virtual classes from some of the world’s best companies and universities like the University of Michigan, Duke, and Stanford. Instructors teach Coursera courses at some of the world’s top universities, take about 4-6 weeks to complete, and include video lectures, peer-reviewed assignments, and community discussion forums.
Option 2: Self-hosting
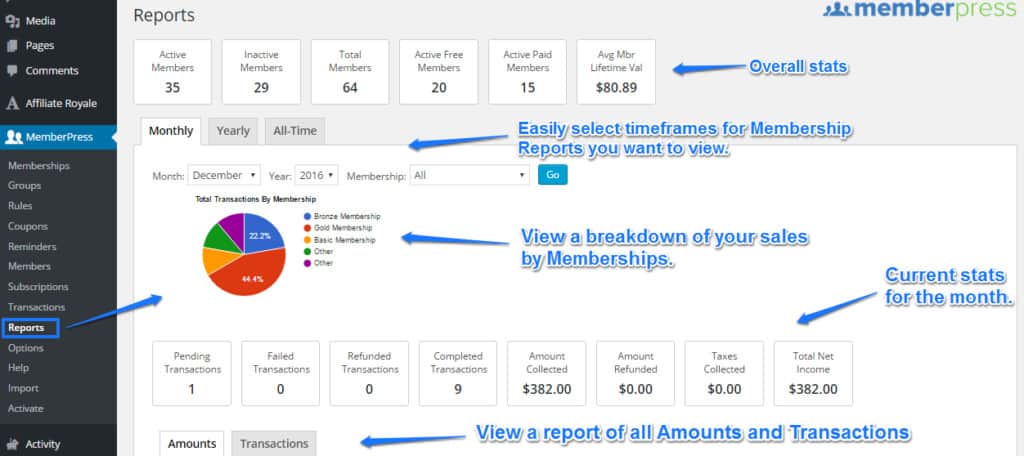
Source: Memberpress
To create and sell online courses from your own website, you will need:
- Hosting
- A platform like WordPress
- A theme and plugins to run your site
- An LMS plugin that allows you to create and run online courses. I personally recommend you try Memberpress.
Option 3: Learning Management Systems (LMS)
A learning management system (LMS) is a software application for the administration, documentation, tracking, reporting, automation, and delivery of educational courses, training programs, or learning and development programs.
What you need to do next:

- Value: What are your students getting out of it? Try to deliver at least 10x the value your students are paying for the course.
- Uniqueness. If you can teach something different which can not be found anywhere else, people will be willing to go the extra mile.
- Quality. If you want to charge a premium price for your online course, you need to offer premium-level content. That means investing in a good camera, microphone, and lighting setup if you’re creating video content.
Tips on how to price your course
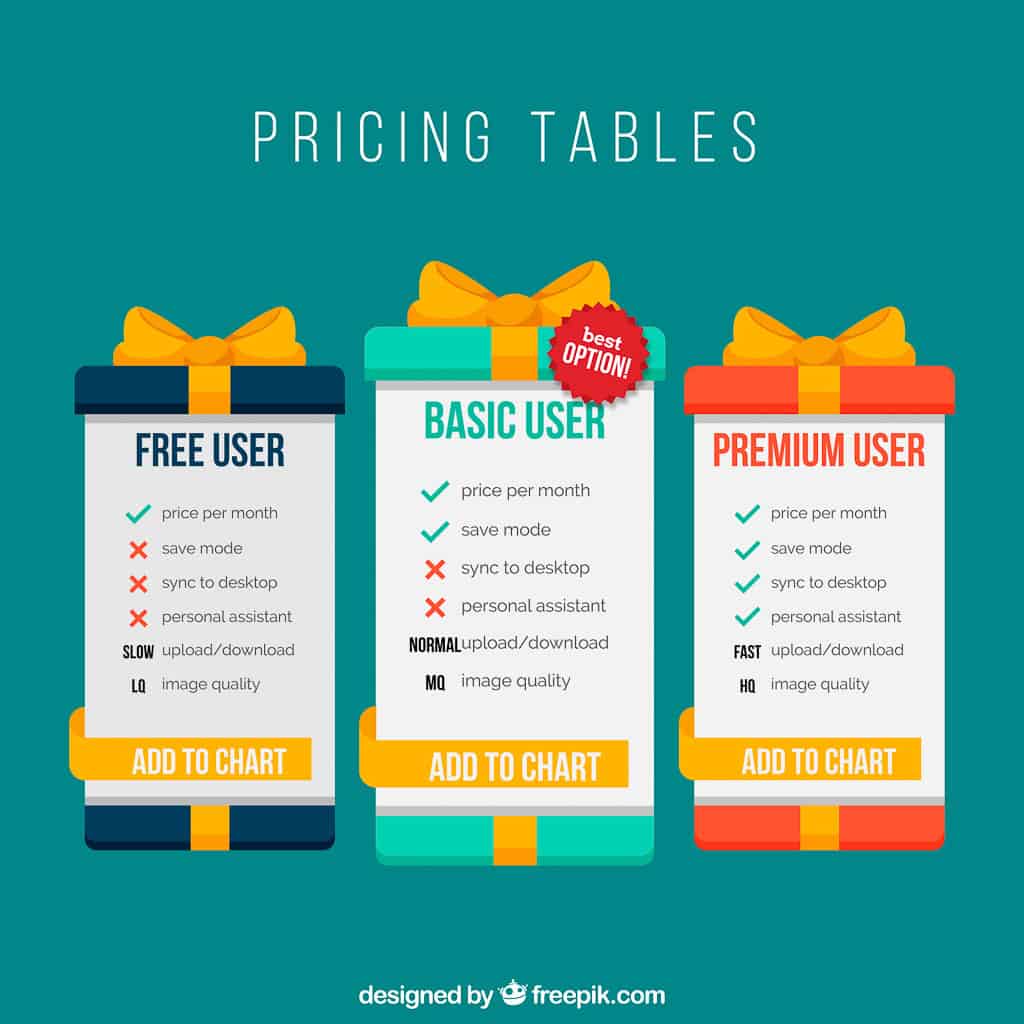
1. Offer different pricing options.
Offering a couple of different options like a basic and premium plan is a good way to benefit from those willing to pay a higher price but not miss out on sales from more budget-conscious customers.
- Basic plan. This version of your course contains the essentials. It might be missing some more advanced content and might not include access to live sessions or other features.
- Premium plan: This version of your course contains all of your knowledge, bonus content, community access, and maybe even things like one-on-one coaching.
2. Avoid Low Prices
- People expect to pay more for premium education. A course with low tags might make people think it does not have premium content on it.
- Online courses offer more. An online course can contain videos, podcasts, worksheets, and a community discussion group. Students are willing to pay more for all these extras.
- Online courses offer a huge shortcut. An online course offers a convenient way for people to access everything they need to know about a particular topic or achieve a specific result saving them plenty of time.
- Online courses offer exclusive content. Your students will only be able to acquire this knowledge through your course since the content can not be found anywhere else. Or at least, that is how it should be.
- It filters out students you don’t want anyway. Low-priced products actually attract more low-quality students.
3. Add Value To Increase Prices
- Offer content upgrades. Such as worksheets, infographics, ebooks, etc.
- Provide one on one coaching.
- Set up recurring webinars for a specific topic.
Pricing start recommendation

- It implies it has premium content and not just cheap content.
- It enables you to start earning income faster.
- You can promote it with ads without losing money due to a meager price tag.
What you need to do next:
The structure of a compelling course sales page
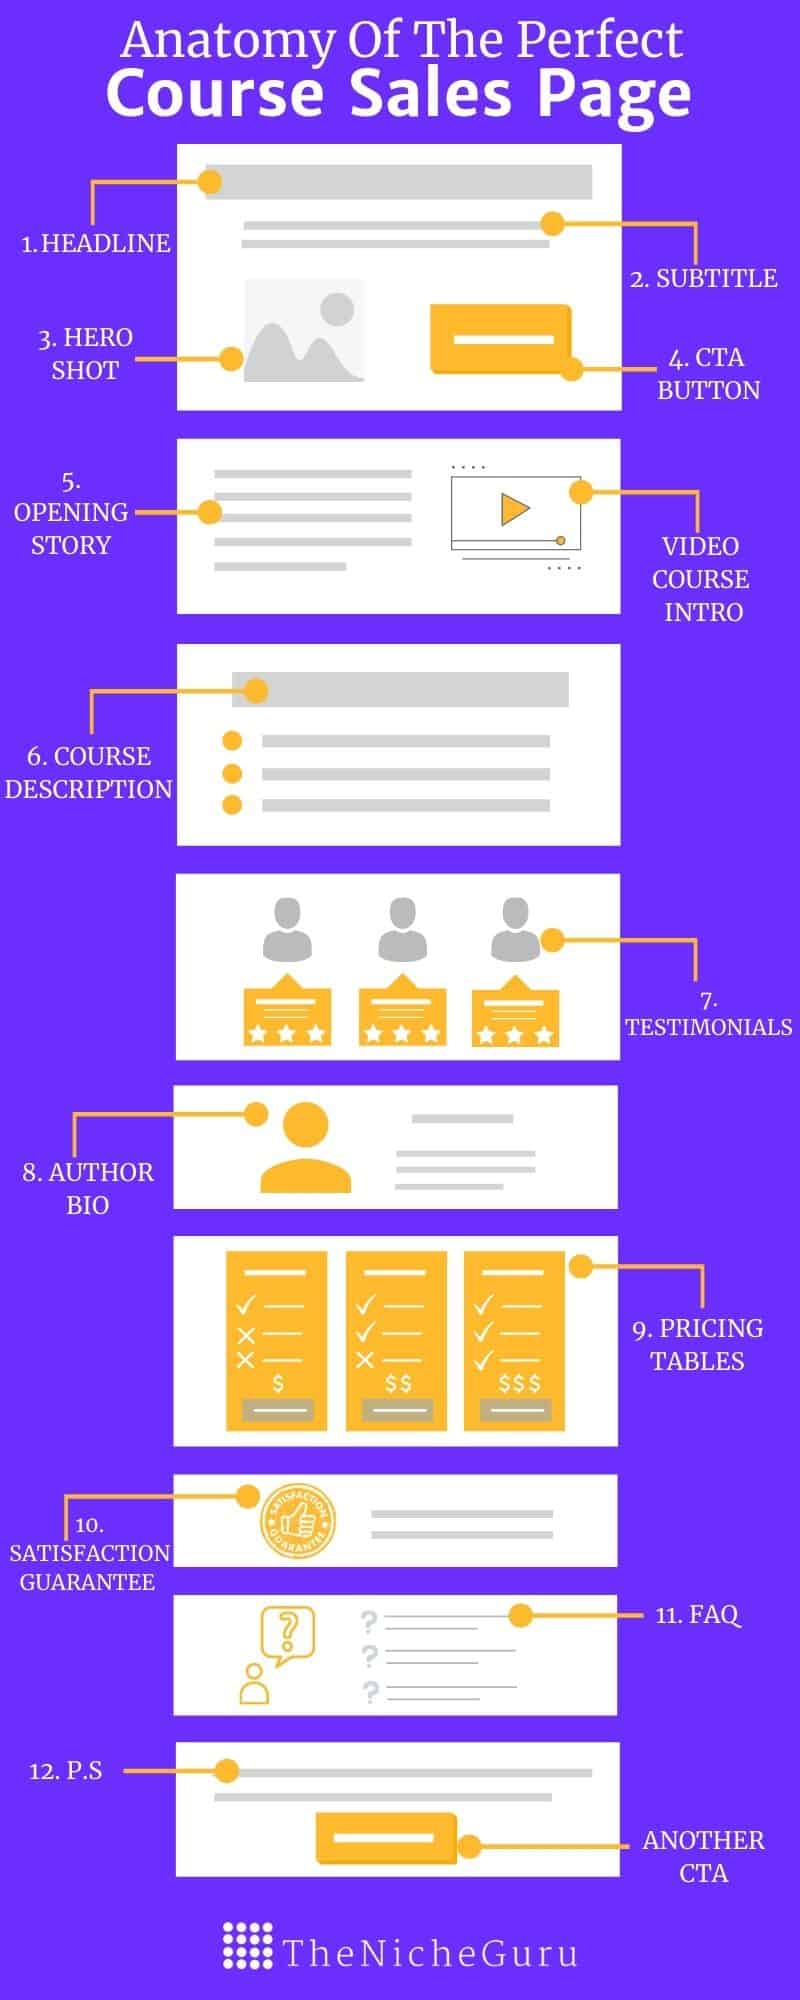 Click to expand
1. A compelling headline.
- Make the headline unique.
- Your headline has to be useful.
- Be very specific.
- It should convey a sense of urgency, scarcity, or curiosity.
- Focus on the benefits of taking your course.
2. A descriptive subtitle.
- Who is this online course for?
- How would it help me?
- Why would I benefit by taking it?
3. High-quality media.
- Videos. Adding a demo of how your course works can be a great and visual idea. Plus, people love videos.
- Pictures. Use a picture directly related to the online course topic. Bright pictures normally work best.
- Mockups. You can create mockups of how a lesson looks like on a laptop or an iPad.
- Graphs/Charts. These work great to show your students some statistics of useful data about your course.
4. Call to action (CTA) buttons.
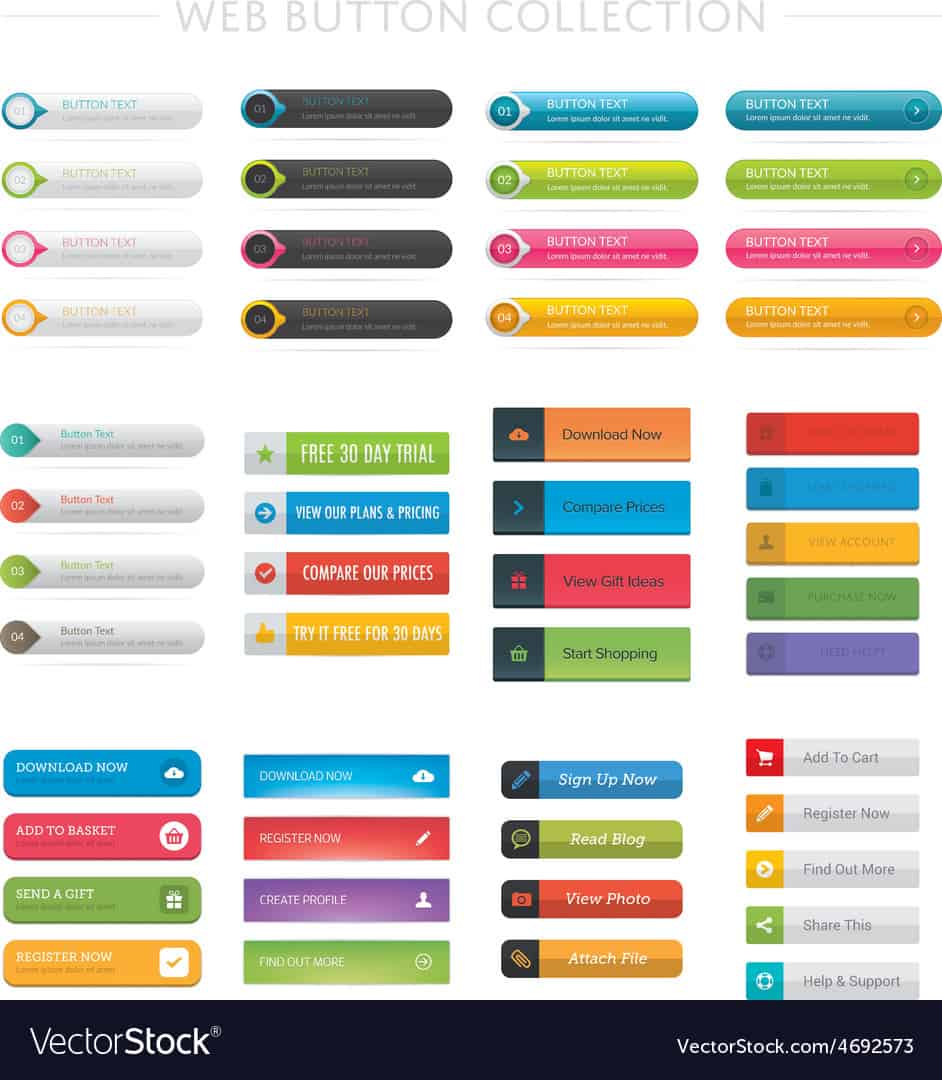
Some tips on how to create CTA buttons that stand out are:
- Use short action-packed text. Call to action buttons should feature action-oriented text. Some powerful words that work well are “get,” “you,” and “try,” and “now.” They should back up your offer.
- Use grab-attention colors. One of the easiest ways to make them stand-out is with colors. Bright colors normally performed the best.
- Create large and easy-to-read buttons. You need to make them easy to find even if you are accessing the page through mobile. Make sure you stick to an easy-to-read font.
- Create a sense of urgency or scarcity. This will likely improve click-through rates. Add words like “Only Today,” “limited time,” etc.
- Use them above the fold, in the middle, and at the bottom. Most of the time, one CTA is not just enough. So place them across your page for better chances.
- Test your buttons text. A good practice is to try different variations and choose the one with more clicks.
5. An opening story.
6. The course description.
Your course description should contain the what and the why:
- What are you going to learn?
- Why this is beneficial for you
7. Testimonials.

If you don’t have any students yet, offer your course for free to the first 5 or 10 people in exchange for testimonials and feedback.
That could be a good promotion technique, and it will be beneficial for both.
8. Instructor bio.
9. Pricing details.
10. Satisfaction guarantee.
11. FAQ.

12.Include a P.S.
What you need to do next:
Use Social Media

Run a webinar to connect with potential students.

Use ads to promote your course.

Write a guest blog post.

- keyword “submit a guest post.”
- keyword “guest post.”
Use your email list

What you need to do next: