Want to learn how to start dropshipping with Shopify?
During the last few years, the dropshipping business model has proven to be one of the most profitable online businesses. Moreover, it is relatively easy to set, and the investment is minimal.
However, many entrepreneurs know the potential of this new and juicy business model, so you’ll need to find your unique selling proposition while creating an appealing store if you want to get your spot online.
In this post, I’ll show you how to start dropshipping on Shopify step by step. In fact, I’ll cover everything from setting up your store to adding products and making your first sale. Does it sound good?
Then let’s dive in!
- What is Shopify Dropshipping?
- What is Shopify?
- Why Use Shopify?
- Why Shopify Dropshipping?
- How to Start Dropshipping on Shopify
- 1. Choose Your Niche
- 2. Find a Supplier
- 3. Buy Your Shopify Store’s Domain
- 4. Create Your Shopify Store
- 5. Add Products to Your Shopify Store
- 6. Choose a Theme for Your Shopify Store
- 7. Customize Your Shopify Store
- 8. Start Adding Products to Your Store
- 9. Set Up Your Shopify Store’s Payment Methods
- 10. Set Up Your Shopify Store’s Shipping Methods
- How To promote your Shopify Dropshipping Store
- Shopify Dropshipping: Conclusion
- FAQs
*Disclosure: I only recommend products I would use myself, and all opinions expressed here are my own. This post may contain affiliate links that at no additional cost to you, I may earn a small commission.
What is Shopify Dropshipping?
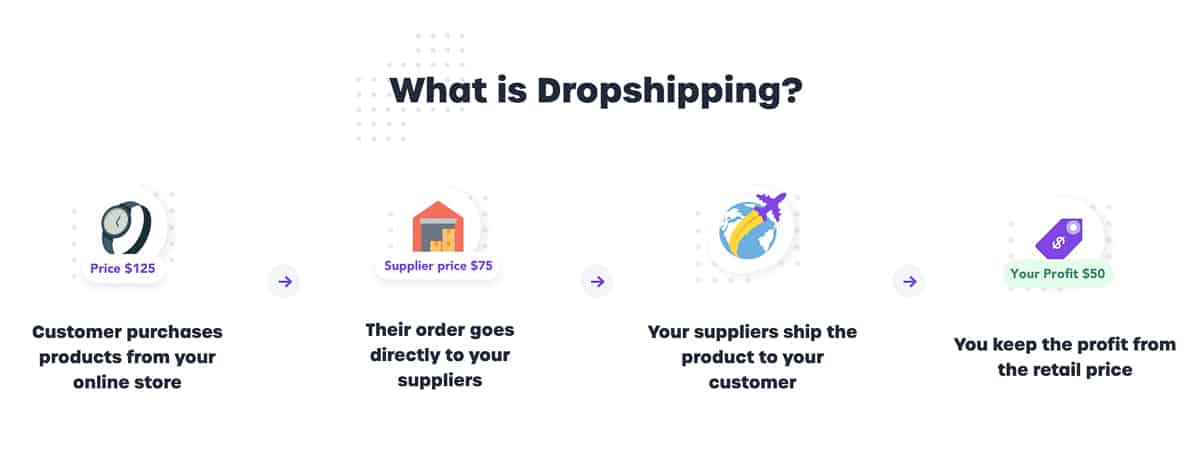
Shopify dropshipping is a business model in which eCommerce entrepreneurs sell products without having to carry any inventory. When a store owner receives an order from a customer, they simply contact the supplier, who will then ship the products directly to the customer’s doorsteps.
Dropshipping is a great way to start an online business with little upfront investment.
What is Shopify?
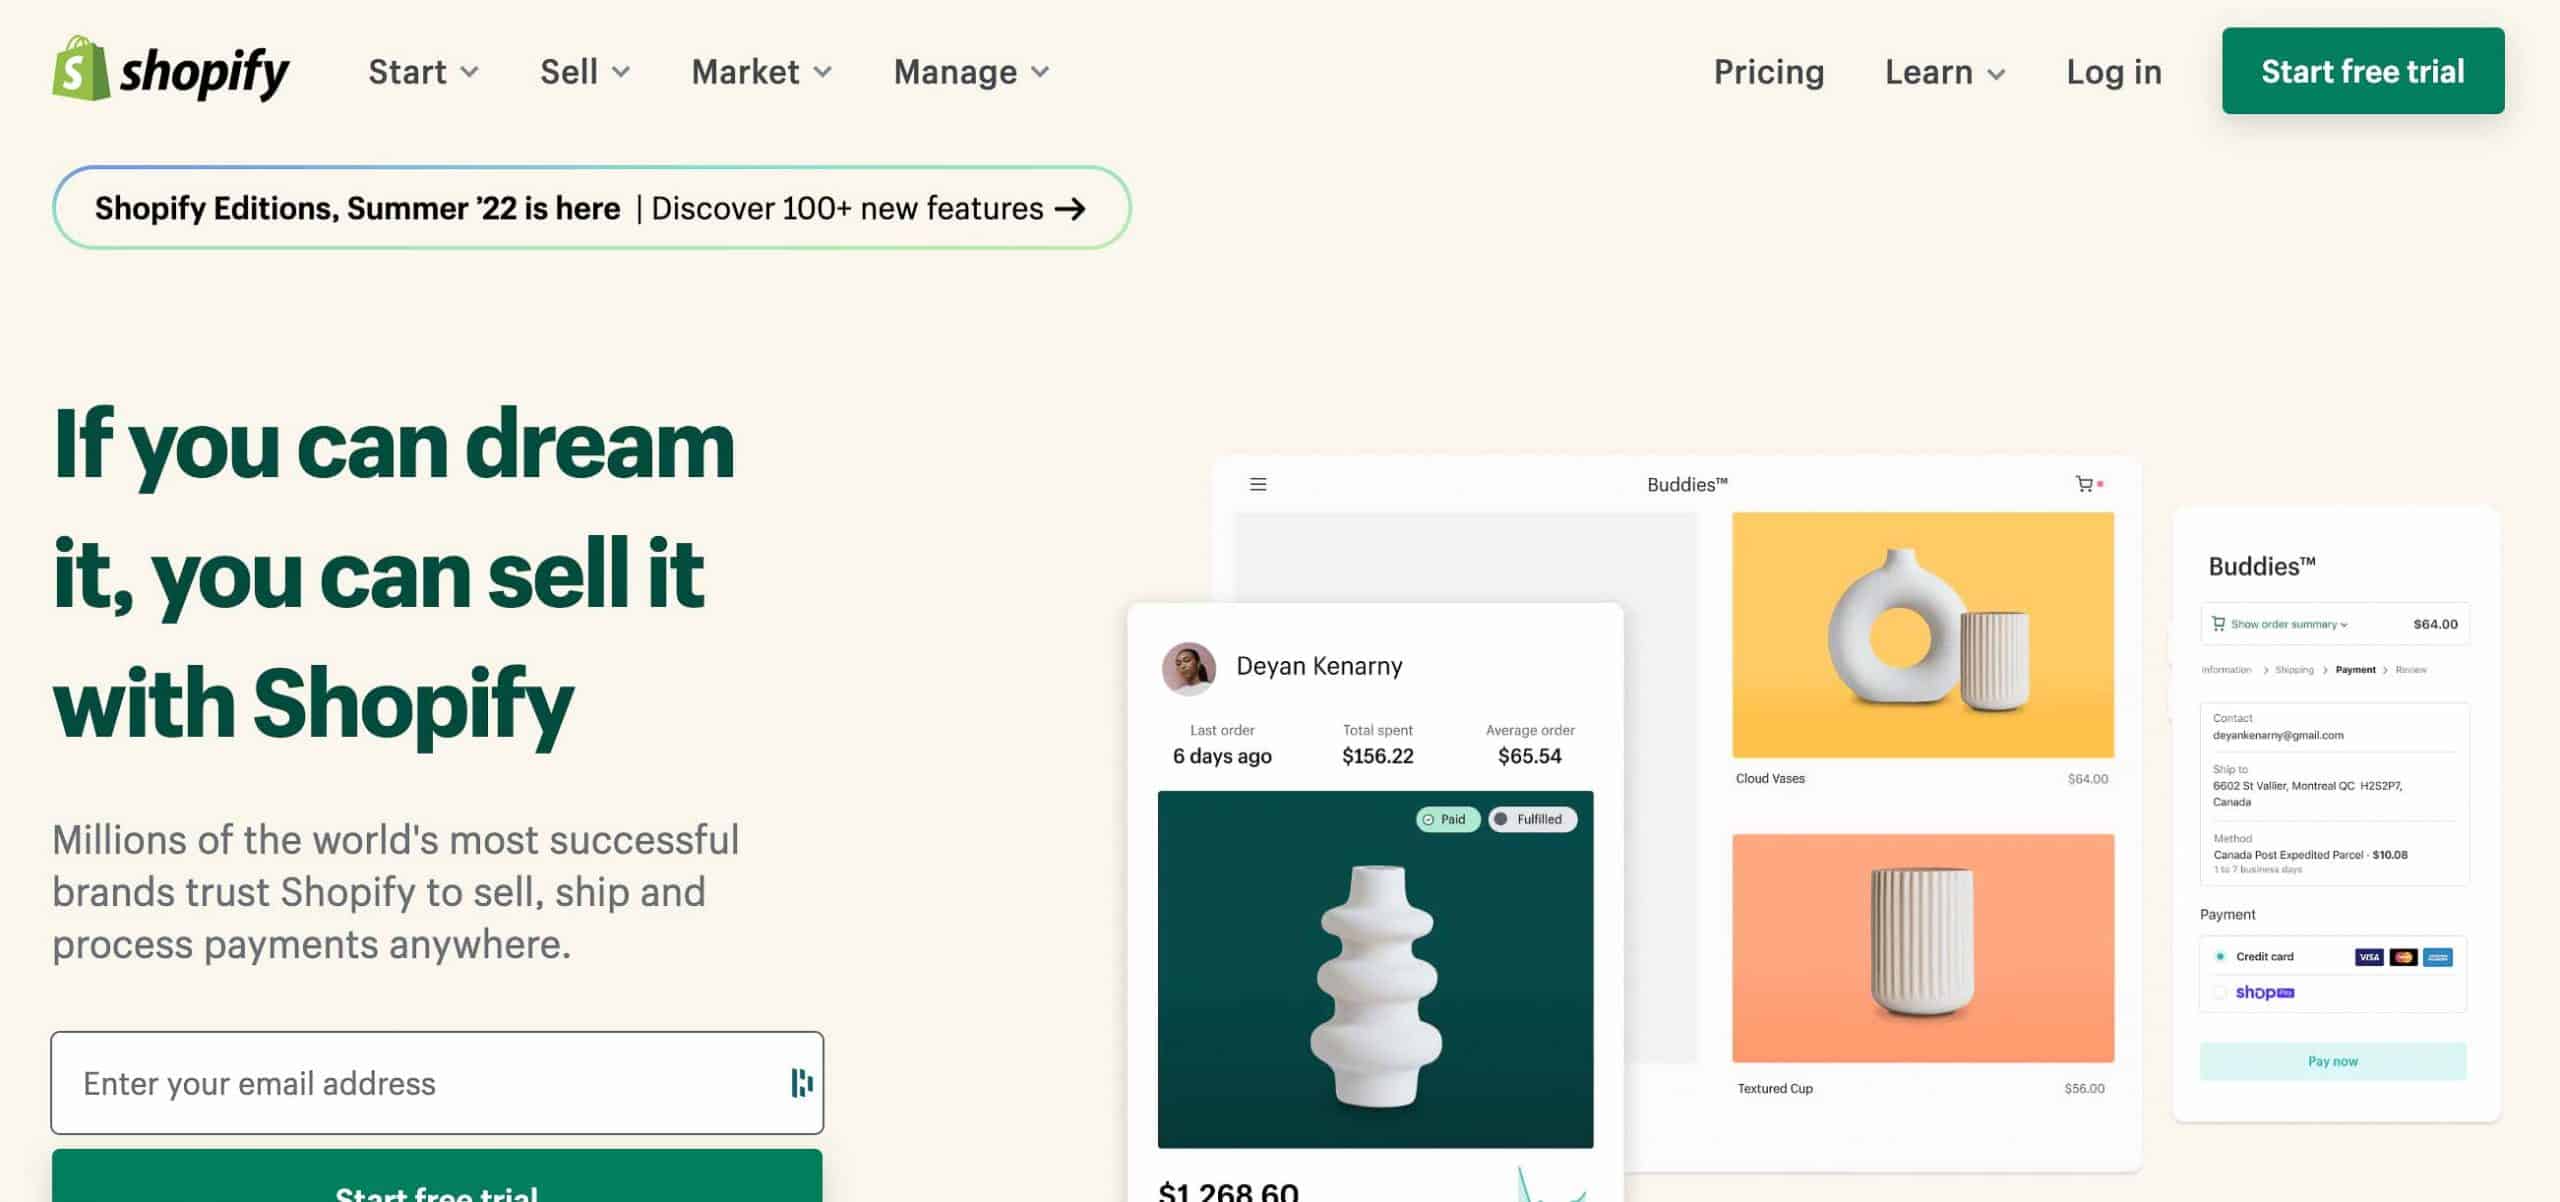
Shopify is a platform that allows you to create an online store. It’s simple to use, especially a Shopify dropshipping store, and it has all the features and tools that you need to build a successful online business.
Shopify is a comprehensive eCommerce platform that provides entrepreneurs with everything they need to create an online store and sell products. Moreover, it is easy to use and has all the features and tools you need to build a successful online business.
Why Use Shopify?
Shopify is the most popular eCommerce platform on the planet. Over half a million entrepreneurs already use Shopify to run their businesses, which is likely because it’s flush with features that’ll help entrepreneurs succeed with their online stores.
Some of the most important reasons to use Shopify include:
1. Shopify Is Easy To Use
You can create a professional online store quickly and easily, without any prior experience. And, if you ever need help, Shopify has 24/7 support available via chat, phone, and email.
2. Shopify Is Scalable
As your business grows, Shopify grows with you. It’s easy to add new products, connect additional sales channels, and manage increased traffic without any disruptions to your online store.
3. Shopify Is Reliable
With Shopify, you don’t have to worry about your website going down because of server issues. Shopify runs on cloud-based servers, so your site can handle sudden spikes in traffic without any problems.
4. Shopify Is Secure
Your customers’ data is always safe and secure when you use Shopify. Shopify is Level 1 PCI DSS compliant, which means it meets the highest level of security standards in the industry.
Why Shopify Dropshipping?
Dropshipping is a lot like print-on-demand, except instead of printing a design on a product and shipping it to the customer, you’re shipping products from a manufacturer or wholesaler to the customer. Dropshipping is one of the best business models for entrepreneurs who are looking to set up their own business with little up-front investment, and it’s perfect for those who want to be able to run their business from anywhere in the world.
Some of the important reasons to consider dropshipping include:
1. Low Startup Costs
Dropshipping is a very lightweight business model, so you can get started without investing a lot of money upfront. Even if you don’t have the money to buy inventory, you can still start a dropshipping business as long as you have enough to cover the costs of your Shopify store and other business expenses.
2. No Need For Warehousing Or Shipping
One of the biggest benefits of dropshipping is that you don’t need to worry about warehousing or shipping inventory. When a customer orders a product from your store, the order is sent directly to the supplier, who will then ship it directly to the customer. This means that you can run your business from anywhere in the world, as long as you have an internet connection.
3. Access To A Global Market
Dropshipping gives you the ability to reach a global market. Since you’re not limited by inventory, you can sell products to customers anywhere in the world. This is a great way to expand your business and reach new markets.
4. Easy To Get Started
Dropshipping is one of the easiest business models to get started with. All you need is a Shopify store and an internet connection. There’s no need to worry about inventory, warehousing, or shipping. You can start your business quickly and easily.
How to Start Dropshipping on Shopify

Now that you know why Shopify and dropshipping are a perfect match let’s look at how to start dropshipping on Shopify and create your niche store. This step-by-step guide will show you how to create your own Shopify store and start dropshipping products:
1. Choose Your Niche
The first step to starting a dropshipping business is to choose your niche. When choosing a niche, it’s important to consider three things:
- What are you passionate about?
- What are you knowledgeable about?
- What is there a demand for?
If you’re able to find a niche that meets all three of these criteria, you’ll be in a great position to succeed.
Step #1. Brainstorm Niche Ideas
To get started, brainstorm a list of potential niches. Some popular dropshipping niche ideas:
- Fitness
- Beauty
- Pet supplies
- Home decor
- Electronics
- Clothing
I suggest you check this post to find the 10 best Shopify niches.
Once you have a list of potential niches, it’s time to start narrowing things down.
Step #2. Research Your Niche
Now that you have a list of potential niches, it’s time to do niche research. The goal of this research is to find a niche that meets the three criteria we mentioned earlier: passion, knowledge, and demand.
To help you out, here are some questions to ask yourself when researching a potential niche:
- Is there a demand for this product?
- Can I find suppliers for this product?
- Am I passionate about this product?
- Do I have knowledge about this product?
By answering these questions, you should be able to narrow down your list of potential niches to one or two that you’re excited about.
Step #3. Consider Competition in Your Niche
Studying your niche competitors is vital- Once you’ve found a niche that you’re passionate about and that meets the other criteria we mentioned, it’s important to consider your competition. Even if there’s a demand for the product, you might not be able to succeed if there are already established businesses in the niche.
To research your competition, start by searching for your niche keyword on Google. For example, if you’re selling fitness products, you would search for “fitness” or “fitness products.”
Take a look at the first few pages of results to get an idea of the level of competition in your niche. If you see a lot of big brands and well-established businesses, it might be difficult to compete. However, if you see most small businesses and mom-and-pop shops, you might have a good chance of succeeding.
Step #4. Choose Your Niche
Once you’ve done your research, it’s time to choose your niche. When choosing your niche, make sure to consider the demand for the product, as well as your passion and knowledge. Additionally, be sure to research your competition to see if you have a chance of succeeding in the niche.
Alternatively, I can perform niche research for you and provide you with some sure-proof niches for your Shopify dropshipping store.
2. Find a Supplier
Now that you’ve chosen your niche, it’s time to find a supplier for your products. A supplier is a company that manufactures or procures goods for another company. In the context of dropshipping, a supplier is a middleman between you and the products you want to sell.
There are a few simple steps to find suppliers for your dropshipping business:
Step #1. Search for Suppliers
The first step is to search for potential suppliers. There are a few different ways to do this:
- Google Search: Start by doing a Google search for your niche keyword + “wholesale” or “supplier.” For example, if you’re selling fitness products, you would search for “fitness wholesale” or “fitness supplier.”
- Alibaba: Alibaba is a website that connects suppliers with buyers. To find suppliers on Alibaba, create a free account and then search for your niche keyword. For example, if you’re selling fitness products, you would search for “fitness.”
- AliExpress: AliExpress is a website owned by Alibaba that connects buyers with suppliers. Similar to Alibaba, you can create a free account and then search for your niche keyword.
Step #2. Evaluate Potential Suppliers
Once you have a list of potential suppliers, it’s time to start evaluating them. The goal of this evaluation is to find a reputable supplier that offers good prices.
To evaluate potential suppliers, there are a few factors you should consider:
- Reputation: One of the most important things to consider when choosing a supplier is their reputation. A supplier’s reputation can be determined by their reviews, as well as their rating on websites like Alibaba and AliExpress.
- Price: Another important factor to consider is price. You’ll want to find a supplier that offers good prices for their products. Keep in mind, however, that the lowest prices aren’t always the best. In some cases, a slightly higher price might be worth it if it means working with a supplier that is more reputable.
- Shipping Time: Shipping time is important because it will affect how long it takes for you to get the product to your customer. Ideally, you’ll want to find a supplier that offers fast shipping times.
- Communication: Communication is another important factor to consider when choosing a supplier. You’ll want to find a supplier that is easy to communicate with, and that is responsive to your questions.
3. Buy Your Shopify Store’s Domain
The next step is to set up your shop’s domain. A domain is the address of your store on the internet. For example, our domain is www.example.com.
You have a few options for setting up your domain:
- Buy a domain from Shopify: If you don’t have a domain already, you can buy one from Shopify. Just click this link and introduce your desired domain. if it is available, you can buy it directly.
- Connect an existing domain: If you already have a domain, you can connect it to your Shopify store. To do this, go to Settings > Domains and scroll down to the “Connect an existing domain” section.
4. Create Your Shopify Store
Now that you’ve chosen your niche and found a supplier, it’s time to create your Shopify store. Creating a Shopify store is simple and only takes a few minutes.
To create your Shopify store, follow these steps:
Step #1. Go to Shopify.com and click “Start free trial.”
Step #2. Evaluate Potential Suppliers
Step #3. Choose your country and currency.
Step #4. Enter your personal information.
Step #5. Choose your store name.
Step #6. Choose your plan. For most people, the Basic Shopify plan will be sufficient to begin.
Step #7. Enter your credit card information and click “Start free trial.”
5. Add Products to Your Shopify Store
Now that you have a Shopify store, it’s time to add products. You’ll need to connect your Shopify store to your supplier to add products.
Although you can do this manually, there are more effective methods to do this. My personal preference is using some of the Shopify third-party integrations designed exactly for this end, like;
- Spocket: Spocket is a Shopify app that allows you to browse products from its catalog and add them directly to your store with just a few clicks. I wrote a review about this useful app here.
- Salehoo: Salehoo is another Shopify app that integrates directly with Shopify for importing products and order fulfillment.
Lastly, I suggest you check the best dropshipping website builders for your e-commerce store. This article can really help in creating a Shopify dropshipping story effortlessly.
6. Choose a Theme for Your Shopify Store
The next step is to choose a theme for your Shopify store. A theme is a pre-designed template that you can use to customize your shop’s look and feel.
Shopify has a wide variety of both free and paid themes. Go to Shopify’s Theme Store and browse through the various options to find a theme.
When choosing a theme, there are a few things to keep in mind:
- Make sure the theme is responsive: A responsive theme is a theme that looks good on both desktop and mobile devices. This is important because more and more people are shopping on mobile devices.
- Make sure the theme is easy to customize: You’ll want to be able to customize your theme so that it matches your brand. Look for a theme that is easy to customize and that comes with a wide variety of options.
- Make sure the theme has good support: If you run into any issues with your theme, you’ll want to be able to get help from the theme’s developer. Look for a theme that comes with good support.
To set up your selected theme, simply follow these three steps:
Step #1. Go to Shopify’s Theme Store and find a theme that you like.
Step #2. Click “Add theme to your store.”
Step #3. Click “Publish as my shop’s theme.”
7. Customize Your Shopify Store
Now that you have a theme, it’s time to customize your Shopify store. There are a few things you’ll need to do to set up your store:
- Add your logo: Your logo is an important part of your brand identity. To add your logo, go to Settings > General and scroll down to the “Logo” section.
- Upload your product photos: Product photos are an important part of your store. They should be high-quality and professional-looking. To upload your product photos, go to Products > Add product.
- Add your payment methods: You’ll need to add a payment method so that you can accept payments from your customers. To do this, go to Settings > Payments and scroll down to the “Accept credit cards” section.
- Choose your shipping methods: You’ll need to choose a shipping method so that you can calculate shipping rates for your customers. To do this, go to Settings > Shipping and scroll down to the “Shipping rates” section.
8. Start Adding Products to Your Store
Now it’s time to start adding products to your store! To add a product, go to Products > Add product.
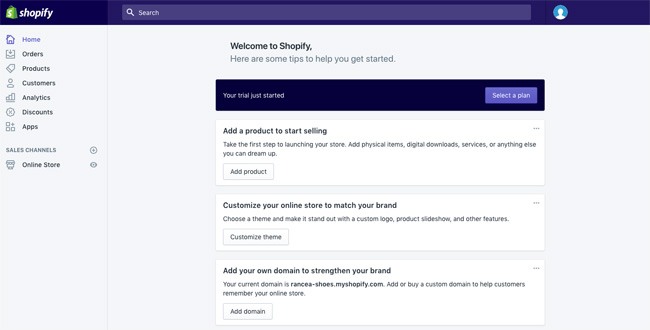
When adding a product, you’ll need to enter the following information:
- Product name: This is the name of your product.
- Product description: This is a short description of your product.
- Product price: This is the price of your product.
- Shipping weight: This is the shipping weight of your product.
- Inventory: This is the number of units of your product that you have in stock.
9. Set Up Your Shopify Store’s Payment Methods
The next step is to set up your shop’s payment methods. You can do this by going to Settings > Payments and scrolling down to the “Accept credit cards” section.
There are a few things to keep in mind when setting up your payment methods:
- Choose which credit cards you want to accept: You can choose all major credit cards, or you can select specific ones you want to accept.
- Enter your banking information: You’ll need to enter your bank account information so that Shopify can deposit your payments.
10. Set Up Your Shopify Store’s Shipping Methods
The next step is to set up your shop’s shipping methods. You can do this by going to Settings > Shipping and scrolling down to the “Shipping rates” section.
There are a few things to keep in mind when setting up your shipping methods:
- Choose which countries you want to ship to: You can choose to ship to all countries, or you can select specific countries that you want to ship to.
- Enter your shipping rates: You’ll need to enter your shipping rates so that Shopify can calculate shipping charges for your customers.
Did you manage to follow all the previous steps? Then congratulations on setting up your Shopify store! Now it’s time to start selling!
How To promote your Shopify Dropshipping Store

Now that your store is set up, it’s time to start marketing it! There are a few things you can do to market your Shopify store:
- Add social media buttons: You can add social media buttons to your store so that your customers can share your products on social media. To do this, go to Settings > General and scroll down to the “Social media” section.
- Add a blog: You can add a blog to your store so that you can write articles about your products. To do this, go to Online Store > Blog Posts and click the “Add blog post” button.
- Add an email newsletter: You can add an email newsletter to your store so that you can send promotional emails to your customers. Go to Marketing > Email and click the “Create email” button to do this.
- Invest in SEO. Optimizing Shopify for SEO should be one of your preferences. This will help you to drive organic traffic and increase your sales.
- Use PPC advertising for the first push. Driving traffic to any new website takes time in the beginning. That is why investing in ads can be a great solution to making your first sales and obtaining your first customers.
Lastly, I suggest you check the best ways to increase your website traffic to make more sales.
Shopify Dropshipping: Conclusion
Starting a Shopify store is a great way to start your own business. However, it’s important to keep in mind that setting up a store is just the first step. Once your store is set up, you’ll need to market it and drive traffic to it so that you can start making sales.
Now it is your turn!

You might want to read next:
> How To Make Money On Shopify in 2022 (6 Proven Methods)
> 10+ Best Shopify Nices in 2022 (+ Best Products To Sell.)
> Guide To Marketing Automation For ECommerce (+Best Tools)
> Sellvia Review: The Best Dropshipping Tool for a US-Based Audience?
> AppScenic Review: Pros, Cons, Pricing, and Alternatives
FAQs
RELATED CONTENT
